30
To Set a Recording
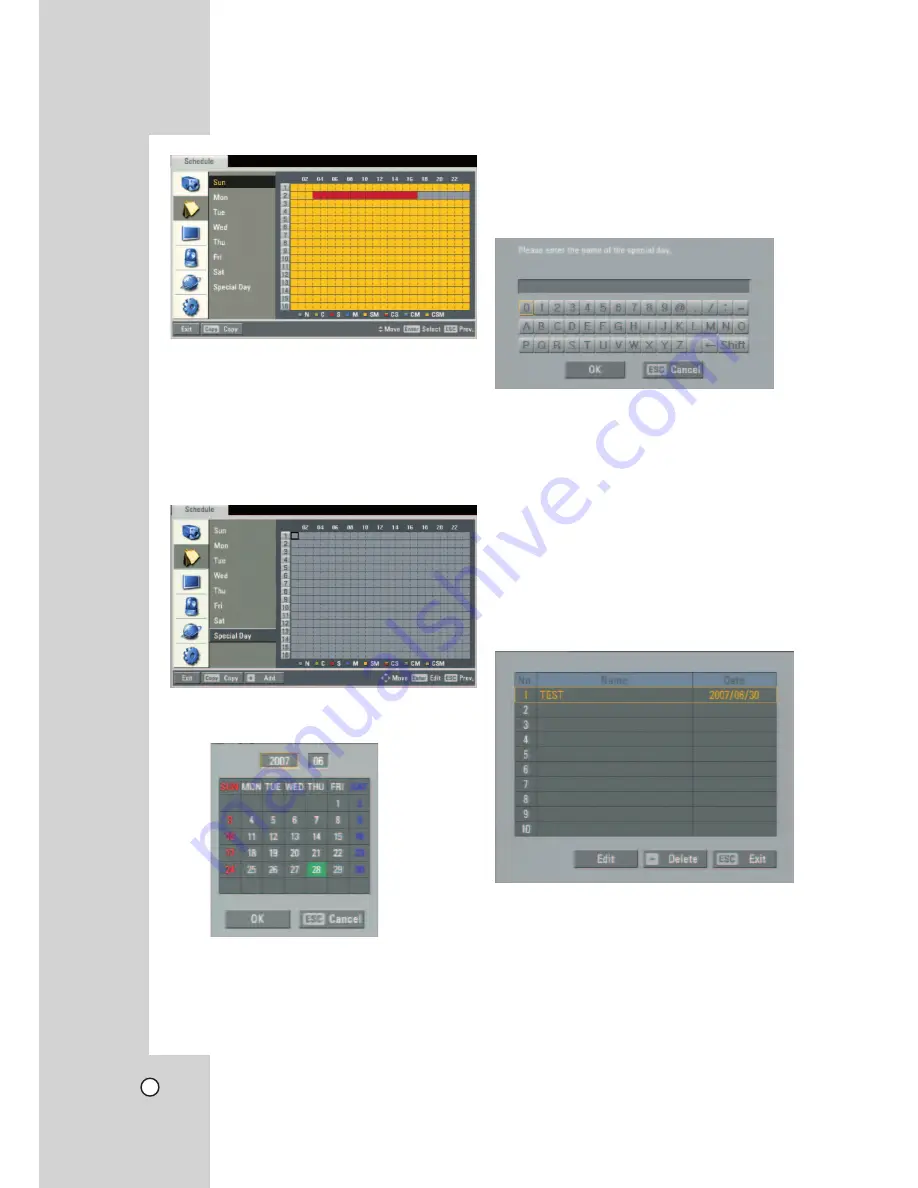
Schedule for a Special Day
In addition to the weekly schedule, up to 10 specific
date/time periods can be defined. To configure the
specific recording schedule select Specific Dates.
1. Select the [Special Day] option.
2. Select a cell block.
3. Press the ZOOM + button or click the [Add] icon
on the special day setting menu.
The specific date selection menu appears.
4. Enter the necessary information for year, month
and date.
•
b / B
/
v / V
: Press to move the columns,
[OK] or [Cancel] buttons.
•
b / B
(or left/right mouse button): Changes
the value at the current position.
5. Use
b / B
/
v / V
to select [OK] button and
press ENTER.
The virtual keyboard menu appears.
6. Enter the name of the special day. Use
v/V/b
/
B
to select a character then press ENTER to con-
firm your selection.
7. Use
v / V
to select the [OK] icon then press
ENTER to fix the date of the special day and
return to the special day menu screen.
8. Select the schedule time and set the recording
method for each channel.
Checking the Special Day Schedule List
1. Press INFO when the “Special Day” option is
selected.
The special day scheduled list appears.
2. Select a special day title on the list and press
ENTER.
The title color turns orange.
3. Select the [Edit] icon then press ENTER to edit
the special day or press ZOOM - to delete the
special day schedule.
4. Press ESC to exit the special day schedule list.


