background image

25

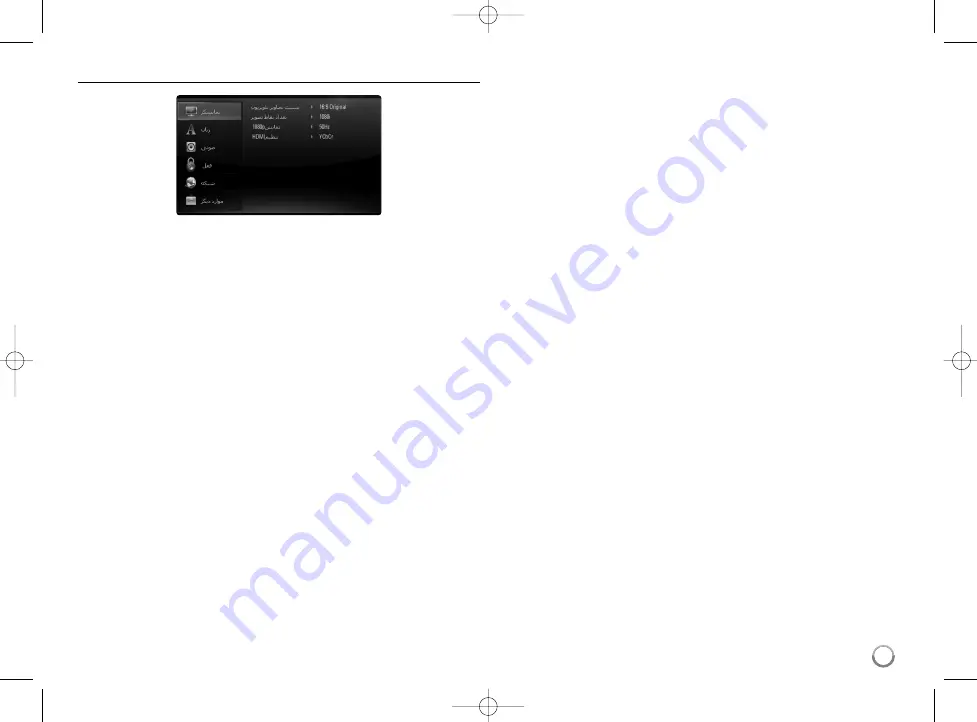
[DISPLAY] Menu

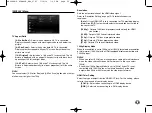
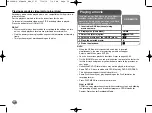
TV Aspect Ratio

[4:3 Letter Box] – 

Select when a standard 4:3 TV is connected.

Displays theatrical images with masking bars above and below the 
picture.

[4:3 Pan Scan] – 

Select when a standard 4:3 TV is connected.

Displays pictures cropped to fill your TV screen. Both sides of the 
picture are cut off.

[16:9 Original] –

Select when a 16:9 wide TV is connected. The 4:3

picture is displayed with an original 4:3 aspect ratio, with black bars
appearing at the left and right sides.

[16:9 Full] –

Select when a 16:9 wide TV is connected. The 4:3 

picture is adjusted horizontally (in a linear proportion) to fill the entire
screen.

Note:

You cannot select [4:3 Letter Box] and [4:3 Pan Scan] option when the res-
olution is set to higher than 720p.

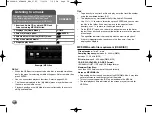
Resolution

Sets the output resolution of the HDMI video signal.
Refer to “Resolution Setting” on page 15-16 for details about the 
resolution.

[Auto] – 

If the HDMI OUT jack is connected for TVs providing display

information (EDID), automatically selects the resolution best suited to
the connected TV. 

[1080p] – 

Outputs 1080 lines of progressive video (only for HDMI 
connection).

[1080i] – 

Outputs 1080 lines of interlaced video.

[720p] – 

Outputs 720 lines of progressive video.

[576p] – 

Outputs 576 lines progressive video.

[576i] – 

Outputs 576 lines of interlaced video.

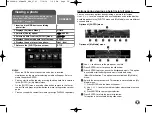
1080p Display Mode

When the resolution is set to 1080p, select [24Hz] for smooth presentation
of film material (1080/24p) with a HDMI-equipped display compatible with
1080/24p input.

Notes:

• When you select [24Hz], you may experience some picture disturbance

when the video switches video and film material. In this case, select
[50Hz].

• Even when [1080p Display Mode] is set to [24Hz], if your TV is not 

compatible with 1080/24p, the actual frame frequency of the video 
output will be 50Hz or 60Hz to match the video source format.

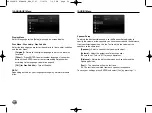
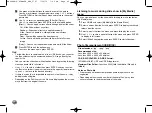
HDMI Color Setting

Select the type of output from the HDMI OUT jack. For this setting, please
refer to the manuals of your display device. 

[YCbCr] – 

Select when connecting to a HDMI display device.

[RGB] – 

Select when connecting to a DVI display device.

HB994PK-F.AIRNDLK_ENG_9793  7/14/10  7:45 PM  Page 25

Содержание HB994PK

Страница 1: ... W94 P OWNER S MANUAL Network Blu ray DiscTM DVD Home Theater System Please read this manual carefully before operating your set and retain it for future reference P NO MFL65899793 HB994PK F AIRNDLK_ENG_9793 indd 1 2010 7 14 7 52 45 PM ...

Страница 2: ...e reference Shall the unit require maintenance con tact an authorized service center Use of controls adjustments or the performance of procedures other than those specified herein may result in hazardous radiation exposure To prevent direct exposure to laser beam do not try to open the enclosure Visible laser radiation when open DO NOT STARE INTO BEAM CAUTION The apparatus shall not be exposed to ...

Страница 3: ...ay Pause Scan Skip Stop Power Off etc Refer to the TV owner s manual for the details of SIMPLINK function LG TV s with SIMPLINK function have the logo as shown above Notes Depending on the disc type or playing status some SIMPLINK operation may differ from your purpose or not work If SIMPLINK function does not work check that your HDMI cable supports by CEC Consumer Electronics Control for HDMI If...

Страница 4: ...Using the Home Menu 24 Adjust the Setup settings 24 29 Play a disc 30 33 Displaying disc information 34 Enjoying BD LIVE 35 36 Playing a movie 36 37 Listening to a music 38 Viewing a photo 39 40 Using My media features 41 44 Listening to the radio 45 Using HDMI IN jack 46 Using DIGITAL AUDIO IN jacks 46 Reference 47 Language Codes 48 Area Codes 48 Troubleshooting 49 50 Specifications 51 IMPORTANT ...

Страница 5: ...cticide spray near the unit Wiping with strong pressure may damage the surface Do not leave rubber or plastic products in contact with the unit for a long period of time Cleaning the unit To clean the player use a soft dry cloth If the surfaces are extremely dirty use a soft cloth lightly moistened with a mild detergent solution Do not use strong solvents such as alcohol benzine or thinner as thes...

Страница 6: ...the recording software the finalization some recorded discs CD R RW or DVD R RW may not be playable DVD R RW and CD R RW discs recorded using a personal computer or a DVD or CD Recorder may not play if the disc is damaged or dirty or if there is dirt or condensation on the player s lens If you record a disc using a personal computer even if it is recorded in a compatible format there are cases in ...

Страница 7: ...to view high definition contents in BD ROM discs may be limited depending on the resolution of your TV Menu sounds When you highlight or select a menu option sounds can be heard such as button clicks or a voice over explaining the highlighted menu choice Multi page PopUp Menus With DVD Video playback is interrupted each time a new menu screen is accessed Due to BD ROM disc s ability to preload dat...

Страница 8: ...ures Dolby Digital EX DTS ES and DTS 96 24 are output as Dolby Digital 5 1 or DTS 5 1 You can use the USB device that is used to store some disc related information including downloaded on line content The disc you are using will control how long this information is retained Certain System Requirements For high definition video playback High definition display that has HDMI input jacks BD ROM disc...

Страница 9: ... preset radio programme TUNING Tunes in the desired radio station ENTER Acknowledges menu selection RETURN O Exits the menu or resumes playback The resume play function may not work depending on the BD ROM disc TITLE POPUP Displays the DVD title menu or BD ROM s popup menu if available DISPLAY Displays or exits the On Screen Display d Coloured A B C D buttons Use to navigate BD ROM menus They are ...

Страница 10: ...c from the slot loader j Remote Sensor Point the remote control here Main Unit Front View Precautions in using the touch buttons Use the touch buttons with clean and dry hands In a humid environment wipe out any moisture on the touch buttons before using Do not press the touch buttons hard to make it work If you apply too much pressure it can damage the sensor of the touch buttons Touch the button...

Страница 11: ... to digital optical audio equipment e LAN port Connect a network with an always on broadband connection f AC IN Connector Connect the supplied power cord Main Unit Back View Bottom of the floor base Take up the slack in the cords by pulling from the bottom of the floor base and secure them by running through the cord retainer d e f a b c HB994PK F AIRNDLK_ENG_9793 7 14 10 7 44 PM Page 11 ...

Страница 12: ...nce from the listening position A To prevent injury install the speakers in a horizontal position only as the speaker may fall down A Wireless front left speaker B Wireless front right speaker Place the front speakers to the sides of the monitor or screen and as flush with the screen surface as possible C Rear left speaker D Rear right speaker Place these speakers behind your listening position fa...

Страница 13: ...lace any part of the system the wireless link should be set again a a Disconnect the power cord from the wall outlet on the wireless front left speaker the wireless subwoofer and the wireless receiver b b Press and hold the x button on the wireless front right speaker and the MUTE button on the remote control simultaneously The unit will display REMATE c c Reconnect the power cord to the wall outl...

Страница 14: ...I device s audio sound may be distorted or may not output Tips You can fully enjoy digital audio and video signals together with this HDMI connection When you use HDMI connection you can change the resolution for the HDMI output Refer to Resolution Setting on page 15 16 Select the type of video output from the HDMI OUT jack using HDMI Color Setting option on the Setup menu see page 25 Cautions Cha...

Страница 15: ...or pressing the RESOLUTION button in Home Menu and Setup Menu Note Since several factors affect the resolution of video output see Available resolution according to the resolution setting on page 16 How to change the resolution using RESOLUTION button Press RESOLUTION repeatedly in Home Menu and Setup Menu to change the resolution The display window will show you the current resolution How to chan...

Страница 16: ...it the resolution setting is set to Auto If you select a resolution that your TV does not accept the warning message will appear After resolution change if you cannot see the screen please wait 20 seconds and the resolution will automatically revert back to the previous resolution The 1080p video output frame rate may be automatically set to either 24Hz or 50Hz depending both on the capability and...

Страница 17: ...ter using a commercially available LAN or Ethernet cable CAT5 or better with RJ45 connector In the example configuration for wired connection below this player would be able to access content from either of the PCs Notes When plugging or unplugging the LAN cable hold the plug portion of the cable When unplugging do not pull on the LAN cable but unplug while pressing down on the lock Do not connect...

Страница 18: ... i and numerical buttons If you make a mistake while entering a number press CLEAR to clear the highlighted part 4 Select OK and press ENTER to apply network settings 5 The player will ask you to test the network connection Select OK and press ENTER to complete the network connection 2 The Connection Setting menu appear on the screen Use U u to select Wired and press ENTER 1 Select the Connection ...

Страница 19: ...N cables are available at many stores in lengths of 50 feet and longer If you do chose to use the wireless option note that performance can sometimes be affected by other electronic devices in the home Wireless network setup For the wireless network connection the player needs to be set up for network communication This adjustment can be done from the Setup menu Adjust the NETWORK setting as follo...

Страница 20: ...r settings through your computer and either set your router to broadcast SSID or manually enter the access point name SSID in Manual 5 Use U u I i to select the IP mode between Dynamic and Static Normally select Dynamic to allocate an IP address automatically Note If there is no DHCP server on the network and you want to set the IP address manually select Static then set IP Address Subnet Mask Gat...

Страница 21: ...on charges are your responsibility A 10 Base T or 100 Base TX LAN port is required for wired connection to this player If your internet service does not allow for such a connection you will not be able to connect the player You must use a Router to use xDSL service A DSL modem is required to use DSL service and a cable modem is required to use cable modem service Depending on the access method of ...

Страница 22: ...ert hall Music ReTouch mode When listening to MP3 files or other compressed music you can enhance the sound This mode is available only to 2 channel sources Adjust the speaker level settings You can adjust the sound level of each speaker Press SPEAKER LEVEL repeatedly to select a desired speaker to set Press VOL to adjust the sound level of the selected speaker while the level setting menu is disp...

Страница 23: ...SB device which requires additional program installation when you have connected it to a computer is not supported USB device USB device that support USB1 1 and USB2 0 Movie files Music files and photo files can be played For details of operations on each file refer to relevant pages Regular back up is recommended to prevent data loss If you use a USB extension cable or USB HUB the USB device may ...

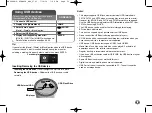
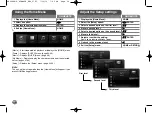
Страница 24: ... Select an option I I i i 3 Displays the selected option menu ENTER 4 Exit the Home Menu HOME ON REMOTE Adjust the Setup settings 1 Displays the Home Menu HOME 2 Select the Setup option I I i i ENTER 3 Select a desired option on the first level U U u u 4 Move to second level i i 5 Select a desired option on the second level U U u u 6 Move to third level i i 7 Adjust or confirm the setting U U u u ...

Страница 25: ... information EDID automatically selects the resolution best suited to the connected TV 1080p Outputs 1080 lines of progressive video only for HDMI connection 1080i Outputs 1080 lines of interlaced video 720p Outputs 720 lines of progressive video 576p Outputs 576 lines progressive video 576i Outputs 576 lines of interlaced video 1080p Display Mode When the resolution is set to 1080p select 24Hz fo...

Страница 26: ...setting may not work for some discs AUDIO Menu Speaker Setup To obtain the best possible sound use the Speaker Setup display to specify the volume of the speakers you have connected and their distance from your listening position Use the Test to adjust the volume of the speakers to the same level Speaker Select a speaker that you want to adjust Volume Adjust the output level of each speaker Be sur...

Страница 27: ...ngs affect only BD and DVD playback To access any features in LOCK settings you must enter the 4 digit security code you have created If you have not entered a password yet you are prompted to do so Enter a 4 digit password and press ENTER Enter it again and press ENTER to verify Password You can create change or delete the password New Enter a 4 digit password and press ENTER Enter it again and p...

Страница 28: ...e needed to use the BD Live and My Media features Connection Setting If you have connected this player to a local area network LAN the player needs to be set up for network communication See Connecting to your Home Network on pages 17 21 Connection Status If you want to check the network status on this player select the Connection Status options and press i or ENTER to check whether a connection t...

Страница 29: ... www divx com for more information and software tools to convert your files into DivX videos ABOUT DIVX VIDEO ON DEMAND This DivX Certified device must be registered in order to play DivX Video on Demand VOD content To generate the registration code locate the DivX VOD section in the Setup menu Go to vod divx com with this code to complete the registration process and learn more about DivX VOD Div...

Страница 30: ...e point may be cleared when a button is pressed for example POWER OPEN CLOSE etc On BD Video discs including BD J the resume play function does not work On BD ROM interactive title the unit will be in Complete Stop mode if you press x once during playback Skip to the next previous chapter track file During playback press or to go to the next chapter track file or to return to the beginning of the ...

Страница 31: ...To return to normal playback press REPEAT repeatedly to select Off Audio CDs Music files Track The current track or file will be played back repeatedly All All the tracks or files will be played back repeatedly The tracks or files will be played back in random order All All the tracks or files will be played back repeatedly in random order Selected portion will be repeated continually Audio CD onl...

Страница 32: ... between the display and actual sound On BD ROM disc the multi audio format 5 1CH or 7 1CH is displayed with MultiCH in the on screen display Using the search menu During playback press SEARCH to display the search menu Press I i to skip the playback 15 seconds forward or backward Tip You can select a point that you want to skip by pressing and holding I i button Notes This function may not work o...

Страница 33: ...ene Memory function for a previous disc is erased once a different disc is played This function may not work depending on the disc Screen Saver The screen saver appears when you leave the player in Stop mode for about five minutes Note Depending on the unit status the screen saver may not appear Changing content list view On the Movie Music Photo and My Media menu you can change the content list v...

Страница 34: ...ime search box shows the elapsed playing time Select the Time option and then input the required start time in hours minutes and seconds from left to right For example to find a scene at 2 hours 10 minutes and 20 seconds enter 21020 and press ENTER If you enter the wrong numbers press CLEAR and enter the correct numbers Notes This function may not work on some disc or titles This function may not ...

Страница 35: ...B device from the PC and reuse it with this player Notes Some BD Live contents may be restrictively accessed in some territories by contents provider s own decision It may take up to several minutes to load and start enjoying BD Live contents Depending on a disc the BD Live function may not be operated if BD LIVE connection option is set to Partially permitted See page 28 The connection to the Int...

Страница 36: ...or the last file or track and green or yellow button to move to the previous or next page Unfinalized DVD VR format discs may not be played in this player Some DVD VR disc are made with CPRM data by DVD RECORDER This unit cannot support these kinds of discs Some DivX files may not play depending on the DivX format or the recording format Press DISC MENU to move to the list menu What is CPRM CPRM i...

Страница 37: ...1 SS MPEG2 PS MPEG2 TS Playable Audio format Dolby Digital DTS MP3 WMA AAC AC3 Sampling frequency between 32 48 kHz WMA between 16 48 kHz MP3 Bit rate between 20 320 kbps WMA between 32 320 kbps MP3 CD R RW DVD R RW BD R RE Format ISO 9660 JOLIET UDF and UDF Bridge format Maximum Files Folder Less than 2000 total number of files and folders The movie file name and subtitle are limited to 180 chara...

Страница 38: ...t coupled with the music in play back If there is impossible code to express in the file name it may be displayed as illegible MP3 WMA audio file requirement USB DISC File extensions mp3 wma Sampling frequency between 8 48 kHz WMA between 11 48 kHz MP3 Bit rate between 8 320 kbps WMA MP3 CD R RW DVD R RW BD R RE Format ISO 9660 JOLIET UDF and UDF Bridge format Maximum Files Disc Less than 2000 tot...

Страница 39: ...o start or pause the slide show c Press ENTER to play or pause the background music This option is available after the background music is selected using Music Select option This option is not available on My Media menu d Selects the background music This option is not available on My Media menu 1 Press ENTER and the menu will appear 2 Use U u I i to select a media or folder where there are music ...

Страница 40: ...e to the upper or lower directo ry use U u to move to the desired directory If there is a code that is impossible to express in the file name it may be displayed as illegible Depending on the DLNA server the file name displayed on the screen may differ from the original file name Listening to music during slide show in My Media menu You can view photos as a slide show while listening to music cont...

Страница 41: ...ernet services and Apple iTunes This manual explains operations with the English version of Nero MediaHome 4 Essentials as examples Follow the explanation referring to the actual operations of your language version Installing Nero MediaHome 4 Essentials Nero MediaHome 4 Essentials is a software for sharing movie music and photo files stored on your computer with this player Before you install Nero...

Страница 42: ...data select the check box and click the Next button 8 Click the Exit button to complete the installation Sharing files and folders On your computer you must share the folder containing movie music and or photo content to play them using My Media features This part explains the procedure for selecting the shared folders on your computer 1 Double click the Nero MediaHome 4 Essentials icon on the des...

Страница 43: ...nformation is displayed on the screen But the information may not be correct compared to the actual file features The thumbnail of the unplayable files can be displayed in the My Media menu but those cannot be played on this player If there is an unplayable music file in the My Media menu the player skip the file and play the next file The file information indicated on the screen may not be correc...

Страница 44: ...tle is not available for mkv mp4 file playback If there are more than 1 subtitle file within a folder displaying priority is as follow Priority High Low File extension smi sub srt txt ssa Playable Codec format DIVX3 xx DIVX4 xx DIVX5 xx XVID DIVX6 xx Standard playback only DIVX HD MPEG1 SS MPEG2 PS MPEG2 TS Audio format Dolby Digital DTS MP3 WMA AAC AC3 Sampling frequency between 32 48 kHz WMA bet...

Страница 45: ...te all the saved stations Press and hold ENTER for two seconds ERASE ALL will flash up on the display Press ENTER to erase all saved radio stations Improve poor FM reception Press MO ST This will change the tuner from stereo to mono and usually improve the reception Listening to the radio 1 Select FM RADIO INPUT 2 Select a radio station TUNING 3 To save a radio station ENTER A preset number will s...

Страница 46: ...option RADIO INPUT 4 Turn down the volume VOL 5 Turn your component on 6 Adjust the volume VOL You can enjoy the sound of your component with the digital optical output jack from the speakers of the system ON REMOTE Using DIGITAL AUDIO IN jacks To the digital optical output jack of your component 1 Connect the HDMI OUT jack of your component into the HDMI IN jack on the back of the wireless front ...

Страница 47: ...V s input source between the TV and other input sources PR CH U u Scan up or down through memorized channels VOL Adjust the volume of the TV Setting up the remote to control your TV You can operate your LG GoldStar TV with the supplied remote control While holding down TV 1 button press PR CH U or u Release the TV 1 button to complete setting When you replace the batteries of the remote you may ha...

Страница 48: ...t 8365 Scots Gaelic 7168 Serbian 8382 Serbo Croatian 8372 Shona 8378 Sindhi 8368 Singhalese 8373 Slovak 8375 Slovenian 8376 Spanish 6983 Sudanese 8385 Swahili 8387 Swedish 8386 Tagalog 8476 Language Code Tajik 8471 Tamil 8465 Telugu 8469 Thai 8472 Tonga 8479 Turkish 8482 Turkmen 8475 Twi 8487 Ukrainian 8575 Urdu 8582 Uzbek 8590 Vietnamese 8673 Volapük 8679 Welsh 6789 Wolof 8779 Xhosa 8872 Yiddish ...

Страница 49: ... Check that the NIGHT ON is displayed in the display window Symptom No power No picture No sound The player does not start playback The Remote Control does not work properly The level meter is not displayed The lighting of the touch button is turned off Correction Plug the power cord into the wall outlet securely Select the appropriate video input mode on the TV Connect the video cable securely Se...

Страница 50: ...r contact LG Electronics customer care cen tre Design and specifications are subject to change without notice Troubleshooting Possible Cause External USB device is not connected The connected USB device does not have enough space Internet connection is not established The BD LIVE connection option in the Setup menu is set to Prohibited The signal strength of the stations is too weak when tuning in...

Страница 51: ...o noise ratio More than 100 dB ANALOG OUT connectors only Harmonic distortion Less than 0 008 Dynamic range More than 95 dB LAN port Ethernet jack x 1 10BASE T 100BASE TX Speakers Front right Front left Rear Passive speaker Speaker Speaker Subwoofer Type 2 Way 3speaker 2 Way 3speaker 2 Way 3speaker 1 Way 1 speaker Impedance 4Ω 4Ω 4Ω 3Ω Rated Input Power 185 W 185 W 185 W 260 W Max Input power 370 ...

Страница 52: ...PLIED WARRANTIES INCLUDING BUT NOT LIMITED TO WARRANTIES OF MERCHANTABILITY OR FITNESS FOR A PARTICULAR PURPOSE UNDER NO CIRCUMSTANCES AND UNDER NO LEGAL THEORY WHETHER IN CONTRACT TORT STRICT LIABILITY OR OTHERWISE SHALL LG BE LIABLE TO YOU OR ANY THIRD PARTY FOR ANY DIRECT INDIRECT INCIDENTAL SPECIAL STATUTORY CONSEQUENTIAL OR OTHER DAMAGES OR ATTORNEY FEES OR EXPENSES RELATING TO OR ARISING OUT...

Страница 53: ...url library Copyright 1996 2008 Daniel Stenberg daniel haxx se boost C library Copyright Beman Dawes 1999 2003 UPnP SDK Copyright 2000 2003 Intel Corporation Libnet 1998 2004 Mike D Schiffman mike infonexus com Libpcap This product includes other open source software Copyright David L Mills 1992 2006 Copyright 1998 2003 Daniel Veillard Copyright 1998 1999 Thai Open Source Software Centre Ltd Copyr...

Страница 54: ...R HB994PK F AIRNDLK_ENG_9793 indd 2 2010 7 14 7 52 53 PM ...

Отзывы: