


26
Operation
3
Oper
ation
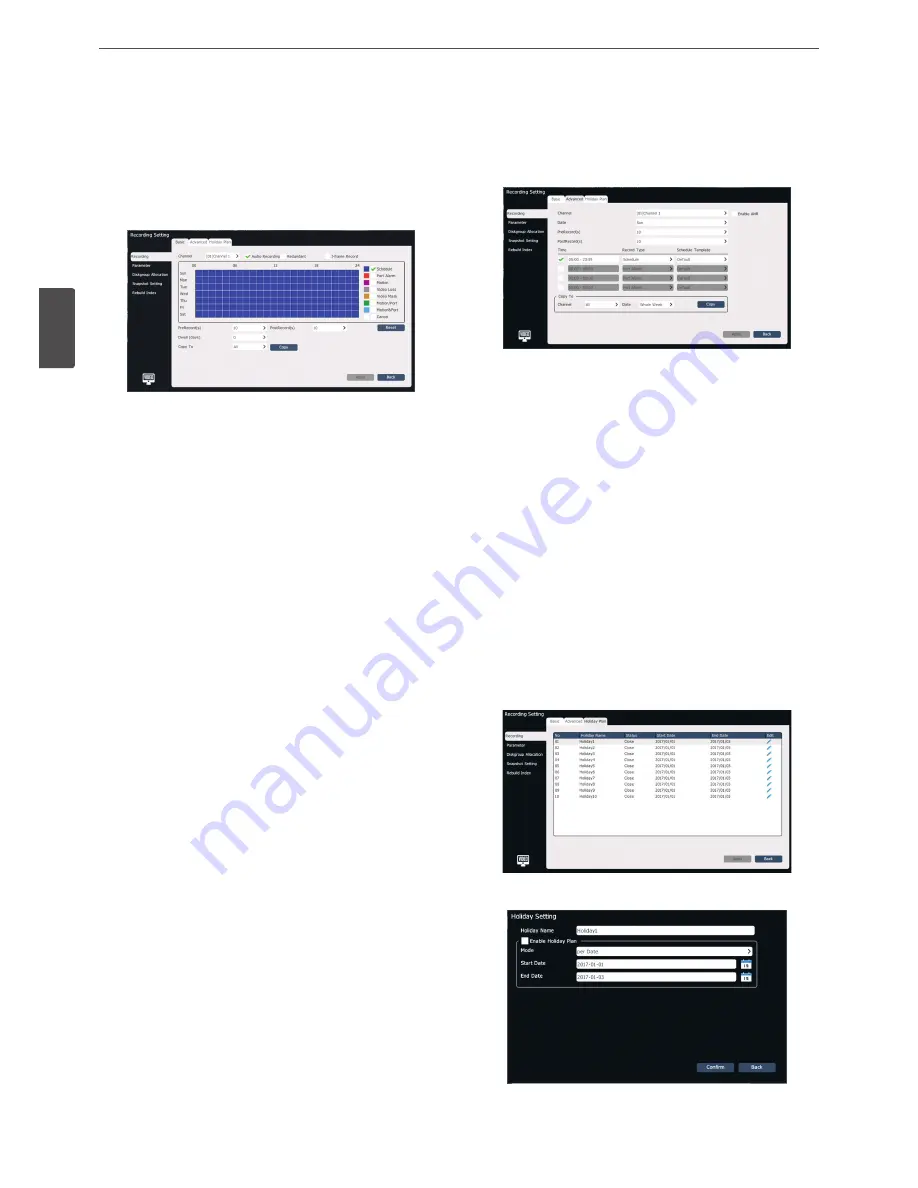
Recording Setting
Basic setting
1. Select [Main Menu] > [Recording Setting] > [Recording] > [Basic]
to enter the basic setting screen of recording as shown in the
figure below.
2. Select the channel to be set.
3. Select options for the recording.
• When [Audio Recording] is disabled, only video data is saved in
the recording file.
• When [Redundent] option is enabled, the recording and
snapshot image files will be saved in the redundant disk if there
is a redundent space.
• When [I-Frame Record] is enabled, the system record videos
with frame extraction so the hard disk space can be saved for
the video.
4. Select a recording type. Available options are [Schedule], [Port
Alarm], [Motion], [Video Loss], [Video Mask], [Motion/Port] and
[Motion&Port].
5. Drag in the time period area, the selected time area will be
updated to the selected recording type.
6. Set [PreRecord] and [PostRecord] options of alarm recording.
These options are convenient for analyzing the monitoring
information before and after the alarm occurrence.
•
PreRecord : It is the recording time setting before the alarm
occurrence.
•
PostRecord: It is the recording time setting after the alarm is
turned off.
7. Set [Dwell] option to set the the maximum video retention time.
8. Click [Apply] to save the setting.
Advanced Setting
1. Select [Main Menu] > [Recording Setting] > [Recording] >
[Advanced] to enter the advanced setting screen of recording as
shown in the figure below.
2. Select [channel] and [date] options.
3. Set [Enable ANR] option. If it is enabled, IP device will automatically
start the local recording when IP device is offline, and it will
automatically upload the video saved locally into the system when
it is online again.
4. Set [PreRecord] and [PostRecord] options of alarm recording.
5. Set the time period and the recording type within this time
period. Click the time period enabling checkbox to make it be
selected. Input the start and end time of time period in the time
period input box. Select a recording type in the pull-down list of
“Recording Type”. Different recording types can be specified for
different time periods.
6. Copy the current settings to the others channels and dates.
7. Click [Apply] to save the setting.
Holidy plan
The holidy recording plan of current year can be set. After the holiday
plan is enabled, this plan is recorded preferentially during the holiday.
1. Select [Main Menu] > [Recording Setting] > [Recording] >
[Holiday Plan] to enter the [Holiday Plan] screen as shown in the
figure below.
2. Select a holiday in the list and click [Edit] or double click to enter
the [Holiday Setup] screen.
Содержание RNRZ-B510A
Страница 50: ......


