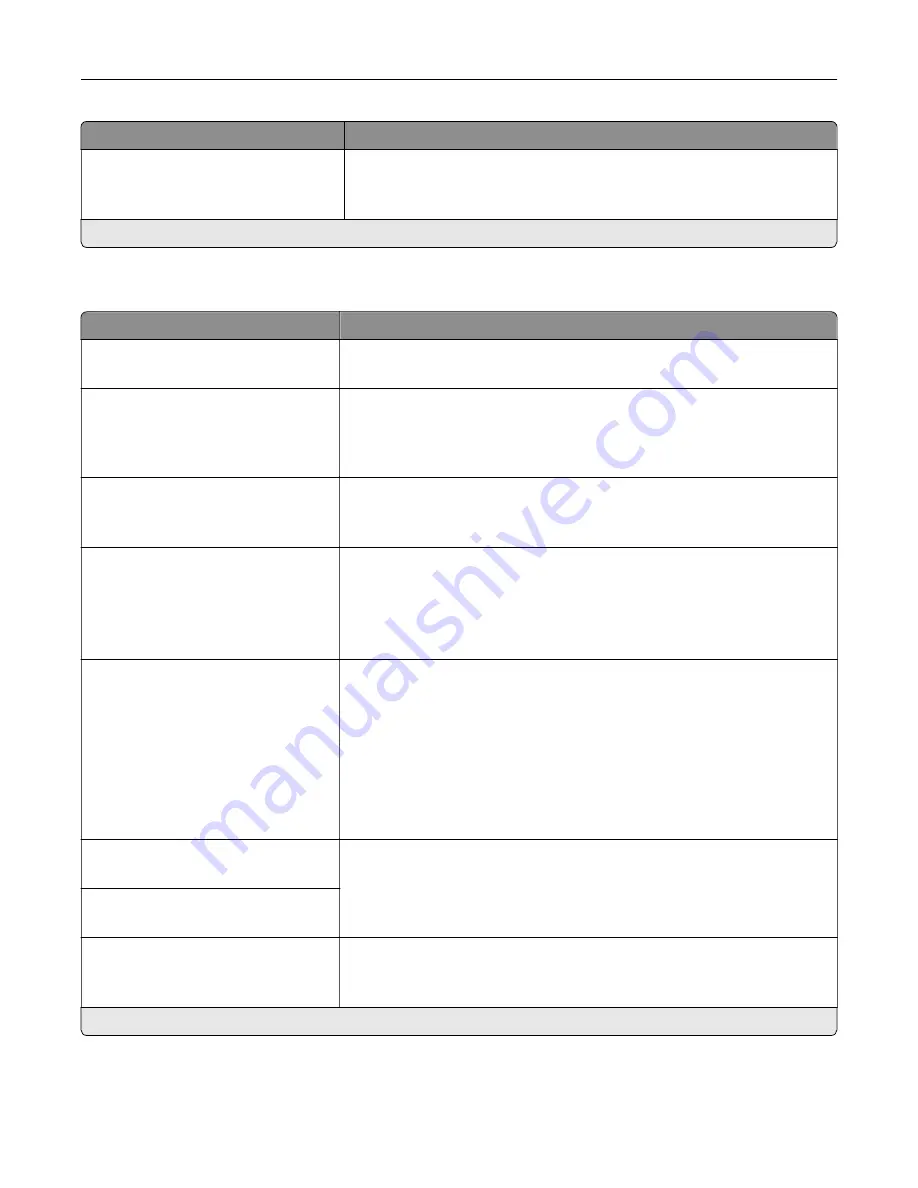
Menu item
Description
Wait Timeout Time
15–65535 (40*)
Set the time in seconds for the printer to wait for more data before
canceling a print job.
Note:
This menu item appears only when Wait Timeout is enabled.
Note:
An asterisk (*) next to a value indicates the factory default setting.
PCL
Menu item
Description
Font Name
[List of available fonts] (Courier*)
Select a font from the specified font source.
Symbol Set
[List of available symbol set] (10U
PC
‑
8*)
Specify the symbol set for each font name.
Note:
A symbol set is a set of alphabetic and numeric characters,
punctuation, and special symbols. Symbol sets support the different
languages or specific programs such as math symbols for scientific text.
Pitch
0.08–100.00 (10.00*)
Specify the pitch for fixed or monospaced fonts.
Note:
Pitch refers to the number of fixed
‑
space characters in a horizontal
inch of type.
Orientation
Portrait*
Landscape
Reverse Portrait
Reverse Landscape
Specify the orientation of text and graphics on the page.
Lines per Page
1–255
Specify the number of lines of text for each page printed through the PCL®
data stream.
Notes:
•
This menu item activates vertical escapement that causes the
selected number of requested lines to print between the default
margins of the page.
•
60 is the U.S. factory default setting. 64 is the international factory
default setting.
PCL5 Minimum Line Width
1–30 (2*)
Set the initial minimum stroke width.
PCLXL Minimum Line Width
1–30 (2*)
A4 Width
198 mm*
203 mm
Set the width of the logical page on A4
‑
size paper.
Note:
Logical page is the space on the physical page where data is
printed.
Note:
An asterisk (*) next to a value indicates the factory default setting.
Use printer menus
91
Содержание XC2326
Страница 145: ...5 Insert the new print cartridge 6 Insert the print cartridge tray and then close the door Maintain the printer 145 ...
Страница 148: ...4 Insert the new manual feeder 5 Insert the tray Replacing the ADF tray 1 Open the ADF cover Maintain the printer 148 ...
Страница 149: ...2 Remove the used ADF tray 3 Unpack the new ADF tray Maintain the printer 149 ...
Страница 156: ...4 Insert the new separator pad until it clicks into place 5 Close the ADF cover Maintain the printer 156 ...
Страница 205: ...2 Lower the scanner Troubleshoot a problem 205 ...
Страница 208: ... Below the fuser area Duplex unit 3 Close the door Troubleshoot a problem 208 ...
Страница 254: ...Wi Fi Protected Setup wireless network 50 Index 254 ...


