3-2
Service Manual
4060-
xxx
Device tests
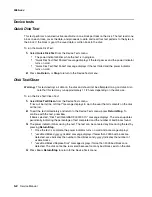
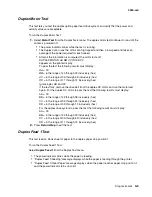
Quick Disk Test
This test performs a non-destructive read/write on one block per track on the disk. The test reads one
block on each track, saves the data, and proceeds to write and read four test patterns to the bytes in
the block. If the block is good, the saved data is written back to the disk.
To run the Quick Disk Test:
1.
Select
Quick Disk Test
from the Device Tests menu.
•
The power indicator blinks while the test is in progress.
•
“Quick Disk Test/Test Passed” message displays if the test passes and the power indicator
turns on solid.
•
“Quick Disk Test/Test Failed” message displays if the test failed and the power indicator
turns on solid.
2.
Press
Go
,
Return
, or
Stop
to return to the Device Tests menu.
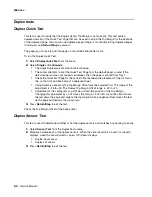
Disk Test/Clean
Warning:
This test destroys all data on the disk and should not be attempted on a good disk. Also
note that this test may run approximately 1 1/2 hours depending on the disk size.
To run the Disk Test/Clean Test:
1.
Select
Disk Test/Clean
from the Device Tests menu.
“Files will be lost/Go or Stop?” message displays to warn the user that all contents on the disk
will be lost.
2.
To exit the test immediately and return to the Device Tests menu, press
Return/Stop
. To
continue with the test, press
Go
.
If
Go
is selected, “Disk Test/Clean/BAD:000000 00%” message displays. The screen updates
periodically indicating the percentage of test completed and the number of bad blocks found.
3.
The power indicator blinks during the test. The test can be canceled anytime during the test by
pressing
Return/Stop
.
•
Once the test is complete, the power indicator turns on solid and a message displays.
•
“
xxxx
Bad Blocks/
yyyyyy
Usable” message displays if fewer than 2000 bad blocks are
detected.
xxxx
indicates the number of bad blocks and
yyyyyy
indicates the number of
usable blocks.
•
“
xxxx
Bad Blocks/Replace Disk” message displays if more than 2000 bad blocks are
detected. The disk cannot be recovered because too many bad blocks exist on the disk.
4.
Press
Go
or
Return/Stop
to return to the Device Tests menu.
Содержание T63 Series
Страница 13: ...Laser notices xiii 4060 xxx Japanese Laser Notice ...
Страница 14: ...xiv Service Manual 4060 xxx Korean Laser Notice ...
Страница 34: ...1 16 Service Manual 4060 xxx ...
Страница 218: ...4 64 Service Manual 4060 xxx ...
Страница 236: ...6 2 Service Manual 4060 xxx ...
Страница 238: ...7 2 Service Manual 4060 xxx Assembly 1 Covers ...
Страница 240: ...7 4 Service Manual 4060 xxx Assembly 2 Frame 1 5 2 1 3 4 3 4 8 6 7 ...
Страница 250: ...7 14 Service Manual 4060 xxx Assembly 8 Paper feed multipurpose feeder 3 11 7 5 9 2 6 4 8 1 7 13 5 12 10 ...
Страница 252: ...7 16 Service Manual 4060 xxx Assembly 9 Paper feed alignment 3 2 1 4 ...
Страница 254: ...7 18 Service Manual 4060 xxx Assembly 10 Integrated paper tray 250 sheet 3 11 7 5 9 2 10 6 4 8 1 ...
Страница 256: ...7 20 Service Manual 4060 xxx Assembly 11 Integrated paper tray 500 sheet 3 11 7 5 9 2 10 6 4 8 1 ...
Страница 258: ...7 22 Service Manual 4060 xxx Assembly 12 Drives Main drive and developer drive 3 2 4 1 7 6 5 ...
Страница 260: ...7 24 Service Manual 4060 xxx Assembly 13 Hot roll fuser 3 7 5 2 6 4 1 5 8 7 9 ...
Страница 262: ...7 26 Service Manual 4060 xxx Assembly 14 Transfer charging 3 2 4 1 5 6 7 9 10 8 ...
Страница 264: ...7 28 Service Manual 4060 xxx Assembly 15 Electronics power supplies 3 7 5 2 6 4 1 ...
Страница 266: ...7 30 Service Manual 4060 xxx Assembly 16 Electronics card assemblies 3 1 4 5 6 9 2 4 7 8 10 ...
Страница 268: ...7 32 Service Manual 4060 xxx Assembly 17 Electronics shields ...
Страница 270: ...7 34 Service Manual 4060 xxx Assembly 18 Cabling diagrams 1 3 1 2 4 5 6 7 8 7 4 ...
Страница 272: ...7 36 Service Manual 4060 xxx Assembly 19 Cabling diagrams 2 HVPS LVPS 3 5 4 1 2 6 ...
Страница 274: ...7 38 Service Manual 4060 xxx Assembly 20 Cabling diagrams 3 3 4 5 6 1 2 400 410 2 000 010 1 1 2 200 210 2 7 ...
Страница 276: ...7 40 Service Manual 4060 xxx Assembly 21 250 sheet paper tray ...
Страница 278: ...7 42 Service Manual 4060 xxx Assembly 21 cont 250 sheet paper tray 43 41 42 38 36 34 39 37 35 40 46 45 44 ...
Страница 284: ...7 48 Service Manual 4060 xxx Assembly 23 Duplex option 1 ...
Страница 286: ...7 50 Service Manual 4060 xxx Assembly 24 Envelope feeder 3 11 7 13 5 9 2 10 6 4 12 8 14 1 ...
Страница 288: ...7 52 Service Manual 4060 xxx Assembly 25 Output expander ...
Страница 290: ...7 54 Service Manual 4060 xxx Assembly 25 cont Output expander ...
Страница 292: ...7 56 Service Manual 4060 xxx Assembly 26 High capacity output expander ...
Страница 296: ...7 60 Service Manual 4060 xxx Assembly 27 5 bin mailbox ...
Страница 298: ...7 62 Service Manual 4060 xxx Assembly 27 cont 5 bin mailbox ...
Страница 300: ...7 64 Service Manual 4060 xxx Assembly 28 High capacity feeder 1 ...
Страница 304: ...7 68 Service Manual 4060 xxx Assembly 30 High capacity feeder 3 3 11 7 13 9 15 2 10 6 4 12 8 14 1 1 3 5 ...
Страница 306: ...7 70 Service Manual 4060 xxx Assembly 31 High capacity feeder 4 3 11 7 13 18 5 16 9 15 2 10 6 17 4 12 8 14 19 1 4 ...
Страница 308: ...7 72 Service Manual 4060 xxx Assembly 32 High capacity feeder 5 3 11 7 5 9 2 10 6 4 12 8 1 10 10 10 12 ...
Страница 314: ...7 78 Service Manual 4060 xxx Assembly 35 StapleSmart finisher I 3 11 7 13 5 16 9 15 2 10 6 17 4 12 8 14 1 5 18 ...
Страница 316: ...7 80 Service Manual 4060 xxx Assembly 36 StapleSmart finisher 2 3 11 7 13 5 9 2 10 6 4 12 8 14 1 4 4 4 4 ...
Страница 320: ...7 84 Service Manual 4060 xxx Assembly 38 StapleSmart finisher 4 1 ...
Страница 344: ...I 20 Service Manual 4060 xxx ...
Страница 345: ......

