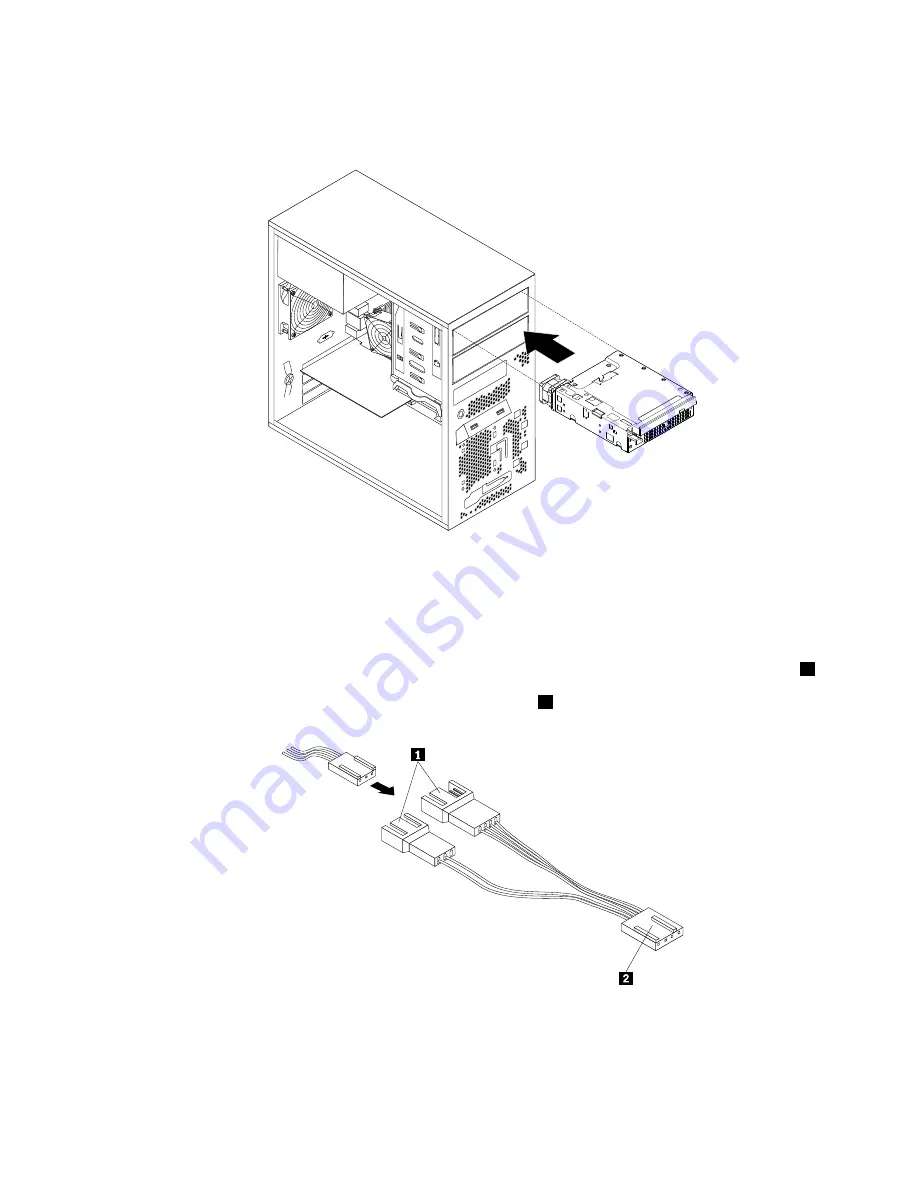
11. Slide the cage with the slim optical drive and the hard disk drive into the optical drive bay from the front
of the server until the cage snaps into position.
Figure 32. Sliding the cage into the optical drive bay
12. Connect the signal cables and the power cables to the slim optical drive and the hard disk drive.
13. Connect the cable of the fan for the fourth hard disk drive to the hard disk drive fan connector on the
system board. See “Locating parts on the system board” on page 17.
Note:
If your server has a tertiary hard disk drive installed, the fan power converter cable connector
2
is
connected to the hard disk drive fan connector on the system board. Connect the cable of the fan for
the fourth hard disk drive to one of the available connectors
1
of the fan power converter cable.
Figure 33. Connecting the cable of the fan for the fourth hard disk drive
14. Install the plastic bezel for the cage onto the front bezel.
15. Reinstall the front bezel. See “Removing and reinstalling the front bezel” on page 42.
Chapter 6
.
Installing, removing, or replacing hardware
59
Содержание ThinkServer TS140
Страница 1: ...ThinkServer TS140 Hardware Maintenance Manual Machine Types 70A0 70A1 70A4 and 70A5 ...
Страница 14: ...xii ThinkServer TS140 Hardware Maintenance Manual ...
Страница 18: ...4 ThinkServer TS140 Hardware Maintenance Manual ...
Страница 20: ...6 ThinkServer TS140 Hardware Maintenance Manual ...
Страница 34: ...20 ThinkServer TS140 Hardware Maintenance Manual ...
Страница 36: ...22 ThinkServer TS140 Hardware Maintenance Manual ...
Страница 52: ...38 ThinkServer TS140 Hardware Maintenance Manual ...
Страница 112: ...Symptom Action 2 Restart the server 3 Replace the USB device 98 ThinkServer TS140 Hardware Maintenance Manual ...
Страница 116: ...102 ThinkServer TS140 Hardware Maintenance Manual ...
Страница 130: ...116 ThinkServer TS140 Hardware Maintenance Manual ...
Страница 131: ......
Страница 132: ......


