Before installing a DIMM:
1. Touch the static-protective package that contains the new DIMM to any unpainted surface on the
outside of the server. Then, take the new DIMM out of the package and place it on a static-protective
surface.
2. Locate the required DIMM slot on the system board and ensure that you observe the installation rules
and sequence. See “DIMM installation rules” on page 36.
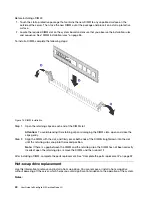
To install a DIMM, complete the following steps:
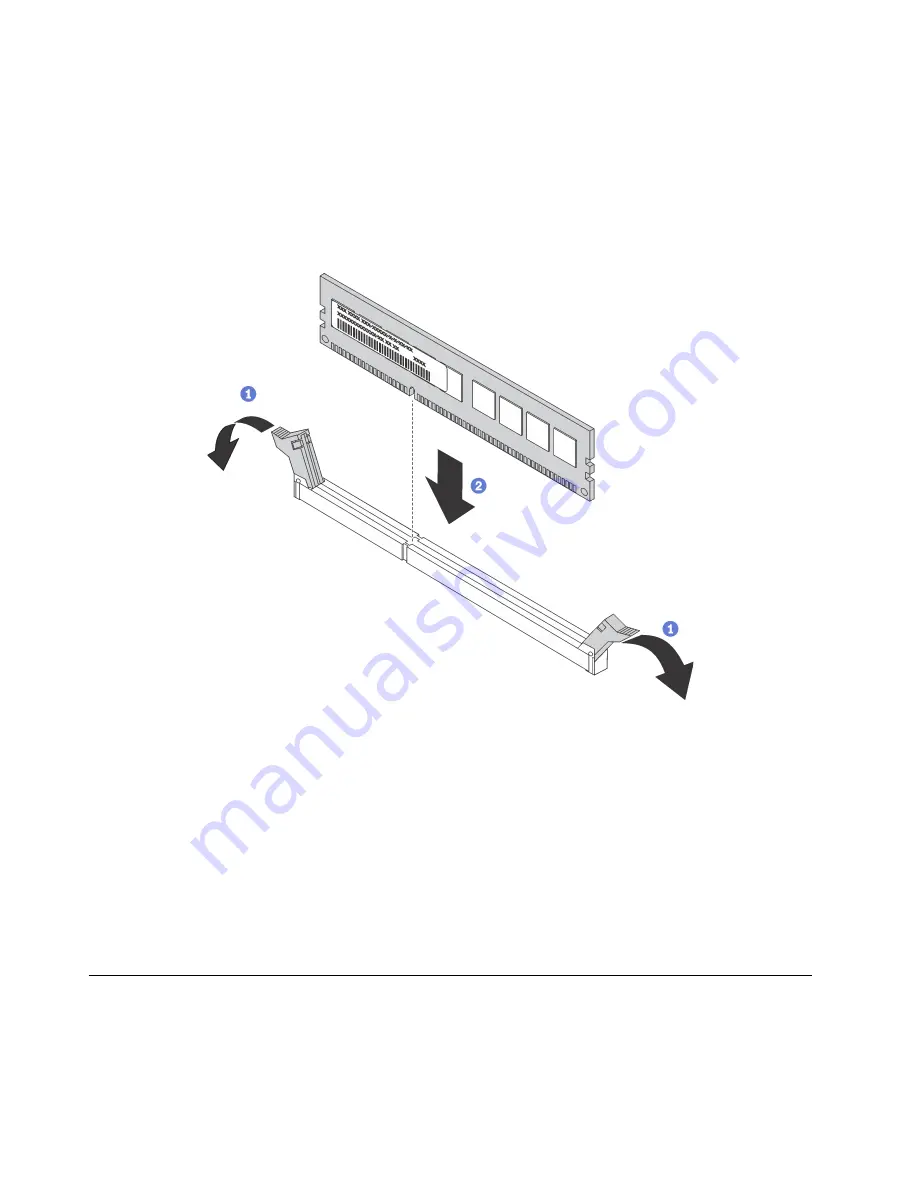
Figure 12. DIMM installation
Step 1. Open the retaining clips on each end of the DIMM slot.
Attention:
To avoid breaking the retaining clips or damaging the DIMM slots, open and close the
clips gently.
Step 2. Align the DIMM with the slot, and firmly press both ends of the DIMM straight down into the slot
until the retaining clips snap into the locked position.
Note:
If there is a gap between the DIMM and the retaining clips, the DIMM has not been correctly
inserted; open the retaining clips, remove the DIMM, and then reinsert it.
After installing a DIMM, complete the parts replacement. See “Complete the parts replacement” on page 32.
Hot-swap drive replacement
Use this information to remove and install a hot-swap drive. You can remove or install a hot-swap drive
without powering off the server, which helps you avoid significant interruption to the operation of the system.
Notes:
40
User Guide forThinkAgile MX Certified Node 2U
Содержание ThinkAgile MX Certified Node 2U
Страница 1: ...User Guide for ThinkAgile MX Certified Node 2U Machine Type 7Z20 ...
Страница 4: ...ii User Guide forThinkAgile MX Certified Node 2U ...
Страница 14: ...10 User Guide forThinkAgile MX Certified Node 2U ...
Страница 38: ...34 User Guide forThinkAgile MX Certified Node 2U ...
Страница 94: ...90 User Guide forThinkAgile MX Certified Node 2U ...
Страница 98: ...94 User Guide forThinkAgile MX Certified Node 2U ...
Страница 100: ...96 User Guide forThinkAgile MX Certified Node 2U ...
Страница 103: ......
Страница 104: ......


