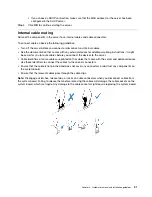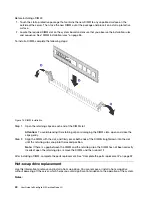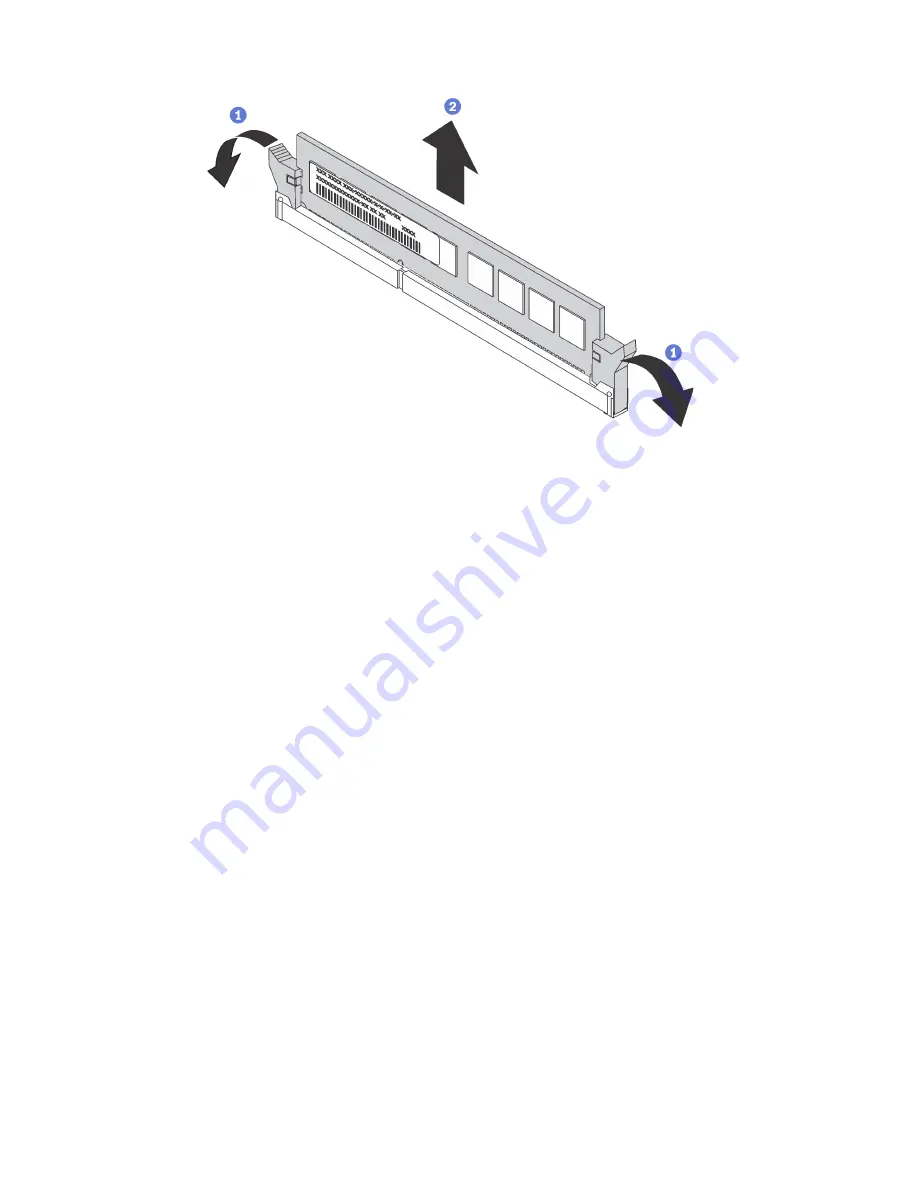
Figure 10. DIMM removal
Step 1. Open the retaining clips on each end of the DIMM slot.
Attention:
To avoid breaking the retaining clips or damaging the DIMM slots, handle the clips
gently.
Step 2. Grasp the DIMM at both ends and carefully lift it up to remove it from the slot.
After removing a DIMM:
1. Install a DIMM filler or a new DIMM to cover the slot. See “Install a DIMM” on page 39.
2. If you are instructed to return the old DIMM, follow all packaging instructions and use any packaging
materials that are provided.
DIMM installation rules
DIMMs must be installed in a specific order based on the memory configuration that you implement on your
server.
Your server has 24 DIMM slots and it has the following features:
• Each slot supports 8 GB, 16 GB, and 32 GB DDR4 RDIMMs with Error Checking and Correcting (ECC)
technology.
• Each slot supports 64 GB DDR4 LRDIMMs with ECC technology.
• Your server supports up to 12 DIMMs when one processor is installed, and up to 24 DIMMs when two
processors are installed.
• The minimum system memory is 8 GB (only one processor installed and only one 8 GB RDIMM installed in
the Processor 1 DIMM5 slot).
• The maximum system memory is as follows:
– 768 GB using RDIMMs (two processors installed and one 32 GB RDIMM installed in each of the 24
DIMM slots)
– 1.5 TB using LRDIMMs (two processors installed and one 64 GB LRDIMM installed in each of the 24
DIMM slots)
36
User Guide forThinkAgile MX Certified Node 2U
Содержание ThinkAgile MX Certified Node 2U
Страница 1: ...User Guide for ThinkAgile MX Certified Node 2U Machine Type 7Z20 ...
Страница 4: ...ii User Guide forThinkAgile MX Certified Node 2U ...
Страница 14: ...10 User Guide forThinkAgile MX Certified Node 2U ...
Страница 38: ...34 User Guide forThinkAgile MX Certified Node 2U ...
Страница 94: ...90 User Guide forThinkAgile MX Certified Node 2U ...
Страница 98: ...94 User Guide forThinkAgile MX Certified Node 2U ...
Страница 100: ...96 User Guide forThinkAgile MX Certified Node 2U ...
Страница 103: ......
Страница 104: ......


