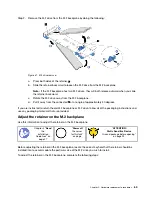
Step 2. Remove the M.2 drive from the M.2 backplane by doing the following:
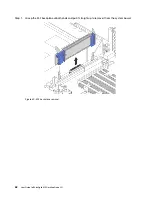
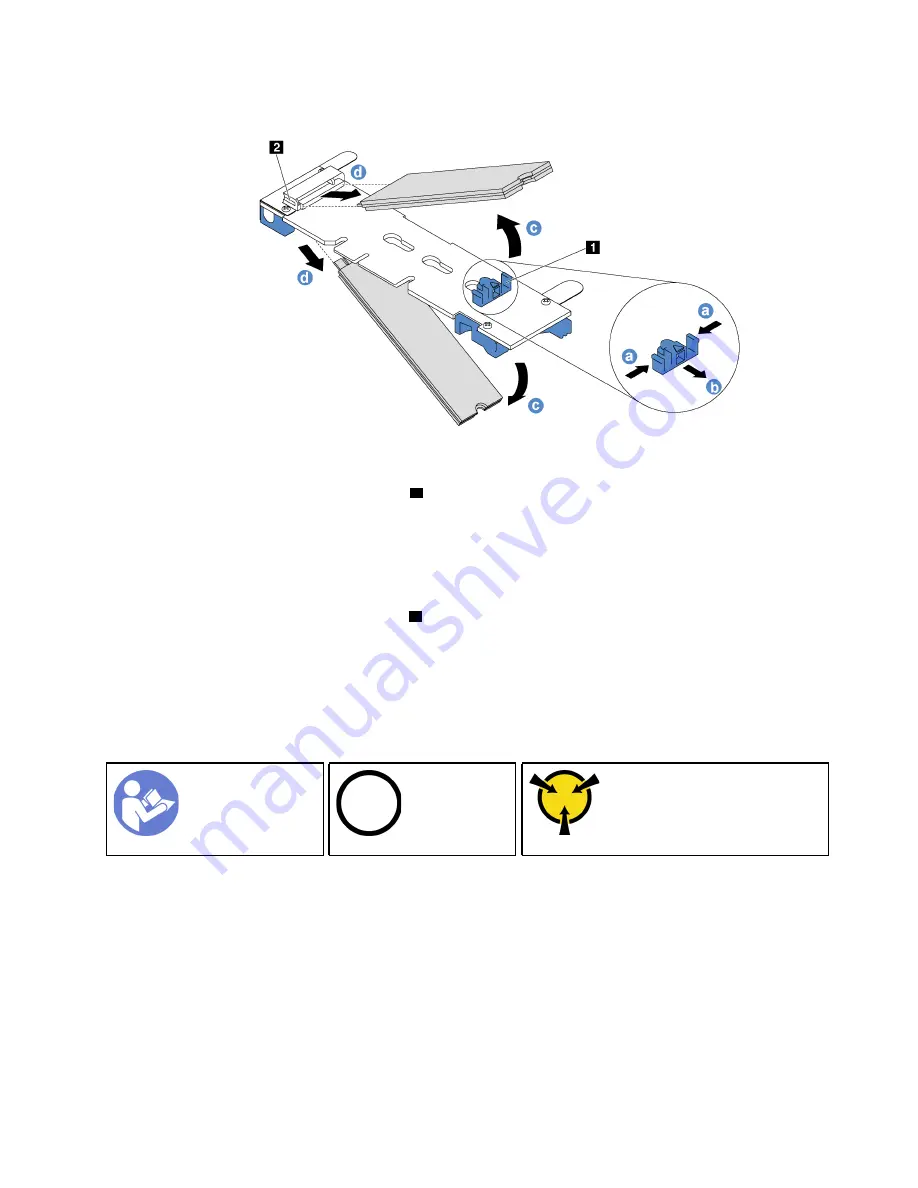
Figure 31. M.2 drive removal
a. Press both sides of the retainer
1
.
b. Slide the retainer backward to loosen the M.2 drive from the M.2 backplane.
Note:
If the M.2 backplane has two M.2 drives, they will both release outward when you slide
the retainer backward.
c. Rotate the M.2 drive away from the M.2 backplane.
d. Pull it away from the connector
2
at an angle of approximately 30 degrees.
If you are instructed to return the old M.2 backplane or M.2 drive, follow all of the packaging instructions and
use any packaging materials that are provided.
Adjust the retainer on the M.2 backplane
Use this information to adjust the retainer on the M.2 backplane.
“
Power off
the server
for this task”
on page
Ground package before opening”
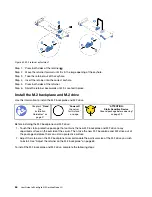
Before adjusting the retainer on the M.2 backplane, locate the correct keyhole that the retainer should be
installed into to accommodate the particular size of the M.2 drive you wish to install.
To adjust the retainer on the M.2 backplane, complete the following steps:
.
Hardware replacement procedures
63
Содержание ThinkAgile MX Certified Node 2U
Страница 1: ...User Guide for ThinkAgile MX Certified Node 2U Machine Type 7Z20 ...
Страница 4: ...ii User Guide forThinkAgile MX Certified Node 2U ...
Страница 14: ...10 User Guide forThinkAgile MX Certified Node 2U ...
Страница 38: ...34 User Guide forThinkAgile MX Certified Node 2U ...
Страница 94: ...90 User Guide forThinkAgile MX Certified Node 2U ...
Страница 98: ...94 User Guide forThinkAgile MX Certified Node 2U ...
Страница 100: ...96 User Guide forThinkAgile MX Certified Node 2U ...
Страница 103: ......
Страница 104: ......

