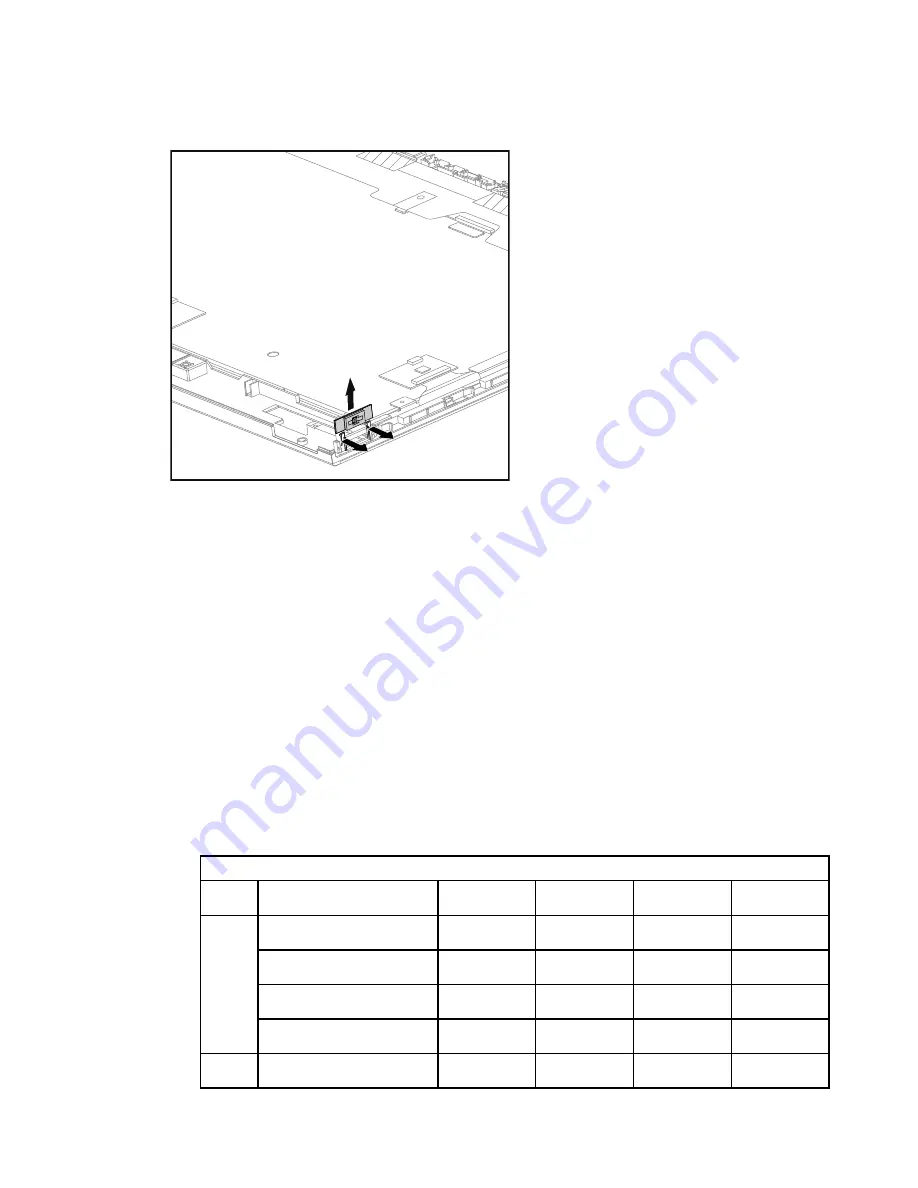
Step 22. Push the pins that secure the power switch board to the front bezel, and then lift out the power
switch board as shown.
Step 23. To install the new the LED panel:
a.
Install the power switch board to the new front bezel.
b.
Connect the converter cable to the connector on the new LED panel, and attach the converter
cable to the LED panel properly using double faced adhesive tape.
c.
Line up the chassis with the mounting holes on the front bezel, connect the touch control
cable and LVDS cable to the connectors on the new LED panel, and then place the chassis
into position.
d.
Connect the converter cable to the converter.
e.
Connect the front function board cable, front indicator board cable and the power switch
board cable to the connectors on the motherboard.
f.
Reattach the Wi-Fi antenna cables back to the front bezel.
g.
Secure the new LED panel to the chassis with four screws.
h.
Secure the chassis to the front bezel with the eight screws.
i.
Reinstall the camera and the Bluetooth module.
j.
To get the best display quality for your monitor, adjust the PTV139 DIP switch settings on the
TV scalar board according the below chart for different panel models:
Note: 1=OFF 0=ON
Size
Model
DIP 1
DIP 2
DIP 3
DIP 4
LTM230HT10 M01
1
1
1
0
LTM230HT10 M02
1
1
0
1
LM230WF5-TLF1
1
1
0
0
23'LED
M230HGE-L20 C1
1
0
1
1
23'FPR LM230WF8-TLA1
1
0
1
0
Chapter 8
.
Replacing hardware
59
Содержание IdeaCentre B345
Страница 2: ......
Страница 6: ...iv IdeaCentre B345 B545 All In OneHardware Maintenance Manual ...
Страница 8: ...2 IdeaCentre B345 B545 All In OneHardware Maintenance Manual ...
Страница 16: ...10 IdeaCentre B345 B545 All In OneHardware Maintenance Manual ...
Страница 18: ...12 IdeaCentre B345 B545 All In OneHardware Maintenance Manual ...
Страница 24: ...18 IdeaCentre B345 B545 All In OneHardware Maintenance Manual ...


