Lake Shore Model 647 Magnet Power Supply User’s Manual
Operation
3-2
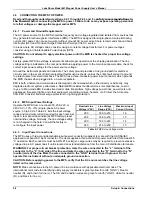
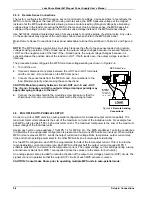
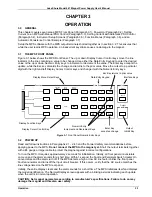
3.3 GENERAL DISPLAY DESCRIPTION
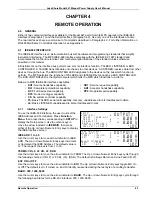
In general, screen displays are split into two sections. The left section is the Entry Window where users enter
new parameters. The right section is the Menu Window where Menus display when Output values do not.
The
arrow (
¤
) symbol is the line indicator. The cursor up and down keys move the line indicator.
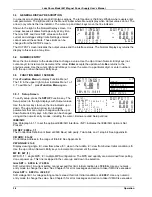
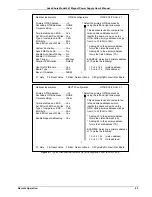
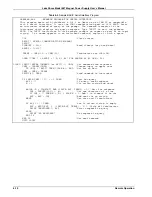
Shown to the right is the Normal Display screen. It is
unique because it allows Settings entry at any time.
The I
MAX
SET and V
MAX
SET values are the soft
current and voltage setting limits. Settings entered
cannot exceed these limits. These limits can be
changed from the SETUP screen.
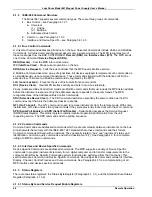
The OUTPUT screen indicates the output values and the interface status. The Normal Display key returns the
display to this screen at any time.
3.4 NUMERIC
ENTRY
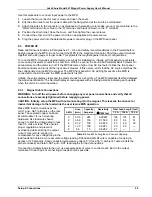
Move the line indicator to the desired line to change a value. Use the Up or down Numeric Entry keys (not
cursor keys) to increment or decrement the value.
Enter
accepts the update, while
Esc
returns to the
previous value. Use the cursor right and left keys to move the cursor to a particular digit, or enter numbers
with the up or down Numeric Entry keys.
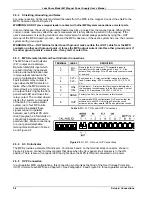
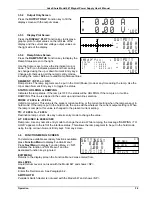
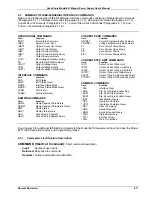
3.5 FUNCTION MENU 1 SCREEN
Press
Function Menu
to display Function Menu 1.
The 1/3 in the upper right corner indicates Menu 1 of
3. To exit Menu 1, press
Function Menu
again.
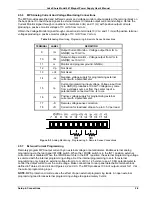
3.5.1 Setup
Screen
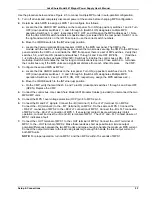
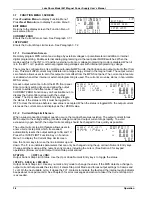
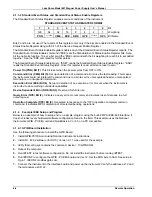
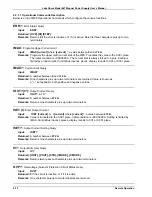
To verify setup, press the
SETUP
Function key. The
Setup screen to the right displays with Output values.
Use the Cursor keys to move the line indicator up or
down. The up and down arrow icon indicates
parameters that can only be changed with the up or
down Numeric Entry keys. All others can be changed
using all the numeric entry modes, including the cursor. Below are valid Setup entries:
IEEE/SIO:
See Paragraph 4.1.1 to set the optional IEEE/SIO Interface. <NP> indicates the IEEE/SIO option is Not
Present.
CB DEF: 9600,o,7,1
The Control Bus Definition is fixed at 9600 Baud, odd parity, 7 data bits, and 1 stop bit. See Appendix B.
CB ADD: 0 to 32
Control Bus Address in the range of
0
to
32
. See Appendix B.
VW ANGLE: 2 to 9
Display viewing angle.
9
= view from above,
5
= view in the middle,
2
= view from below. Initial condition is
5
.
Use the up or down Numeric Entry keys to increment or decrement the value.
MF ID: 647 (1)
MPS ID.
1
= single MPS,
2
= multiple MPS configuration. The MPS and quantity are determined from polling
done at power up. This line is skipped in the cursor up and down line selection.
I
MAX
SET: + 0.00 A to +72.00 A
Soft current limit. A current setting cannot exceed this limit. Initial condition is
+72.00 A
. Use any numeric
entry mode to change the value. See Chapter 5 for error messages and action to take if IMAX is exceeded.
V
MAX
SET: + 0.00 V to +32.00 V
Soft voltage limit. A voltage setting cannot exceed this limit. Initial condition is
+32.00 V
. Use any numeric
entry mode to change the value. See Chapter 5 for error messages and action to take if VMAX is exceeded.
- 0 .0 0 A
+ 0 .0 0 V
L O C
¤
IM A X S E T :+ 7 2 .0 0 A
V M A X S E T :+ 3 2 .0 0 V
O U T P U T :
*
S E T T IN G S :
+ 0 .0 0 A
1.0 0 V
1/3
SE T U P
OU T P U T ON L Y
DIS P LA Y P LO T
RA M P S T AT U S
¤
IM A X S E T :+ 7 2 .0 0 A
V M A X S E T :+ 3 2 .0 0 V
S E T T IN G S :
+ 0 .0 0 A
1.0 0 V
S E T U P :
¤ IE E E / S O I
C B D E F
C B A D D
V W A N G L E
M F ID
IM A X S E T
V M A X S E T
O U T P U T :
:
: 9 6 0 0 ,o ,7 ,1
: 0
: 5
: 6 4 7 (1)
: + 7 2 .0 0 A
: + 3 2 .0 0 V
¥
¥
¥
*
- 0 .0 0 A
+ 0 .0 0 V
L O C

