LaCie 5big Backup Server
Recovery
Configuration Guide
page 44
1. Insert the Server Recovery DVD into a workstation’s optical disk
drive.
2. Insert a USB 2.0 flash drive into an available USB 2.0 port on
the same workstation.
IMPORTANT INFO:
Creating a server recovery USB 2.0 flash
drive will erase any data that is stored on the USB 2.0 flash drive.
Please backup data that you want to preserve before moving to the
next step.
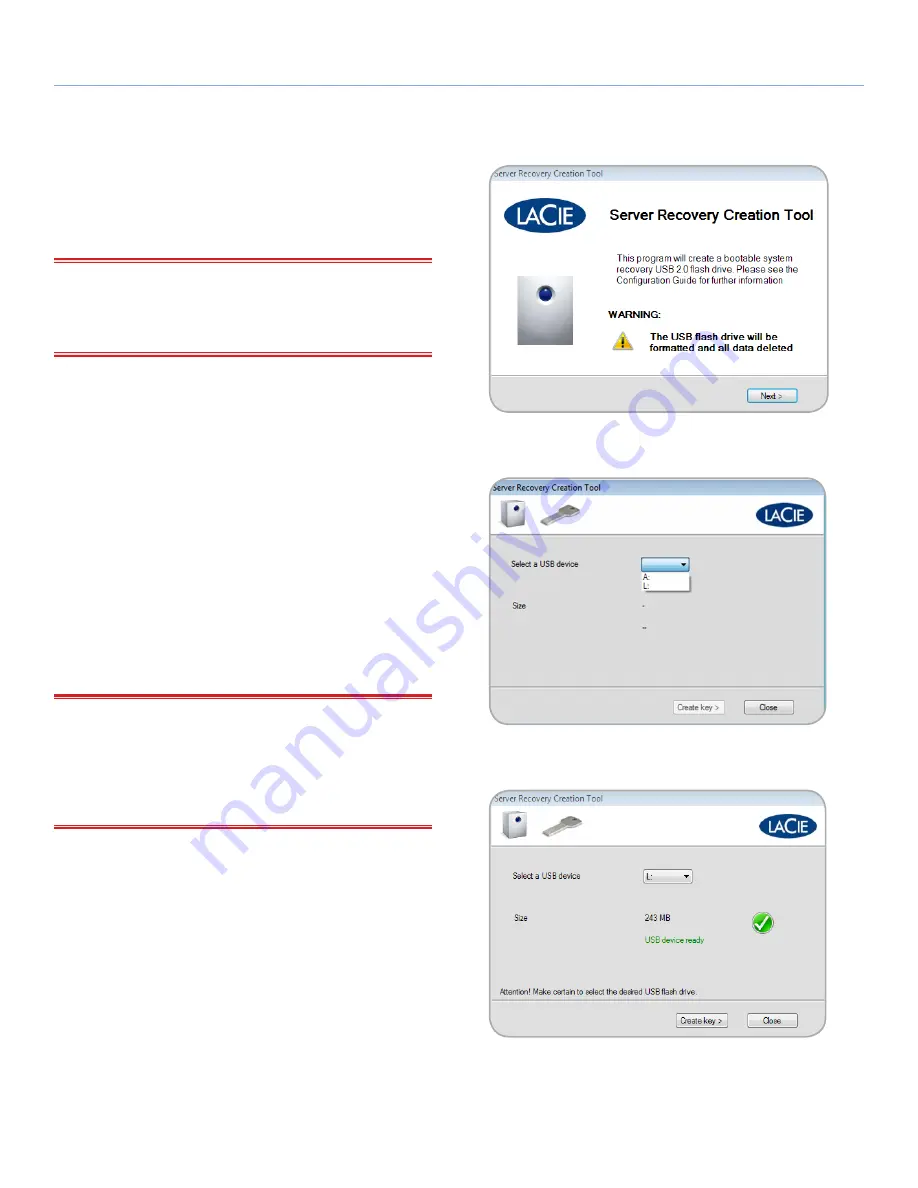
3. Launch Server Recovery Key (
Server Recovery DVD>Applications>
Server Recovery Key
).
4. Please note the information on the welcome window (
Fig. 76
).
Click
Next>
to continue.
5. Select the USB flash drive from the pulldown menu (
Fig. 77
).
If there are more than one USB flash drives connected to your
workstation, make certain to choose the target flash drive.
Choosing the incorrect flash drive may delete data that you
want to keep. Consider closing Server Recovery Key and remov-
ing all USB flash drives. Reinsert only the USB flash drive that
you want to use as a server recovery disk.
6. Once the flash drive has been chosen, Server Recovery Key of-
fers a green check mark indicating that the device is compat-
ible (
Fig. 78
). If the flash drive is not compatible, a red “X” will
appear.
IMPORTANT INFO:
There are a great number of USB 2.0 flash
drives manufactured by a wide range of companies. While many
USB 2.0 flash drives from 512 MB to 4 GB should work as a recov-
ery flash drive, LaCie cannot test every model. If Server Recovery Key
experiences problems in creating the system recovery USB 2.0 flash
drive, please try a different flash drive.
7. Click
Create Key>
to continue (
Fig. 78
).
continued on the next page>>
Fig. 76
Fig. 77
Fig. 78


