background image

System Menu 

OPERATION GUIDE

6-3

6

3

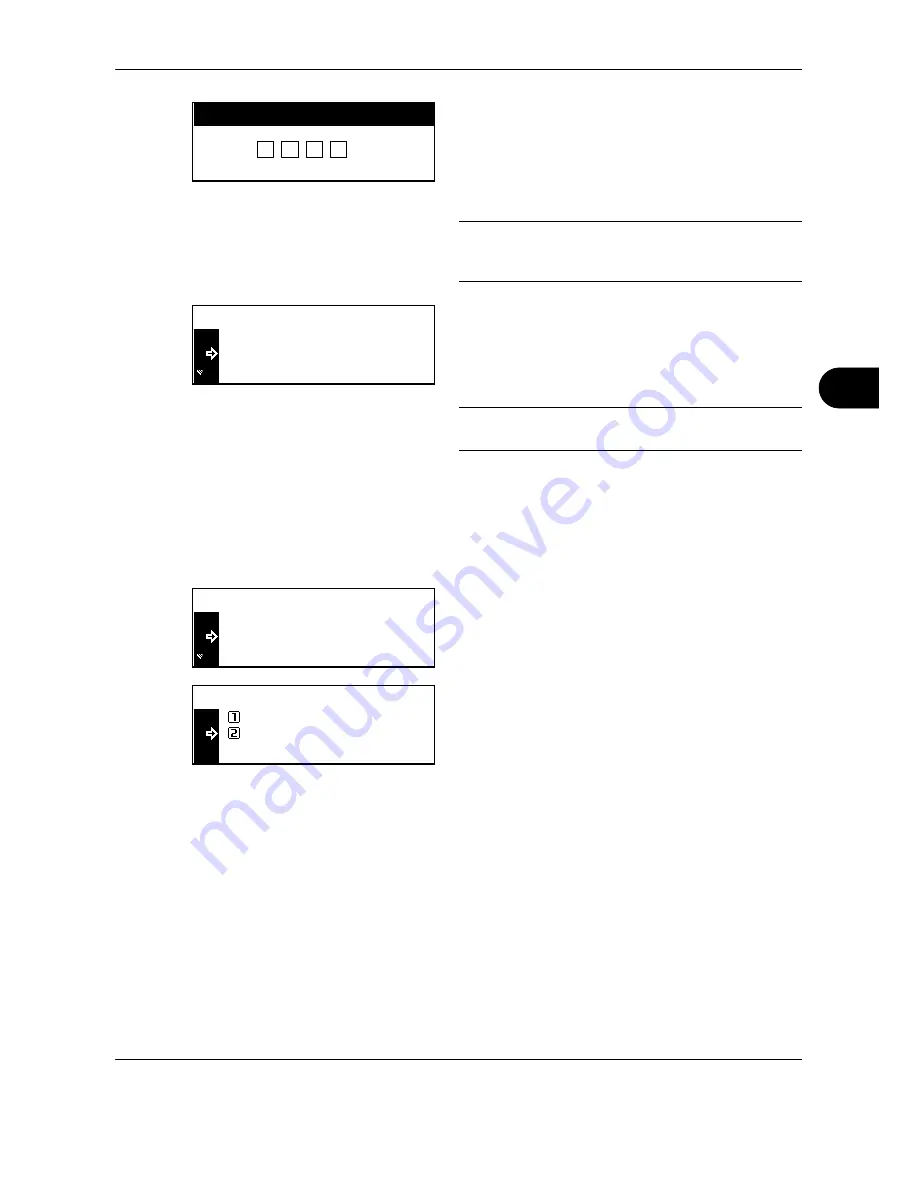
Enter the four-digit management code using the 
numeric keys.

The management code at the factory default 
setting is 1800 for the 18 ppm model and 2200 for 
the 22 ppm model.

NOTE: 

The four-digit management code can be 

changed. (See 

Administrator Management Code 

Change on page 6-24

.)

4

If the management code is accepted, the Copy 
Default screen is displayed.

Next, perform the setting referring to the following 
description of each setting item.

NOTE: 

The * (asterisk) at an item on each setting 

screen indicates the current setting.

Density Mode

Set the Default exposure mode: auto or manual.

1

Display the Copy Default screen. (See 

How to 

Display the Copy Default Screen on page 6-2

.)

2

Press 

U

 or 

V

 to select 

Exposure Mode

, and then 

press the 

Enter

 key.

3

Press 

U

 or 

V

 to select 

Auto

 or 

Manual

, and then 

press the 

Enter

 key.

4

Press the 

Reset

 key.

The message display returns to the copier basic 
screen.

Original Image Quality

Set the default original image quality mode.

1

Display the Copy Default screen. (See 

How to 

Display the Copy Default Screen on page 6-2

.)

Enter Pin Code using  # key.

End

Density Mode

Copy Default :

Original Image

Manual

Txt+Phto

:
:

End

Density Mode

Copy Default :

Original Image

Manual

Txt+Phto

:
:

Density Mode :

Auto

Manual

*

Содержание TASKalfa 181

Страница 1: ......

Страница 2: ...to the machine for easy reference We recommend the use of our own brand supplies We will not be liable for any damage caused by the use of third party supplies in this machine A label shown in the illustration assures that the supplies are our own brand In this Operation Guide Taskalfa 181 221 are referred to as 18 ppm model and 22 ppm model respectively Included Guides The following guides are su...

Страница 3: ...action are indicated inside the symbol Please contact your service representative to order a replacement if the safety warnings in this Operation Guide are illegible or if the guide itself is missing fee required NOTE An original which resembles a bank note closely may not be copied properly in some rare cases because this machine is equipped with a counterfeiting prevention function WARNING Indic...

Страница 4: ... Mode 3 4 Sleep and Auto Sleep 3 5 Printing from Applications 3 6 4 Copying Functions Basic Copying Procedure 4 2 Adjusting Density 4 3 Selecting Image Quality 4 4 Zoom Copying 4 5 Collate Copying 4 8 Offset Copying 4 9 Staple 4 10 Original Size 4 12 Paper Selection 4 14 Mixed Sized Originals 4 15 Original Orientation 4 16 EcoPrint 4 18 Combine Mode 4 19 Margin Mode 4 22 Border Erase 4 23 Duplex C...

Страница 5: ...nter 6 31 Report Output 6 33 Language Setting 6 34 7 Job Accounting Job Accounting Mode 7 2 All Account Management 7 10 Individual Account Management 7 11 Enabling Job Accounting 7 12 Default Settings 7 13 Using Job Accounting 7 17 8 Maintenance Cleaning 8 2 Toner Container and Waste Toner Box Replacement 8 6 9 Troubleshooting Solving Malfunctions 9 2 Responding to Error Messages 9 5 Clearing Pape...

Страница 6: ...lacing toner NOTE Do not remove these labels Label 2 High temperature inside Do not touch parts in this area because there is a danger of getting burned Label 3 Do not attempt to incinerate the toner container Dangerous sparks may cause burns Label 1 High temperature inside Do not touch parts in this area because there is a danger of getting burned Label 4 Do not attempt to incinerate the waste to...

Страница 7: ...r of fire To keep the machine cool and facilitate changing of parts and maintenance allow access space as shown below Leave adequate space especially around the rear cover to allow air to be properly ventilated out of the machine Other precautions The service environmental conditions are as follows Temperature 50 to 90 5 F 10 to 32 5 C Humidity 15 to 80 However adverse environmental conditions may...

Страница 8: ...f fire or electrical shock Plug the power cord securely into the mains power outlet and the power socket on the machine A buildup of dust around the prongs on the plug or contact between the prongs and metallic objects may cause a fire or electric shock Incomplete electrical contact could cause overheating and ignition Always connect the machine to an outlet with a ground connection to avoid the d...

Страница 9: ...re is a danger of personal injury fire electrical shock or exposure to the laser If the laser beam escapes there is a danger of it causing blindness If the machine becomes excessively hot smoke appears from the machine there is an odd smell or any other abnormal situation occurs there is a danger of fire or electrical shock Turn the main power switch off immediately be absolutely certain to remove...

Страница 10: ...effective if accomplished prior to seasons of high humidity Consult with your service representative in regard to the cost of cleaning the internal parts of the machine Other precautions Do not place heavy objects on the machine or cause other damage to the machine Do not open the front cover turn off the main power switch or pull out the power plug during copying When lifting or moving the machin...

Страница 11: ... remaining tenderness contact a physician If toner does happen to get on your skin wash with soap and water Do not attempt to force open or destroy the toner container or the waste toner box If the optional Fax kit is installed and the main power switch is off transmitting receiving Fax is disabled Do not turn off the main power switch but press the Power key on the operation panel to enter Sleep ...

Страница 12: ...ctive housing and sealed within the external covers never permits the laser beam to escape 2 The CDRH Act A laser product related act was implemented on Aug 2 1976 by the Center for Devices and Radiological Health CDRH of the U S Food and Drug Administration FDA This act prohibits the sale of laser products in the U S without certification and applies to laser products manufactured after Aug 1 197...

Страница 13: ... beam which is invisible Shown at below is the label located on the cover of the optical unit 4 Maintenance For safety of the service personnel follow the maintenance instructions in the other section of this manual 5 Safety switch The power to the laser unit is cut off when the front cover is opened ...

Страница 14: ...is equipment does cause harmful interference to radio or television reception which can be determined by turning the equipment off and on the user is encouraged to try to correct the interference by one or more of the following measures Reorient or relocate the receiving antenna Increase the separation between the equipment and receiver Connect the equipment into an outlet on a circuit different f...

Страница 15: ...o obtain performance of this warranty the Customer must immediately notify the Authorized Kyocera Dealer from whom the product was purchased If the Kyocera Dealer is not able to provide service write to Kyocera at the address below for the name and address of the Authorized Kyocera Dealer in your area or check Kyocera s website at www kyoceramita com us This warranty does not cover MFPs or accesso...

Страница 16: ...er Copying Scanning the following items is prohibited and may be penalized by low It may not be limited to these items Do not knowingly copy scan the items that are not to be copied scanned Paper money Bank note Securities Stamp Passport Certificate Local laws and regulations may prohibit or restrict copying scanning of other items not mentioned above ...

Страница 17: ...e using your machine This chapter provides information on the following topics Legal Information xvi Regarding Trade Names xvii Energy Saving Control Function xix Automatic 2 Sided Copy Function xix Paper Recycling xix Energy Star ENERGY STAR Program xix About this Operation Guide xx ...

Страница 18: ...xvi OPERATION GUIDE Legal Information Copying or other reproduction of all or part of this guide without the prior written consent of Kyocera Mita Corporation is prohibited ...

Страница 19: ...tion Novell and NetWare are registered trademarks of Novell Inc IBM and IBM PC AT are trademarks of International Business Machines Corporation Power PC is a trademark of IBM in the U S A and or other countries Macintosh and AppleTalk are registered trademarks of Apple Computer Inc This machine has been developed using embedded real time operating system Tornado by Wind River Systems Inc TrueType ...

Страница 20: ...r destroy all copies of the Software and Typefaces and documentation as requested 6 You agree that you will not modify alter disassemble decrypt reverse engineer or decompile the Software 7 Monotype Imaging warrants that for ninety 90 days after delivery the Software will perform in accordance with Monotype Imaging published specifications and the diskette will be free from defects in material and...

Страница 21: ...lly enters Sleep when 1 minutes have passed since the device was last used The amount of time of no activity that must pass before Sleep is activated may be lengthened For more information see Sleep and Auto Sleep on page 3 5 Automatic 2 Sided Copy Function This device includes 2 sided copying as an optional function For example by copying two 1 sided originals onto a single sheet of paper as a 2 ...

Страница 22: ... Chapter 5 Printing Functions Explains various settings that can be made in relation to the printer functions of this machine Chapter 6 System Menu Explains the other general settings that can be made in this machine Chapter 7 Job Accounting Explains the settings of the job accounting functions Chapter 8 Maintenance Explains the replacement of the toner container and the waste toner box and mainte...

Страница 23: ...played on the touch panel Ready to copy is displayed Used to emphasize a key word phrase or references to additional information For more information refer to Sleep and Auto Sleep on page 3 5 Note Indicates supplemental information or operations for reference NOTE Important Indicates items that are required or prohibited so as to avoid problems IMPORTANT Caution Indicates what must be observed to ...

Страница 24: ...ate the orientation of the original paper Placement direction Indicated size The size of the original paper that can be used depends on the function and source tray For further details refer to the page detailing that function or source tray Vertical direction A4 B5 A5 B6 A6 16K Letter Statement For the originals paper dimension A is longer than B Horizontal direction A4 R B5 R A5 R B6 R A6 R 16K ...

Страница 25: ...OPERATION GUIDE 1 1 1 Part Names This chapter identifies the machine parts and operation panel keys Operation Panel 1 2 Machine 1 6 ...

Страница 26: ...ey and indicator 10 Function key 11 Scanner Function key 12 Mixed Size Originals key and indicator 13 Margin key and indicator 14 Collate key and indicator 15 Staple key and indicator 16 Program key 17 Zoom key key 18 Auto 100 key T key 19 Original Size key S key 20 Paper Selection key key 21 Enter key 22 Image quality mode select key 23 Auto Density key Auto 1 100 Ready to copy Auto 6 27 36 33 34...

Страница 27: ...efault setting procedure For details refer to Default Setting Mode on page 6 2 It is possible to change the cassette selected in the initial mode For the 18 ppm model the optional paper feeder must be installed For details refer to Default Cassette on page 6 6 It is possible to change the image quality mode selected in the initial mode For details refer to Original Image Quality on page 6 3 It is ...

Страница 28: ...assette Switching on page 6 14 The paper in both cassettes must be set in the same orientation Message Display The message display on this machine indicates the operation status of the machine Copier Basic Screen This screen is displayed when the Copy key is pressed Reference number Meaning 1 Indicates the current status of the machine and displays the message for required operation 2 Displayed wh...

Страница 29: ... displayed Reference number Meaning 1 Indicates the current status of the machine and displays the message for required operation 2 Select to switch between online and offline to print resume printing to clear a specific error and to begin a new page to forcibly print the last page that waits for printing 3 Select to stop printing in progress 4 Select to perform network setting See Network TCP IP ...

Страница 30: ...RATION GUIDE Machine 1 Original cover 2 Output tray 3 Operation panel 4 Cassette 1 5 Paper width adjusting tab 6 Paper length adjusting tab 7 Left cover handle 8 MP tray 9 MP tray extension 10 Slider 7 8 9 10 6 5 1 2 3 4 ...

Страница 31: ...OPERATION GUIDE 1 7 1 11 Platen 12 Original size indicator plates 13 Left cover 14 Waste toner box 15 Toner container release lever 16 Toner container 17 Charger cleaner rod 18 Front cover 11 16 12 15 14 13 17 18 ...

Страница 32: ...Part Names 1 8 OPERATION GUIDE 19 Main power switch 20 Main power switch cover 21 Handles for transport 22 USB interface connector 23 Network interface connector 24 Memory card slot 22 23 24 19 20 21 21 ...

Страница 33: ... as well as the procedures for loading papers and originals Check bundled items 2 2 Determining the Connection Method and Preparing Cables 2 3 Connecting Cables 2 5 Switching the Language for Display Language 2 7 Setting Date and Time 2 8 Network TCP IP Setup 2 10 Installing Software 2 13 Loading Paper 2 14 Loading Originals 2 25 ...

Страница 34: ...nts Contained in the Included CD ROM The following documents are contained in the included CD ROM Product Library Refer to them as necessary Documents KYOCERA COMMAND CENTER Operation Guide Printer Driver User Guide Network FAX Driver Operation Guide KM NET for Direct Printing Operation Guide PRESCRIBE Commands Technical Reference PRESCRIBE Commands Command Reference ...

Страница 35: ...work with a network cable 100BASE TX or 10BASE T FAX Option TWAIN Scanning TWAIN is standardized interface for communication between software applications and image acquisition devices Send E mail Sends the image data of scanned originals to the desired recipient as a file attached to an E mail message Send to PC Saves the scanned image as a data file on your PC MFP FAX Administrator s PC COMMAND ...

Страница 36: ...aces Function Interface Necessary Cable Printer Scanner Network FAX Function available when using optional scanner kit For details on scanner refer to the Scan Kit Operation Guide Function available when using optional fax kit For details on Network FAX refer to the Fax Kit Operation Guide Network interface LAN 10Base T or 100Base TX Shielded Printer USB interface USB2 0 compatible cable Hi Speed ...

Страница 37: ... powered up first press the Power key on the operation panel Check that the Power indicator and the memory indicator are off After this turn off the main power switch 2 Connect the LAN cable to the network interface located on right side of the body 3 Connect the other end of the cable to the hub 4 Configure the network For details refer to Network TCP IP Setup on page 2 10 ...

Страница 38: ... the Power indicator and the memory indicator are off After this turn off the main power switch 2 Connect the USB cable to the appropriate interface located on the right side of the body 3 Connect the other end of the cable to the PC Connecting the Power Cable Connect one end of the supplied power cable to the machine and the other end to a power outlet IMPORTANT Only use the power cable that come...

Страница 39: ...y 2 Press U or V repeatedly until Language appears The default message language is English 3 Press the Enter key 4 Press U or V The display cycles through the available selection in the following order English Français Deutsch Italiano Nederlands Español Русский Português 5 Press the Enter key The touch panel language will be changed The display returns to Ready to copy End System Menu Counter Lan...

Страница 40: ...e factory default setting is 1800 for the 18 ppm model and 2200 for the 22 ppm model NOTE The four digit management code can be changed For details refer to Administrator Management Code Change on page 6 24 If the management code is accepted the Machine default screen is displayed NOTE The asterisk at an item on each setting screen indicates the current setting 4 Press U or V to select Date Time a...

Страница 41: ... set the current month 10 Press U or V to select Day and then press Y or Z to set the current day 11 After all setting is complete press U or V to select End and then press the Enter key 12 Press the Reset key The message display returns to the copier basic screen 06 33 On End Time Date Time DST Year On 2009 Time Zone Date Time DST GMT 00 00 Month GMT 00 00 2009 11 Year Time Zone Date Time Day 200...

Страница 42: ...lect Network and then press the Enter key 5 Press U or V to select TCP IP and then press the Enter key 6 Press U or V to select Change and then press the Enter key 7 Press U or V to select IP Address and then press the Enter key 8 Press and enter the block of 3 digits of the IP address in the highlighted area using the numeric keys 9 Continue the same procedure for the other 3 blocks GO CANCEL Rea...

Страница 43: ...rocedure from step 3 above 1 Press U or V to select Gateway and then press the Enter key 2 Use the same procedure as steps 8 and 9 of IP address setting to input the address 3 Press the Enter key 4 When you finish making all of the network setting press the Reset key The message display returns to the printer basic screen DHCP Settings Select whether or not to use the DHCP server The default setti...

Страница 44: ...ration before Use 2 12 OPERATION GUIDE 2 Press U or V to select DHCP and then press the Enter key 3 Press U or V to select On and then press the Enter key Back DHCP TCP IP Setting IP Address Back On DHCP Off ...

Страница 45: ...hine or perform TWAIN transmission or FAX transmission from your PC NOTE Installation on Windows XP Windows 2000 Server 2003 and Windows Vista must be done by a user logged on with administrator privileges Plug and Play is disabled on this device when in Sleep Mode Wake the device from Low Power Mode or Sleep Mode before continuing See Low Power Mode and Auto Low Power Mode on page 3 4 and Auto Sl...

Страница 46: ...paper is curled or folded straighten it before loading Paper that is curled or folded may cause a jam CAUTION If you copy onto used paper paper already used for copying do not use paper that is stapled or clipped together This may damage the machine or cause poor image quality NOTE If printouts are curled or not neatly stapled turn the stack in the cassette upside down Avoid exposing opened paper ...

Страница 47: ...nter paper or any paper with a special surface coating Such papers may cause paper jams or other faults Do not load thick paper that is heavier than 105 g m2 in the cassettes Use the MP tray for paper that is heavier than 105 g m2 1 Pull the cassette out toward you until it stops NOTE Do not pull out more than one cassette at a time 2 Push down on the cassette base plate and secure it 3 Holding th...

Страница 48: ...e impressed in the cassette 5 Set the paper straight from the upper part IMPORTANT Be careful not to bend or crease the paper when inserting it into the cassette Creases in the paper may lead to paper jams The maximum paper limit indicator A is provided on a paper width guide Make sure that the paper loaded is below the maximum paper limit indicator When loading paper into the cassette set it with...

Страница 49: ... cassette back in IMPORTANT When the machine will not be used for a long period of time remove the paper from the cassette put it in a storage bag and seal the bag in order to protect the paper from moisture Loading Paper in the MP Tray Up to 100 sheets of standard 80 g m A4 Letter size paper 50 sheets of A5R A6R Statement R 25 sheets of the other sizes can be set The paper sizes that can be used ...

Страница 50: ... MP tray so that when you select the MP tray the MP Tray Paper size screen is displayed For the method of setting refer to MP Tray Settings on page 6 28 1 Open the MP tray NOTE Pull out the MP tray extension to match the paper size Refer to the label which sealed inside the machine when opening the MP tray 2 Adjust the paper width guides to the width of the paper ...

Страница 51: ...r must be uncurled before use Straighten the top edge if it is curled When loading paper into the MP tray check that there is no paper left over in the tray from a previous job before loading the paper If there is just a small amount of paper left over in the MP tray and you want to add more first remove the left over paper from the tray and include it with the new paper before loading the paper b...

Страница 52: ... paper width guides to the width of envelope Acceptable Envelope Size Hagaki 148 100 mm Oufuku Hagaki 148 200 mm Youkei 2 162 114 mm Youkei 4 235 105 mm Monarch 3 7 8 7 1 2 Envelope 10 Commercial 10 4 1 8 9 1 2 Envelope DL 110 220 mm Envelope C5 162 229 mm Executive 7 1 4 10 1 2 Envelope 9 Commercial 9 3 7 8 8 7 8 Envelope 6 Commercial 6 3 4 3 5 8 6 1 2 ISO B5 176 250 mm Envelope C4 229 324 mm ...

Страница 53: ...des keeping the printing side face down and the edge with the flap facing the insertion slot IMPORTANT How to load envelopes orientation and facing will differ depending on the type of envelope Be sure to load it in correctly otherwise printing may be done in the wrong direction or on the wrong face NOTE When you load envelopes in the MP tray select the envelope type by referring to MP Tray Settin...

Страница 54: ...2 Press U or V repeatedly until MP Tray Setting appears and then press the Enter key 3 Press U or V to select the paper size and then press the Enter key The MP Tray Paper type screen is displayed Proceed to Paper Type described below Selecting a Size from Other Regular Sizes Sizes that can be set Inch Specification A3 B4 B5R B5 A5R B6R A6R HAGAKI Folio Executive ISO B5 Envelope DL Envelope C5 Env...

Страница 55: ...1 mm increments 5 Press V to select the horizontal size 6 Press Y or Z to set the horizontal size You can set the horizontal size to 5 7 8 to 17 in 1 8 increments 148 to 432 mm in 1 mm increments and then press the Enter key The MP Tray Paper type screen is displayed Proceed to Paper Type described below Paper Type To set the paper type to be used in the multi bypass tray continue the procedure fr...

Страница 56: ...n before Use 2 24 OPERATION GUIDE Press U or V to select the MP tray paper type and then press the Enter key The message display returns to the copier basic screen MP Tray Paper type Plain Transparency Preprinted ...

Страница 57: ...e that there are no originals left on the original table or on the original eject table Originals left on the original table or on the original eject table may fall off when the document processor is opened Keep the document processor open if the original is books or magazines 2 Place the original Put the scanning side facedown and align it flush against the original size indicator plates with the...

Страница 58: ... document processor for the following types of originals Soft originals such as vinyl sheets Transparencies such as OHP film Carbon paper Originals with very slippery surfaces Originals with adhesive tape or glue Wet originals Originals with correction fluid which is not dried Irregularly shaped non rectangular originals Originals with cut out sections Crumpled paper Originals with folds Straighte...

Страница 59: ... cause other originals to jam When setting multiple originals at one time be sure to use originals of the same size It is possible however to use different size originals of the same width for example 11 x 17 Ledger and 11 x 8 1 2 or A4 and A3 at the same time in the auto selection mode Refer to Chapter 4 Auto Selection Mode 2 Arrange the originals in order and set them face up front side up for 2...

Страница 60: ...en the ejection extension when using large originals such as A3 B4 11 17 Ledger and 8 1 2 14 Legal When copying from 2 sided originals the originals are temporarily ejected onto the ejection tray in order to turn them over Do not touch them at this point Any attempt to remove them may cause the originals to jam ...

Страница 61: ...OPERATION GUIDE 3 1 3 Basic Operation This chapter explains the following operations Power On Off 3 2 Low Power Mode and Auto Low Power Mode 3 4 Sleep and Auto Sleep 3 5 Printing from Applications 3 6 ...

Страница 62: ...hine and turn the main power switch on The machine starts to warm up 2 Once warm up is completed the Start indicator lights up green Power Off Make sure that Power key is off before turning off the main power switch CAUTION The hard disk may be operating when the Power key is lit Turning off the main power switch while the hard disk is operating may cause damage ...

Страница 63: ...e main power switch If the machine will not be used for an even longer period of time e g vacation remove the power plug from the outlet as a safety precaution If the optional Fax kit is installed note that turning the machine off at the main power switch disables fax transmission and reception CAUTION Remove paper from the cassettes and seal it in the paper storage bag to protect it from humidity...

Страница 64: ...arrives while the machine is in Low Power Mode when using the optional fax the machine automatically wakes up and starts printing To resume perform one of the following actions The machine will be ready to operate within 10 seconds Press any key on the operation panel Open the original cover or the optional document processor Place originals in the optional document processor Note that ambient env...

Страница 65: ...s performed while the touch panel remains unlit When using the optional fax received fax data is printed out while the operation panel also remains unlit To resume press the Power key The machine will be ready to use within 17 2 seconds Note that ambient environmental conditions such as ventilation may cause the machine to respond more slowly Auto Sleep Auto Sleep automatically switches the machin...

Страница 66: ...ck the T button next to the Name field and select this machine from the list 4 Enter the desired print quantity in the Number of copies box Enter any number up to 999 When there is more than one document select Collate to print out one by one in the sequence of the page numbers 5 Click Properties button The Properties dialog box appears 6 Select the Basic tab and click Page Size button to select t...

Страница 67: ...ize and type To print on special paper such as envelope or thick paper place it on the MP tray and select MP Tray 8 Select paper orientation either Portrait or Landscape to match the orientation of the document Selecting Rotate 180 will print the document rotated 180 9 Click OK button to return to the Print dialog box 10 Click OK button to start printing ...

Страница 68: ...Basic Operation 3 8 OPERATION GUIDE ...

Страница 69: ...ng Image Quality 4 4 Zoom Copying 4 5 Collate Copying 4 8 Offset Copying 4 9 Staple 4 10 Original Size 4 12 Paper Selection 4 14 Mixed Sized Originals 4 15 Original Orientation 4 16 EcoPrint 4 18 Combine Mode 4 19 Margin Mode 4 22 Border Erase 4 23 Duplex Copying 4 25 Continuous Scan 4 28 Auto Image Rotation 4 29 Interrupt Mode 4 30 Program Function 4 32 ...

Страница 70: ...ed on the message display copy paper of the same size as the original is automatically selected To change the paper size press the Paper Select key to select the desired paper source NOTE Select paper size manually if necessary instead of using automatic paper selection It is possible to disable this auto paper selection function For details refer to It is also possible to specify a cassette that ...

Страница 71: ...elect the Auto Density mode The procedure for adjusting the density of copies is explained below 1 Press the Copy key 2 Place the originals on the platen 3 Adjust density manually pressing Lighter to Darker key To change density adjustment from Manual to Auto press the Auto Density key 4 Press the Start key to start copying Mode Description Auto Density mode The machine detects the density of the ...

Страница 72: ...e 4 Press the Start key to start copying NOTE You can adjust the copy exposure in each of the image quality modes See Density Adjustment for Text Photo Originals on page 6 8 Density Adjustment for Text Originals on page 6 8 and Density Adjustment for Photo Originals on page 6 9 If you select the Photo mode the manual copy exposure mode is set See Adjusting Density on page 4 3 Image quality mode De...

Страница 73: ...d when you select a cassette Refer to Default Magnification on page 6 6 Automatically reduces or enlarges the original image suitably to the selected paper size The procedure for auto zoom magnification selection mode is explained below 1 Press the Copy key 2 Place the originals on the platen 3 Press the Auto 100 key AUTO is displayed on the message display 4 Press the Paper Selection key to selec...

Страница 74: ...ons The following magnifications are available The procedure for preset zoom mode is explained below 1 Press the Copy key 2 Place the originals on the platen 25 200 Zoom 118 100 121 8 5x14 78 8 5x14 11x17 8 5x11 Model Zoom Level Original Copy Inch Models 100 Auto 400 Max 200 5 5 8 5 11 17 154 5 5 8 5 8 5 14 129 8 5 11 11 17 121 8 5 14 11 17 78 8 5 14 8 5 11 77 11 17 8 5 14 64 11 17 8 5 11 50 11 17...

Страница 75: ... 3 Press the Zoom key 4 Press U or V to select the desired maginification and then press the Enter key The zoom ratio is displayed on the message display 5 Press the Start key to start copying 100 100 121 8 5x14 78 8 5x14 11x17 8 5x11 Zoom ...

Страница 76: ... sets of copies as required according to page number 1 Press the Copy key 2 Place the originals on the platen 3 Press the Collate key 4 Enter the number of copies and press the Start key Scanning of the original starts If the originals have been set in the optional document processor copying starts automatically If the original has been set on the platen a message prompting replacement of the orig...

Страница 77: ...ying are limited to A4 B5 11 x 8 1 2 and 16K When you use offsetting printed copies are segregated after each set of copies or after each page 1 Press the Copy key 2 Place the originals on the platen 3 Press the Offset key 4 Enter the number of copies and press the Start key Scanning of the original starts If the originals have been set in the optional document processor copying starts automatical...

Страница 78: ... saddle stitching center stapling requires the folding unit The following stapling options and orientations are available Cassette Paper Load Direction Cassette Paper Load Direction Original Orientation Top Edge Back Edge Original Orientation Top Edge Back Edge Original Orientation Left Top Edge Left top corner Original Orientation Left Top Edge Left top corner ...

Страница 79: ...the Start key Scanning of the original starts If the originals have been set in the optional document processor copying starts automatically If the original has been set on the platen a message prompting replacement of the original is displayed In this case proceed to the next step 6 Replace the original and press the Start key Scanning of the original is performed 7 After scanning all originals p...

Страница 80: ...ey to start copying Selecting an Original Size from Other Regular Sizes Use the procedure below to select the original size 1 Press the Copy key 2 Place the originals on the platen 3 Press the Original Size key 4 Press U or V to select Other Regular Size and then press the Enter key 5 Press U or V to select the desired original size and then press the Enter key 6 Press the Start key to start copyi...

Страница 81: ...ize to 2 to 11 5 8 in 1 8 increments 50 to 297 mm in 1 mm increments 6 Press V to move to the horizontal size 7 Press Y or Z to set the horizontal size and then press the Enter key You can set the horizontal size to 2 to 17 in 1 8 increments 50 to 432 mm in 1 mm increments 8 Press the Start key to start copying Original Size Auto Input Size Input Size 2 2 Input Size 2 2 ...

Страница 82: ...er Selection on page 6 5 You can set a paper size for the cassette For details refer to Paper Size cassettes 1 to 4 on page 6 14 You can set a paper type for the cassette For details refer to Paper Type cassettes 1 to 4 on page 6 15 3 Press the Paper Select key to select the desired paper source NOTE When using the MP tray set the paper size and the paper type referring to MP Tray Settings on page...

Страница 83: ...cument processor at the same time Supported Combinations of Originals The supported combinations of originals are as follows Ledger and Letter A3 and A4 Ledger and Letter R Folio and A4 R B4 and B5 Use the procedure below to copy mixed size originals 1 Press the Copy key 2 Place originals on the document processor 3 Press the Mixed Size Originals key 4 Press the Start key to start copying Ledger L...

Страница 84: ...ering originals Border erase Combine mode Booklets Stapling Punch optional feature When placing originals on the platen When placing originals on the optional document processor NOTE To change the default setting for the original orientation refer to Original Orientation on page 6 19 Original Top Edge Top Top Edge Left Original Top Edge Top Top Edge Left ...

Страница 85: ...2 Place the originals on the platen 3 Press the Function key 4 Press U or V to select Orig direction and then press the Enter key 5 Press U or V to select Top Edge Top or Top Edge Left and then press the Enter key 6 Press the Start key to start copying Continuous Scan Function End Orig Orient Top Edge Off Original Orientation Top Edge Top Top Edge Left ...

Страница 86: ...urn on the ecoprint mode at a default setting Refer to EcoPrint Mode on page 6 4 The procedure for making copies using EcoPrint is explained below 1 Press the Copy key 2 Place the originals on the platen 3 Press the Function key 4 Press U or V to select EcoPrint and then press the Enter key 5 Press U or V to select On or Off and then press the Enter key 6 Press the Start key to start copying EcoPr...

Страница 87: ...the original size and the copy paper size must be regular sizes 2 in 1 Mode For copying two originals onto a single sheet This mode can be used with Duplex mode to copy four originals onto one sheet The following 2 in 1 options and output orientations are available NOTE When placing the original on the platen be sure to copy the originals in page order Original Document processor Platen Orientatio...

Страница 88: ...rientations are available NOTE When placing the original on the platen be sure to copy the originals in page order Types of Page Boundary Lines The following types of the boundary lines are available The procedure for using Combine mode copying is explained below 1 Press the Copy key 2 Place the originals on the platen Original Document processor Platen Orientation of Original Copy None Dotted Sol...

Страница 89: ...y to start scanning If the originals have been set in the optional document processor copying starts automatically If the original has been set on the platen a message prompting replacement of the original is displayed In this case proceed to the next step 7 Replace the original and then press the Start key Scanning of the original is performed 8 After scanning all originals press the Enter key to...

Страница 90: ... Press the Copy key 2 Place the originals on the platen 3 Press the Margin key to select the copy with margin 4 Press U or V to select Left Margin or Top Margin and then press the Enter key 5 Press Y or Z to set the margin width and then press the Enter key You can set the width to 1 8 to 3 4 in 1 8 increments 1 mm to 18 mm in 1 mm increments 6 Press the Start key to start copying Input units Marg...

Страница 91: ...re as below NOTE To specify the default width value of Border Erase refer to Border Erase Width Default Value on page 6 11 for details Use the procedure below to erase borders when copying 1 Press the Copy key 2 Place the originals on the platen 3 Press the Border Erase key 4 Press U or V to select Sheet Erase to erase borders for an individual sheet or Book Erase to erase borders for a book and t...

Страница 92: ...UIDE 5 Press Y or Z to set the border erase width and then press the Enter key You can set the width to 1 8 to 3 4 in 1 8 increments 1 mm to 18 mm in 1 mm increments 6 Press the Start key to start copying Border Erase Width 1 8 1 4 3 4 ...

Страница 93: ...ide are copied without rotation B Finished stitch top of copies The images for the back side are rotated 180 degrees and copied Finished copies can be bound at the top so that double page spread pages are copied in the same orientation Two sided to One sided Copies each side of a two sided original onto two individual sheets The optional document processor is required Two sided to Two sided Produc...

Страница 94: ...laten 3 Press the Duplex key 4 Press U or V to select the desired duplex copy mode and then press the Enter key If you have selected 1 sided 2 sided 1 sided 2 sided proceed to the next step If you have selected 2 sided 2 sided 2 sided 2 sided or Book 2 sided proceed to step 7 5 Press U or V to select the desired finished stitch side and then press the Enter key 6 Press the Start key to start scann...

Страница 95: ...CopyingFunctions OPERATION GUIDE 4 27 4 Scanning of the original is performed 8 After scanning all originals press the Enter key to start copying ...

Страница 96: ...procedure for making copies using Continuous Scan is explained below 1 Press the Copy key 2 Place the originals on the platen 3 Press the Function key 4 Press U or V to select Continuous scan and then press the Enter key 5 Press U or V to select On and then press the Enter key 6 Press the Start key to start scanning 7 Place the next original and press the Start key Repeat these steps to scan the r...

Страница 97: ...4 Legal or 8K cannot be used for auto rotation You can select whether or not to enable auto rotation at a default setting Refer to Auto Rotation Copy on page 6 10 The procedure for making copies using Auto Image Rotation is explained below 1 Press the Copy key 2 Place the originals on the platen 3 Press the Function key 4 Press U or V to select Auto Rotation and then press the Enter key 5 Press U ...

Страница 98: ... restored 5 Replace the original with the originals that have been stored Press the Start key to resume copying Mode Description Interrupt copy This mode can be used to stop copying and to make a copy of a different original at different settings After the interrupt copy has been produced the interrupted copying can be resumed at the same settings in effect prior to the interruption This mode can ...

Страница 99: ...NOTE Priority Printer is displayed when the machine has print data Priority Fax is displayed when the machine has received fax data 3 Press the Enter key If you have selected Interrupt copy message Interrupt mode OK Interrupt mode is displayed Proceed to the next step If you have selected Priority Printer or Priority Fax output of data starts Proceed to step 5 4 Place the originals for interrupt c...

Страница 100: ...ogram number already registered the currently registered functions can be replaced with a new set of functions 3 Press U or V to select the program number to register 1 to 8 and then press the Enter key The program is registered NOTE You can also select the program number using a numeric key Recalling Programs Use the procedure below to recall a registered program 1 Press the Program key 2 Press U...

Страница 101: ...twork printer use the operation panel The principal settings that can be made are shown below Using This Machine as a Network Printer 5 2 Status Page Printing 5 3 e MPS Function 5 4 Interface 5 11 Emulation 5 16 Font 5 19 Print Configuration 5 24 Print Quality 5 29 Memory Card Operation 5 32 Hard Disk Operation 5 38 RAM Disk Operation 5 39 Paper Handling 5 41 Other Settings 5 45 ...

Страница 102: ...address etc È Connection of network cable Refer to Connecting Cables on page 2 5 È Setting operation from the operation panel of this machine See this chapter Principal setting items Network Emulation selection Number of copies and print orientation Print quality Paper sizes for cassette and MP tray È Installation and setting operation of printer driver Refer to Installing Software on page 2 13 È ...

Страница 103: ...re below to print the status page 1 Press the Print key 2 Press U or V to select MENU and then press the Enter key 3 Press U or V to select Print Status Page and then press the Enter key 4 Press U or V to select Print and then press the Enter key The status page is printed GO CANCEL Ready MENU Back Print Status Page Menu Interface No Print Print Status Page ...

Страница 104: ...tional hard disk must be installed For details on e MPS refer to the KX Printer Driver Operation Guide Even if the RAM Disk Operation see page 2 44 is turned On the e MPS function can be used In this case only proof and hold and printing private print can be used How to Display the e MPS Screen 1 Press the Print key 2 Press U or V to select MENU and then press the Enter key 3 Press U or V to selec...

Страница 105: ...en See How to Display the e MPS Screen on page 5 4 2 Press U or V to select Quick Copy and then press the Enter key 3 Press U or V to select the user name and then press the Enter key The user name is the name that has been set with the printer driver 4 Press U or V to select the desired job name and then press the Enter key The job name is the name that has been set with the printer driver 5 Ente...

Страница 106: ...he user name is the name that has been set with the printer driver 4 Press U or V to select the desired job name and then press the Enter key The job name is the name that has been set with the printer driver 5 Enter the four digit access code using the numeric key and then press the Enter key The access code has been set with the printer driver 6 Enter the number of copies using the numeric key a...

Страница 107: ... the Enter key 3 Press U or V to select the mailbox to print and then press the Enter key 4 Enter the five digit access code using the numeric keys The access code has been set with the KM NET Printer Disk Manager 5 Press the Enter key Printing starts Once printing is complete the document data in the mailbox is deleted Printing Virtual Mailbox List A list that includes the currently set virtual m...

Страница 108: ...ments that can be stored in the hard disk and the capacity assigned to each function can be changed Maximum Number of Quick Copy Jobs That Can Be Registered 1 Display the e MPS screen See How to Display the e MPS Screen on page 5 4 2 Press U or V to select e MPS Configuration and then press the Enter key 3 Press U or V to select Quick Copy and then press the Enter key 4 Press Y or Z to enter the m...

Страница 109: ...anent Code Jobs Set the total capacity upper limit for storage of permanent code jobs in the hard disk The actual maximum size however is the size of available hard disk space 1 Display the e MPS screen See How to Display the e MPS Screen on page 5 4 2 Press U or V to select e MPS Configuration and then press the Enter key 3 Press U or V to select Perm Code Job Size Perm code Job size and then pre...

Страница 110: ...creen See How to Display the e MPS Screen on page 5 4 2 Press U or V to select e MPS Configuration and then press the Enter key 3 Press U or V to select VMB Size and then press the Enter key 4 Press Y or Z to enter the capacity for storage of virtual mailboxes VMB You can set the capacity to 0 to 9999 MB 5 Press the Enter key List of VMB List of Code JOB e MPS e MPS Configuration e MPS Configurati...

Страница 111: ...red This section describes the setting required for using the network function NOTE Before setting the IP address ask your network administrator to obtain the address and prepare it NetWare Frame When connecting to a NetWare network turn this setting On 1 Display the Interface screen See How to Display the Interface Screen on page 5 11 2 Press U or V to select Network and then press the Enter key ...

Страница 112: ... the Interface Screen on page 5 11 2 Press U or V to select Network and then press the Enter key 3 Press U or V to select EtherTalk and then press the Enter key 4 Press U or V to select On and then press the Enter key 5 Press the Reset key The message display returns to the printer basic screen TCP IP When connecting to a Windows network through TCP IP turn TCP IP On 1 Display the Interface screen...

Страница 113: ...ct DHCP and then press the Enter key 4 Press U or V to select On and then press the Enter key IP Address Register the IP address of this machine NOTE The IP address that should be registered here differs depending upon your network environment Check with your network administrator before performing this setting If you use the following procedure to manually register the IP address be sure to turn ...

Страница 114: ...the subnet mask Subnet Mask To register the subnet mask continue the procedure from step 6 above 1 Press U or V to select Subnet Mask and then press the Enter key 2 Use the same procedure as steps 4 to 6 of IP Address setting to input the address and then press the Enter key Next set the default gateway Default Gateway To register the default gateway continue the procedure from step 2 above 1 Pres...

Страница 115: ...so print the network status page in succession 1 Display the Interface screen See How to Display the Interface Screen on page 5 11 2 Press U or V to select Network and then press the Enter key 3 Press U or V to select Network Status Page and then press the Enter key 4 Press U or V to select On or Off and then press the Enter key 5 Press the Reset key The message display returns to the printer basi...

Страница 116: ...PDL AUTO the details of any error that occurs during printing can be printed 1 Press the Print key 2 Press U or V to select MENU and then press the Enter key 3 Press U or V to select Emulation and then press the Enter key 4 Press U or V to select the desired interface and then press the Enter key 5 Press U or V to select the desired emulation and then press the Enter key If you have selected KC GL...

Страница 117: ...n press the Enter key 6 Press U or V to select the page size and then press the Enter key NOTE SPSZ is the size specified with the PRESCRIBE SPSZ command For details of the PRESCRIBE commands refer to the PRESCRIBE Command Reference Manual 7 Press the Reset key The message display returns to the printer basic screen KPDL Error Printing The details of any error that occurs during printing in the KP...

Страница 118: ...l be automatically performed according to print data Continue the procedure from step 5 of emulation mode selection to set this item as shown below Available emulation modes PCL6 KC GL Line Printer IBM Proprinter DIABLO 630 EPSON LQ 850 1 Press U or V to select Alt Emulation and then press the Enter key 2 Press U or V to select the desired emulation and then press the Enter key 3 Press the Reset k...

Страница 119: ...then press the Enter key 3 Press U or V to select Font and then press the Enter key 4 Press U or V to select the interface to set and then press the Enter key The Font screen is displayed Next perform the setting referring to the following description of each setting item Font Selection 1 Display the Font screen See How to Display the Font Screen on page 5 19 2 Press U or V to select Select Font a...

Страница 120: ...font size If you have selected the Courier font or the Letter Gothic font as the default font this menu is not displayed and the character pitch setting is displayed 1 Display the Font screen See How to Display the Font Screen on page 5 19 2 Press U or V to select Select Font and then press the Enter key NOTE If optional fonts as well as internal fonts are stored in this machine a screen for selec...

Страница 121: ...19 2 Press U or V to select Select Font and then press the Enter key NOTE If optional fonts as well as internal fonts are stored in this machine a screen for selecting Internal font or Option font is displayed Press U or V to select the font to set 3 Press U or V to select Detail and then press the Enter key 4 Press Y or Z to enter the character pitch and then press the Enter key You can set the c...

Страница 122: ...layed Press U or V to select Internal font 3 Press U or V to select Courier and then press the Enter key 4 Press U or V to select Regular or Dark and then press the Enter key 5 Press the Reset key The message display returns to the printer basic screen Code Set Selection With the PCL6 emulation you can select a code set 1 Display the Font screen See How to Display the Font Screen on page 5 19 2 Pr...

Страница 123: ...he Font Screen on page 5 19 2 Press U or V to select List of Inter Fonts and then press the Enter key NOTE If optional fonts as well as internal fonts are stored in this machine you can also select List of Option Fonts 3 Press U or V to select Print and then press the Enter key Printing of the font list starts Select Font Font Code Set List of Inter Fonts No List of Inter Fonts Print ...

Страница 124: ...to select Page Set and then press the Enter key 4 Press U or V to select the interface to set and then press the Enter key The Page Set screen is displayed Next perform the setting referring to the following description of each setting item Number of Copies You can set the number of copies to be printed through the currently selected interface You can set any number from 1 to 999 1 Display the Pag...

Страница 125: ...Reduce and then press the Enter key 3 Press U or V to select the desired paper size and then press Z 4 Press U or V to select the desired output size and then press the Enter key The reduction ratio is automatically set and displayed 5 Press the Reset key The message display returns to the printer basic screen Print Orientation You can select the print orientation from portrait and landscape 1 Dis...

Страница 126: ...ss U or V to select Page Protect and then press the Enter key 3 Press U or V to select Auto and then press the Enter key 4 Press the Reset key The message display returns to the printer basic screen Line Feed LF Action Set the action of the machine to be executed when it receives a line feed code 0AH 1 Display the Page Set screen See How to Display the Page Set Screen on page 5 24 2 Press U or V t...

Страница 127: ...ed action from the followings and then press the Enter key CR only Performs a carriage return CR and LF Performs a carriage return and line feed Ignore CR Does not perform a carriage return 4 Press the Reset key The message display returns to the printer basic screen Wide A4 The print area of the A4 size can be enlarged 1 Display the Page Set screen See How to Display the Page Set Screen on page 5...

Страница 128: ...Printing Functions 5 28 OPERATION GUIDE 4 Press the Reset key The message display returns to the printer basic screen ...

Страница 129: ...isplayed Next perform the setting referring to the following description of each setting item KIR Mode Smoothing realizes the print quality of 2400 dpi equivalent 600 dpi 1 Display the Print Quality screen See How to Display the Print Quality Screen on page 5 29 2 Press U or V to select KIR Mode and then press the Enter key 3 Press U or V to select On or Off and then press the Enter key 4 Press th...

Страница 130: ...chine three types of resolution are available 300 dpi 600 dpi and Fast 1200 Mode 1 Display the Print Quality screen See How to Display the Print Quality Screen on page 5 29 2 Press U or V to select Resolution and then press the Enter key 3 Press U or V to select Fast 1200 Mode 600 dpi or 300 dpi and then press the Enter key 4 Press the Reset key The message display returns to the printer basic scr...

Страница 131: ...lect Print Density and then press the Enter key 3 Press Y or Z to set the print density and then press the Enter key 4 Press the Reset key The message display returns to the printer basic screen Print Quality EcoPrint Mode Resolution Print Density Print Density 3 ...

Страница 132: ...ess the Print key 2 Press U or V to select MENU and then press the Enter key 3 Press U or V to select Memory Card and then press the Enter key The Memory Card screen is displayed Next perform the setting referring to the following description of each setting item Reading Font Data 1 Display the Memory Card screen See How to Display the Memory Card Screen on page 5 32 2 Press U or V to select Read ...

Страница 133: ...n Reading Data 1 Display the Memory Card screen See How to Display the Memory Card Screen on page 5 32 2 Press U or V to select Read Data and then press the Enter key 3 Press U or V to select the data to read and then press the Enter key The selected data is read from the memory card 4 Press the Reset key The message display returns to the printer basic screen Reading Program 1 Display the Memory ...

Страница 134: ...f you select CANCEL and then press the Enter key data is not written 4 Send data from your computer to this machine When the data is received the message display of this machine changes to Processing data When reception is complete the message display changes to Waiting 5 Press U or V to select GO and then press the Enter key The data is written to the memory card Deleting Data 1 Display the Memor...

Страница 135: ... Press the Reset key The message display returns to the printer basic screen Deleting Program Data 1 Display the Memory Card screen See How to Display the Memory Card Screen on page 5 32 2 Press U or V to select Delete Program and then press the Enter key 3 Press U or V to select the program to delete and then press the Enter key The selected program is deleted from the memory card 4 Press the Res...

Страница 136: ... and then press the Enter key 3 Press U or V to select the language data to delete and then press the Enter key The selected language data is deleted from the memory card 4 Press the Reset key The message display returns to the printer basic screen Formatting Memory Card NOTE Be sure to format the memory card using this machine Any memory card formatted with other equipment cannot be used 1 Displa...

Страница 137: ...on is output Printing a Partition List 1 Display the Memory Card screen See How to Display the Memory Card Screen on page 5 32 2 Press U or V to select List of Partitions and then press the Enter key 3 Press U or V to select Print and then press the Enter key The partition list is printed Memory Card Delete Macro Delete the language List of Partitions No List of Partitions Print ...

Страница 138: ...ing Program Data Deleting Macro Data Deleting Language Data Formatting Hard Disk Printing a Partition List 1 Press the Print key 2 Press U or V to select MENU and then press the Enter key 3 Press U or V to select HARD DISK and then press the Enter key The operation procedure of each item is the same as that of the memory card operation See Memory Card Operation on page 5 32 GO CANCEL Ready MENU Me...

Страница 139: ...memory Consequently note that printing speed may be lower or insufficient memory occurs depending on the RAM disk setting value The RAM disk functions are disabled at the default setting To use the RAM disk functions set as follows 1 Press the Print key 2 Press U or V to select MENU and then press the Enter key 3 Press U or V to select RAM Disk Mode and then press the Enter key 4 Press U or V to s...

Страница 140: ...n press the Enter key 4 Press U or V to select Change and then press the Enter key 5 Press U or V to select RAM Disk Size and then press the Enter key 6 Press Y or Z to enter the RAM disk size and then press the Enter key You can set the size to 1 to 999 Mbyte 7 Press the Reset key 8 Press U or V to select Yes and then press the Enter key This machine restarts Menu Page Set Print Quality RAM Disk ...

Страница 141: ...xt perform the setting referring to the following description of each setting item MP Tray Mode If you select First any paper set in the MP tray will be fed 1 Display the Paper Handling screen See How to Display the Paper Handling Screen on page 5 41 2 Press U or V to select MP Tray Mode and then press the Enter key 3 Press U or V to select Cassette or First and then press the Enter key 4 Press th...

Страница 142: ...ct the desired paper source and then press the Enter key 4 Press the Reset key The message display returns to the printer basic screen Duplex Print Mode Set the binding position on finished prints in duplex printing NOTE This setting is displayed only if the optional duplex unit is installed Back MP Tray Mode Paper Handling Feed Select Back MP Tray Feed Select Cassette 1 Setting Output destination...

Страница 143: ...r job separator is installed 1 Display the Paper Handling screen See How to Display the Paper Handling Screen on page 5 41 2 Press U or V to select Stack Select Stack Slect and then press the Enter key 3 Press U or V to select the desired paper output destination and then press the Enter key 4 Press the Reset key The message display returns to the printer basic screen Paper Handling MP Tray Mode F...

Страница 144: ...ling screen See How to Display the Paper Handling Screen on page 5 41 2 Press U or V to select Override A4 LT and then press the Enter key 3 Press U or V to select On or Off and then press the Enter key 4 Press the Reset key The message display returns to the printer basic screen Paper Handling Feed Select Stack Select Override A4 LT Back On Override A4 LT Off ...

Страница 145: ...tem Form Feed Timeout If this machine does not receive any information indicating the end of data after receiving the last data the machine waits for a certain time without printing the last page When the preset time elapses the machine performs automatically a form feed If you set the time to 0 the machine does not perform a form feed until GO is manually selected 1 Display the Others screen See ...

Страница 146: ...isplay returns to the printer basic screen 4 At this time send data to the printer Dump pages are printed 5 Press U or V to select GO and then press the Enter key 6 Press the Reset key The message display returns to the printer basic screen Printer Function Resetting This function resets the printer s temporary settings such as the current page orientation and font to the default settings 1 Displa...

Страница 147: ...Permanent temporary resources are not protected If you select Perm Temp however temporary resources are also protected 1 Display the Others screen See How to Display the Others Screen on page 5 45 2 Press U or V to select Resource Prot and then press the Enter key 3 Press U or V to select Off Permanent or Perm Temp and then press the Enter key 4 Press the Reset key The message display returns to t...

Страница 148: ...o you can set the time that elapses before auto continue is activated 1 Display the Others screen See How to Display the Others Screen on page 5 45 2 Press U or V to select Auto Continue and then press the Enter key 3 Press U or V to select On or Off and then press the Enter key If you have selected On Change is displayed 4 To set the time that elapses before auto continue is activated press U or ...

Страница 149: ...See How to Display the Others Screen on page 5 45 2 Press U or V to select Finishing Error and then press the Enter key 3 Press U or V to select Proces Duplex print and then press the Enter key 4 Press U or V to select On or Off and then press the Enter key 5 Press the Reset key The message display returns to the printer basic screen Setting Processing On If you select GO one sided printing is per...

Страница 150: ...ss the Enter key 5 Press the Reset key The message display returns to the printer basic screen Service Status Page Printing The service status page contains more detailed printer setting information than the normal status page This page is mainly used by the service personnel for maintenance Use the following procedure to print this page as needed 1 Display the Others screen See How to Display the...

Страница 151: ...int Status Page and then press the Enter key 4 Press U or V to select Print and then press the Enter key The service status page is printed 5 Press the Reset key The message display returns to the printer basic screen Service Auto Continue Others Finishing Error Service Back Print Status Page Paper Feed Print Status Page No Print ...

Страница 152: ...Printing Functions 5 52 OPERATION GUIDE ...

Страница 153: ...ings concerning the general operation of this machine The principal settings that can be made are shown below Default Setting Mode 6 2 Machine Default Settings 6 13 MP Tray Settings 6 28 Browsing and Printing the Total Counter 6 31 Report Output 6 33 Language Setting 6 34 ...

Страница 154: ...mage Quality EcoPrint Mode Background Color Adjustment Paper Selection Paper Type in Auto Paper Selection Default Cassette Default Magnification Auto Exposure Adjustment Auto OCR Exposure Adjustment Exposure Adjustment for Text Photo Originals Exposure Adjustment for Text Originals Exposure Adjustment for Photo Originals Collate Copying Offset Copying Auto Rotation Copy Margin Width Default Value ...

Страница 155: ...n indicates the current setting Density Mode Set the Default exposure mode auto or manual 1 Display the Copy Default screen See How to Display the Copy Default Screen on page 6 2 2 Press U or V to select Exposure Mode and then press the Enter key 3 Press U or V to select Auto or Manual and then press the Enter key 4 Press the Reset key The message display returns to the copier basic screen Origina...

Страница 156: ...key 3 To set the ecoprint mode as the default setting press U or V to select On and then press the Enter key 4 Press the Reset key The message display returns to the copier basic screen Background Color Adjustment If the background color is dark use this item to lighten it 1 Display the Copy Default screen See How to Display the Copy Default Screen on page 6 2 2 Press U or V to select Background a...

Страница 157: ...t key The message display returns to the copier basic screen Paper Type in Auto Paper Selection Paper to be selected in the auto paper selection mode can be limited to a certain paper type Paper types that can be set Plain Transparency Preprinted Labels Bond Recycled Vellum Rough Letterhead Color Colour Prepunched Envelope Cardstock Thick paper High quality and Custom 1 to 8 NOTE You can select a ...

Страница 158: ...ng is displayed only if the optional paper feeder is installed You cannot set the MP tray as the priority cassette 1 Display the Copy Default screen See How to Display the Copy Default Screen on page 6 2 2 Press U or V to select Default Cassette and then press the Enter key 3 Press U or V to select the cassette that will be used with priority and then press the Enter key 4 Press the Reset key The ...

Страница 159: ...ity and then press the Enter key Moving right darkens the density and moving left lightens it 4 Press the Reset key The message display returns to the copier basic screen Auto OCR Density Adjustment Adjust the overall density of scanning for OCR when using the optional scanner functions 1 Display the Copy Default screen See How to Display the Copy Default Screen on page 6 2 2 Press U or V to selec...

Страница 160: ...n press the Enter key Moving right darkens the density and moving left lightens it 4 Press the Reset key The message display returns to the copier basic screen Density Adjustment for Text Originals Adjust the density of the central value in the manual density mode for text originals 1 Display the Copy Default screen See How to Display the Copy Default Screen on page 6 2 2 Press U or V to select Tx...

Страница 161: ...et key The message display returns to the copier basic screen Collate Copying If the optional document finisher is installed select whether or not to set the sort copy mode as a default setting NOTE This item is displayed only if the optional document processor is installed 1 Display the Copy Default screen See How to Display the Copy Default Screen on page 6 2 2 Press U or V to select Collate and...

Страница 162: ...to set the auto rotation copy mode as a default setting 1 Display the Copy Default screen See How to Display the Copy Default Screen on page 6 2 2 Press U or V to select Auto Rotation and then press the Enter key 3 Press U or V to select Off or On and then press the Enter key 4 Press the Reset key The message display returns to the copier basic screen Margin Width Default Value Set the default val...

Страница 163: ...and then press the Enter key 3 Press U or V to set the default value of border erase width and then press the Enter key You can set the value to 1 8 to 3 4 in 1 8 increments 1 mm to 18 mm in 1 mm increments 4 Press the Reset key The message display returns to the copier basic screen Limit of Number of Copies Set the limit of the number of copies that can be set at a time 1 Display the Copy Default...

Страница 164: ... the reproducibility of fine characters it is normally recommended to use the factory default setting 1 Display the Copy Default screen See How to Display the Copy Default Screen on page 6 2 2 Press U or V to select Corr Black line and then press the Enter key 3 Press U or V to select None Weak or Strong and then press the Enter key NOTE To use the black streaking reduction processing first select...

Страница 165: ... Time Display Contrast Adjustment Administrator Management Code Change Auto Sleep Auto Clear Auto Clear Time Silent Mode Machine Administrator Management Code Change How to Display the Machine Default Screen Use the following procedure to display the machine default setting screen 1 Press the System Menu Counter key 2 Press U or V to select Machine default and then press the Enter key 3 Enter the ...

Страница 166: ...aper type select On Only same paper type NOTE On the 18 ppm model this item is displayed only if the optional paper feeder is installed 1 Display the Machine Default screen See How to Display the Machine Default Screen on page 6 13 2 Press U or V to select Auto Cassette SW and then press the Enter key 3 Press U or V to select On All types of paper On Only same paper type or Off and then press the ...

Страница 167: ... of cassettes 1 to 4 Paper types that can be set Plain Preprinted Bond Recycled Rough Letterhead Color Colour Prepunched High quality Custom 1 to 8 NOTE For the 18 ppm model cassettes 2 to 4 are included in the optional paper feeder For the 22 ppm model cassettes 3 and 4 are included in the optional paper feeder This setting is displayed only if the optional paper feeder is installed 1 Display the...

Страница 168: ...isplay returns to the copier basic screen Paper Weight for Paper Type Set the paper weight for each paper type Paper weight types that can be set Super Heavy Heavy3 Heavy2 Heavy1 Middle3 Normal3 Middle2 Normal2 Middle1 Normal1 Light 1 Display the Machine Default screen See How to Display the Machine Default Screen on page 6 13 2 Press U or V to select P type Weight and then press the Enter key 3 P...

Страница 169: ...Press U or V to select P type Duplex and then press the Enter key 3 Press U or V to select the paper type to set from Custom 1 to 8 and then press the Enter key 4 Press U or V to select On or Off and then press the Enter key 5 When all setting is complete press U or V to select End and then press the Enter key 6 Press the Reset key The message display returns to the copier basic screen Plain Heavy...

Страница 170: ...own as shown in illustration A If the optional finisher is installed set the paper with the side for the first page face down as shown in illustration B If the optional finisher is installed the stapling mode may cause incorrect orientation of printing depending on the stapling position 1 Display the Machine Default screen See How to Display the Machine Default Screen on page 6 13 2 Press U or V t...

Страница 171: ...ed to set a longer time if you use the machine frequently and to set a shorter time if not For the inch specification machine if the auto sleep function causes inconvenience for operation of this machine disable this function It is recommended however to set a longer time before disabling this function On the inch specification machine if you have disabled the auto sleep function this item is not ...

Страница 172: ... Enter key 3 Press Y or Z to select the desired time from 1 to 240 minutes 1 to 120 minutes and then press the Enter key 4 Press the Reset key The message display returns to the copier basic screen Copy Output Destination Set the paper output destination with priority for copying NOTE This item is displayed only if the optional finisher or job separator is installed 1 Display the Machine Default s...

Страница 173: ... Machine Default screen See How to Display the Machine Default Screen on page 6 13 2 Press U or V to select Fax Otput Destn and then press the Enter key 3 Press U or V to select the desired output destination and then press the Enter key 4 Press the Reset key The message display returns to the copier basic screen Machine Default Copy Otput Destn Top Tray Low Power Time Sleep Mode Time 1 Min 1 Min ...

Страница 174: ... display returns to the copier basic screen Key Sound Select whether or not to enable the beep sound that will be emitted each time a key on the operation panel is pressed 1 Display the Machine Default screen See How to Display the Machine Default Screen on page 6 13 2 Press U or V to select Key sound On Off and then press the Enter key 3 Press U or V to select Off or On and then press the Enter k...

Страница 175: ...and then press Y or Z to select On or Off 6 Press U or V to select Year and then press Y or Z to set the current year 7 Press U or V to select Month and then press Y or Z to set the current month 8 Press U or V to select Day and then press Y or Z to set the current day 9 After all setting is complete press U or V to select End and then press the Enter key Date Time Key Sound On Off On Machine Defa...

Страница 176: ...tor Management Code Change You can change the four digit management code for the administrator of this machine IMPORTANT If you change the management code be sure to note it If you should forget the management code contact your service representative The management code at the factory default setting is 1800 for the 18 ppm model and 2200 for the 22 ppm model 1 Display the Machine Default screen Se...

Страница 177: ...ne Default Screen on page 6 13 2 Press U or V to select Auto Sleep and then press the Enter key 3 Press U or V to select Off or On and then press the Enter key 4 Press the Reset key The message display returns to the copier basic screen Auto Clear You can set the auto clear function refer to Chapter 1 in Basic Operation Guide Auto Clear Function that will be activated when the preset time elapses ...

Страница 178: ... Timer Auto clear time and then press the Enter key 3 Press Y or Z to set the time to 10 to 270 seconds and then press the Enter key 4 Press the Reset key The message display returns to the copier basic screen Silent Mode This mode reduces operating noise of this machine Use this mode if the operating noise of this machine is annoying 1 Display the Machine Default screen See How to Display the Mac...

Страница 179: ...resentative The management code at the factory default setting is 1800 for the 18 ppm model and 2200 for the 22 ppm model 1 Display the Machine Default screen See How to Display the Machine Default Screen on page 6 13 2 Press U or V to select MachineAdminCode and then press the Enter key 3 Enter the new security administrator management code using the numeric keys and then press the Enter key 4 Pr...

Страница 180: ...ess the Enter key 3 Press U or V to select the paper size and then press the Enter key The MP Tray Paper type screen is displayed Proceed to Paper Type described below Selecting a Size from Other Regular Sizes Sizes that can be set Inch Specification A3 B4 B5R B5 A5R B6R A6R HAGAKI Folio Executive ISO B5 Envelope DL Envelope C5 Envelope C4 Comm 10 Comm 9 Comm 6 3 4 Monarch OufukuHagaki YOUKEI 2 YO...

Страница 181: ...ress the Enter key 4 Press Y or Z to set the vertical size and then press V to select the horizontal size You can set the vertical size to 3 7 8 to 11 5 8 in 1 8 increments 98 to 297 mm in 1 mm increments 5 Press Y or Z to set the horizontal size You can set the horizontal size to 5 7 8 to 17 in 1 8 increments 148 to 432 mm in 1 mm increments 6 Press the Enter key The MP Tray Paper type screen is ...

Страница 182: ...ypes that can be set Plain Transparency Preprinted Labels Bond Recycled Vellum Rough Letterhead Color Colour Prepunched Envelope Cardstock Thick paper High quality Custom 1 to 8 Press U or V to select the paper type and then press the Enter key The message display returns to the copier basic screen MP Tray Paper type Plain Transparency Preprinted ...

Страница 183: ...U or V to select End and then press the Enter key 6 Press the Reset key The message display returns to the copier basic screen Counter Report Output NOTE Ensure that A4 Letter size paper is set in the cassette when printing the counter report 1 Press the System Menu Counter key 2 Press U or V to select Counter check and then press the Enter key 3 Press U or V to select Print counter report and the...

Страница 184: ...System Menu 6 32 OPERATION GUIDE 4 Press the Reset key The message display returns to the copier basic screen ...

Страница 185: ...ze are written The following four items are included Total digital dot coverage report Copy digital dot coverage report Printer digital dot coverage report Fax digital dot coverage report 1 Press the System Menu Counter key 2 Press U or V to select Print Report and then press the Enter key 3 Press U or V to select the report to print and then press the Enter key The report is printed 4 Press the R...

Страница 186: ...English German Deutsch French Français Spanish Español and Italian Italiano 1 Press the System Menu Counter key 2 Press U or V to select Language and then press the Enter key 3 Press U or V to select the language to use and then press the Enter key The message display returns to the copier basic screen and the language for the message display is changed End System Menu Counter Language MP Tray Set...

Страница 187: ...e job accounting functions of this machine The principal functions that can be set are shown below Job Accounting Mode 7 2 All Account Management 7 10 Individual Account Management 7 11 Enabling Job Accounting 7 12 Default Settings 7 13 Using Job Accounting 7 17 ...

Страница 188: ...ttings on page 7 13 The following functions are available in the job accounting mode NOTE For settings on the computer required for using job accounting concerning the printer functions refer to the KX Printer Driver Operation Guide In addition the job accounting mode that can be set from the computer is available For details refer to the KM NET for Accounting Operation Guide When using KM NET for...

Страница 189: ...he Job Accounting screen is displayed Next perform the setting referring to the following description of each setting item Managing Accounts Registering a New Account Register a one to eight digit ID code and the limit of use for each account 1 Display the Job Accounting screen See How to Display the Job Accounting Screen on page 7 3 2 Press U or V to select Edit Job Accounting and then press the ...

Страница 190: ...on Account ID Please wait Printer Limit in use End Copy Able use Able use Item Description of limit Reference page Copy restriction Select whether to permit or prohibit copying Able to use Permits copying Unable to use Prohibits copying 7 5 Print restriction Select whether to permit or prohibit printing Able to use Permits printing Unable to use Prohibits printing 7 5 Output limit Set the limit of...

Страница 191: ...sage display returns to the Limit in use screen Print Restriction You can select whether to permit or prohibit printing NOTE This item is displayed if Printer Job Accounting in the default settings is set to On See page 7 14 1 Display the Limit in use screen referring to steps 1 to 5 of Registering a New Account 2 Press U or V to select Printer and then press the Enter key Fax transmission limit S...

Страница 192: ...Proceed to the next step 4 Enter the counter limit using the numeric keys You can set the limit to 999 999 at the maximum in 1 sheet increments 5 Press the Enter key The message display returns to the Limit in use screen Scanner Transmission Limit You can set the limit of count of scanner transmission if the optional network scanner kit is installed NOTE This item is displayed if Scanner Job Accou...

Страница 193: ...15 1 Display the Limit in use screen referring to steps 1 to 5 of Registering a New Account 2 Press U or V to select Fax TX Fax transm and then press the Enter key 3 Press U or V to select No limit or Counter limit or Is not permitted and then press the Enter key If you have selected Counter limit the Counter limit Default Value screen is displayed Proceed to the next step 4 Enter the counter limi...

Страница 194: ...and then press the Enter key Changing Limit of Use Change the limit of use that has been set for each account IMPORTANT To set the limit of use in managing accounts you must set Copier Job Accounting and Printer Job Accounting in the default settings from Off to On If the optional network scanner kit or fax kit is installed set Scanner Job Accounting or Fax Job Accounting in the default settings t...

Страница 195: ...s the Enter key 5 Change the limit of use NOTE For the method of setting the limit of use see Setting Limit of Use on page 7 4 6 Press U or V to select End and then press the Enter key Job Accountg Def Set Job Accounting Each Job Accounting TL Edit Job Accounting On Delete Edit Job Accounting New registration Change limit in use 22222222 Change limit in use End 11111111 000 234 123 456 22222222 Ch...

Страница 196: ...job accounting report press U or V to select Print Report and then press the Enter key The report is printed 4 To clear the counter press U or V to select Counter clear and then press the Enter key The confirmation screen is displayed 5 Press U or V to select Yes and then press the Enter key 6 Press U or V to select End and then press the Enter key Each Job Accounting TL Job Accounting End Job Acc...

Страница 197: ...t counts of individual accounts are displayed Check the count 3 To clear the counter press U or V to select the ID code and then press the Enter key The confirmation screen is displayed 4 Press U or V to select Yes and then press the Enter key 5 Press U or V to select End and then press the Enter key Each Job Accounting TL Job Accounting End Job Accounting Total On 22222222 Each Job Accnt Ttl Cntr...

Страница 198: ... 7 3 2 Press U or V to select Job Accounting On Off and then press the Enter key 3 Press U or V to select Off or On and then press the Enter key The confirmation screen is displayed 4 Press the Reset key If you have selected On the ID code input screen is displayed Job Accounting On Off Job Accounting Edit Job Accounting Job Accountg Def Set On Job Accounting Off On Enter Account ID Confirm ...

Страница 199: ...ons 1 Display the Job Accounting screen See How to Display the Job Accounting Screen on page 7 3 2 Press U or V to select Job Accounting Def Set and then press the Enter key 3 Press U or V to select Copy Job Account and then press the Enter key 4 Press U or V to select Off or On and then press the Enter key 5 Press U or V to select End and then press the Enter key Job Accountg Def Set Job Accounti...

Страница 200: ...ccounting for the scanner functions NOTE This item is displayed if the optional network scanner kit is installed 1 Display the Job Accounting screen See How to Display the Job Accounting Screen on page 7 3 2 Press U or V to select Job Accounting Def Set and then press the Enter key 3 Press U or V to select Scanner Job Account and then press the Enter key System Menu Counter MP Tray Setting Counter...

Страница 201: ...ey 5 Press U or V to select End and then press the Enter key Operation against Excess over Limit You can select whether to stop output by prohibiting immediately use of the machine to stop the operation from the next job or to display a warning message only when the limit of count that has been set with the function of the limit of use is exceeded 1 Display the Job Accounting screen See How to Dis...

Страница 202: ...job done or Only warning and then press the Enter key 5 Press U or V to select End and then press the Enter key Job Accountg Def Set Job Accounting Each Job Accounting TL Edit Job Accounting On Excess limit Set Job Accounting Default Setting Scanner Job Accnt Fax Job Accountng Prohibit On On Only warning Excess limit Setting Stop job immediately Stop after job done Prnt Job Account Job Accounting ...

Страница 203: ...meric keys and then press the Enter key The copier basic screen is displayed NOTE If you input an incorrect code press the Stop Clear key and input the code again If the input ID code does not match any registered ID code an error sound is emitted Input the correct ID code 2 Perform normal copier operation 3 After copying is complete press the Logout key Printer Operation Under job accounting oper...

Страница 204: ...Job Accounting 7 18 OPERATION GUIDE ...

Страница 205: ...OPERATION GUIDE 8 1 8 Maintenance This chapter describes cleaning and toner replacement Cleaning 8 2 Toner Container and Waste Toner Box Replacement 8 6 ...

Страница 206: ... with a soft cloth dampened with alcohol or mild detergent IMPORTANT Do not use thinner or other organic solvents Original Cover Glass Platen Slit Glass If black streaks or dirt appears in copies when using the optional document processor clean the slit glass using a lint free cloth IMPORTANT Wipe the slit glasses with the dry accessory cloth Do not use water soap or solvents for cleaning To remov...

Страница 207: ...ocument processor and wipe the slit glass a 2 Wipe the white guide b on the document processor Separator Clean the separator regularly at least monthly to ensure optimum output quality 1 Open the front cover 2 Remove cleaning brush blue colored a b ...

Страница 208: ...he figure clean dirt from the separator by moving the brush from side to side along the separator 5 Put away the cleaning brush press the specified position of the front cover and left cover to close Transfer Roller 1 Open the front cover 2 Remove the cleaning brush blue colored ...

Страница 209: ...the figure clean dirt from the transfer roller by moving the brush from side to side along the roller while rotating the roller by turning the gear at the left end of the roller 5 Put away the cleaning brush press the specified position of the front cover and left cover to close ...

Страница 210: ...ainers other than those designated as original toner containers For optimum performance it is also recommended to use only the original toner containers which are specifically intended for use in your country or region If the toner container for another destinations is installed the printer will stop printing NOTE Information Collection on Memory Chips The memory chip attached to the toner contain...

Страница 211: ...se the cap attached to the center of the old waste toner box to cover the opening 4 Pull up the toner container release lever A to pull out the toner container CAUTION Do not attempt to incinerate the toner container or the waste toner box Dangerous sparks may cause burns Do not attempt to force open or destroy the toner container or the waste toner box 5 Place the old waste toner box in the plast...

Страница 212: ...y 5 cm 2 inches Remove the accompanying grid cleaner from its package and remove its cap Fit the grid cleaner to the notch and install it into the main body IMPORTANT When installing the grid cleaner confirm that there is no gap between the main body and the cleaner 3 While holding gently the grid cleaner with your left hand pull out the electrical charge section to the left as far as it will go a...

Страница 213: ...gain after more than 5 minutes have elapsed Installing Toner Container and Waste Toner Box 1 Take the new toner container out of the toner kit 2 Hold the new toner container vertically and tap the upper part five times or more Turn the toner container upside down and tap the upper part five times or more 3 Shake the toner container up and down five times or more Turn the toner container upside dow...

Страница 214: ...il it is locked 6 Install the new waste toner box 7 Close the front cover NOTE Return the exhausted toner container and waste toner box to your dealer or service representative The collected toner container and waste toner box will be recycled or disposed in accordance with the relevant regulations ...

Страница 215: ...OPERATION GUIDE 9 1 9 Troubleshooting This chapter explains how to solve problems with the machine Solving Malfunctions 9 2 Responding to Error Messages 9 5 Clearing Paper Jams 9 12 ...

Страница 216: ...mode The machine will be ready to copy within 30 seconds 3 5 Blank sheets are ejected Are the originals loaded correctly When placing originals on the platen place them face down and align them with the original size indicator plates 2 25 When placing originals in the optional document processor place them face up 2 26 Printouts are too light Is the machine in Auto Density mode Set the correct den...

Страница 217: ...essor 8 2 Is the transfer roller dirty Brush the transfer roller clean 8 4 Images are skewed Are the originals placed correctly When placing originals on the platen align them with the original size indicator plates 2 25 When placing originals in the optional document processor align the original width guides securely before placing the originals 2 26 Is the paper loaded correctly Check the positi...

Страница 218: ...the machine after connecting the printer cable 3 2 Is the machine offline Is the Ready indicator off Press the Print key U or V to select GO and then press the Enter key The Ready indicator lights up Correct characters are not printed Is a proper printer cable connected Connect a shielded type printer cable 2 5 Documents are printed improperly Are the application software settings at the PC set pr...

Страница 219: ...to select the desired processing and then press the Enter key Add paper in cassette Place paper in P cassette Paper has run out Add paper 2 14 Call for service Open the front cover once and close it If the message is displayed again check C and the number Turn the main power switch off and contact your service representative or authorized service center Cannot staple this size Cannot staple this p...

Страница 220: ...de Use the department management mode to clear the copy count 7 11 Format error Memory card The memory card inserted in the machine must be formatted Format the memory card Interface occupied The selected interface is currently being used Wait for a while and retry Insert same memory card When the machine has tried to read data from the memory card it cannot recognize the memory card Insert the me...

Страница 221: ...on of a memory is recommended Current printing cannot be processed because the memory for printing is full Press the Print key to display the following messages GO Continues printing Processed data will be output and remaining data will be printed on the next page CANCEL Cancels printing RESET Resets the printer board In this case only the printer functions will be reset Press U or V to select the...

Страница 222: ...pler Empty Add Staples There are no staples left in the optional finisher Add staples Appendix 5 Paper capacity exceeded Remove paper from Job sep There are already 100 sheets of paper stored on the optional job separator Remove the paper Appendix 7 Paper misfeed A paper jam has occurred The location of the jam is indicated on the message display and the machine stops Leave the main power switch o...

Страница 223: ...atically turned On RAM disk error Press GO An error has occurred in writing to or reading from the RAM disk Press the Print key select GO and then press the Enter key The error will be cleared Ready to Copy Toner low Toner remaining in the machine is low Prepare the toner container Remove paper from Finisher Press GO There are already 250 sheets of paper stored in the optional finisher during prin...

Страница 224: ...0 sheets of paper stored in the output tray when the optional job separator is installed There are already 100 sheets of paper stored in the output tray when the optional finisher is installed Remove the paper Replace Waste Toner Box The waste toner box is full Replace the waste toner box with a new one 8 9 Reposition original or change cassette Reposition original or select other paper cassette T...

Страница 225: ...cessing has occurred Follow the procedure below 1 Turn the main power switch off If printer output is being performed cancel printing on the computer 2 Wait more than five seconds and then turn the main power switch on The error is cleared If printing has been performed perform output again Time for maintenance Periodic maintenance is required to keep this machine in good condition Contact your se...

Страница 226: ...structions will also be displayed Paper misfeed in cassette 1 JAM11 Remove paper A A C D E F B B B B B B Paper misfeed in cassette 1 JAM11 Remove paper Paper Jam Location Indicator Paper Jam Location Paper Jam Number Reference Page A Cassette 1 JAM11 JAM21 9 13 B Cassette 2 to 4 JAM12 JAM13 JAM14 JAM15 JAM16 JAM22 JAM23 JAM24 9 15 C MP tray JAM10 JAM20 9 16 D Left cover JAM30 JAM40 JAM41 JAM42 JAM...

Страница 227: ... be printed again CAUTION High voltage is present in the charger section Take sufficient care when working in this area as there is a danger of getting burned CAUTION The fixing unit is extremely hot Take sufficient care when working in this area as there is a danger of getting burned Cassette 1 If Paper misfeed in cassette 1 Remove paper appears and the jam location indicator shown in the illustr...

Страница 228: ... Push cassette 1 back in place securely NOTE Check to see if paper is out of position in the cassette If the paper is out of position set the paper properly If JAM21 is displayed remove the jammed paper referring to Left Cover on page 9 17 ...

Страница 229: ...n the illustration blinks a paper jam has occurred in the optional paper feeder Follow the steps below to clear paper jams in cassette 1 Open the left cover of the cassette being used 2 Remove the jammed paper without tearing it NOTE If the paper does happen to tear remove any loose scraps from inside the machine 3 Close the left cover of the cassette Paper misfeed Open left cover 2 JAM15 and remo...

Страница 230: ...the machine 6 Push cassette back in place securely MP Tray JAM 10 If Paper misfeed in stack bypass Remove paper appears and the jam location indicator shown in the illustration blinks a paper jam has occurred in the MP tray Follow the steps below to clear paper jams in the MP tray 1 Remove all of the paper remaining in the MP tray Paper misfeed in stack MP Tray JAM10 Remove paper ...

Страница 231: ...t cover and remove paper appears and the jam location indicator shown in the illustration blinks a paper jam has occurred in the left cover Follow the steps below to clear paper jams in the left cover IMPORTANT The drum section inside the main body is sensitive to scratches and contaminants When removing paper be careful not to touch it or scratch it with your watch ring etc 1 Pull the left cover ...

Страница 232: ...2 Remove the jammed paper without tearing it 3 If the optional duplex unit is installed raise the duplex unit and remove any paper NOTE If the paper does happen to tear remove any loose scraps from inside the machine 4 Close the left cover ...

Страница 233: ...nsitive to scratches and contaminants When removing paper be careful not to touch it or scratch it with your watch ring etc 1 If jammed paper is seen through the paper output slot pull it out to remove it NOTE If the paper does happen to tear remove any loose scraps from inside the machine 2 Pull the left cover handle up to open the left cover 3 Remove the jammed paper without tearing it NOTE If t...

Страница 234: ...rocessor Perform the following procedure to remove the jammed original s 1 Remove all of the originals remaining in the original table 2 Open the left cover 3 Remove the jammed original without tearing it NOTE If the original does happen to tear remove any loose scraps from inside the document processor Failure to do so may cause another paper jam later 4 Raise the paper feed unit A Misfeed in DP ...

Страница 235: ...aring them NOTE If the original does happen to tear remove any loose scraps from inside the document processor 6 Turn the dial as shown in the illustration to remove the jammed original 7 Close the left cover to its original position Reset all the originals and start copying again ...

Страница 236: ...the optional finisher Follow the steps below to clear paper jams in the optional finisher IMPORTANT The drum section inside the main body is sensitive to scratches and contaminants When removing paper be careful not to touch it or scratch it with your watch ring etc 1 Turn the lever to lower the process tray 2 Remove the paper 3 Raise the process tray Paper misfeed in Finisher lower Process JAM80 ...

Страница 237: ...Remove the finisher tray 5 Pull the left cover handle up to open the left cover 6 Remove the jammed paper NOTE If the paper does happen to tear remove any loose scraps from inside the machine 7 Close the left cover 8 Reattach the finisher tray ...

Страница 238: ...scratches and contaminants When removing paper be careful not to touch it or scratch it with your watch ring etc 1 If jammed paper is seen through the paper output slot of the job separator pull it toward your side to remove it NOTE If the paper does happen to tear remove any loose scraps from inside the machine 2 Pull the left cover handle up to open the left cover 3 Remove the jammed paper witho...

Страница 239: ...OPERATION GUIDE Appendix 1 Appendix Optional Equipment Appendix 2 Paper Appendix 10 Specifications Appendix 18 Glossary Appendix 24 ...

Страница 240: ...tional Equipment The following optional equipment is available for the machine Document Processor Additional Memory Fax Kit Duplex Unit Finisher Job Separator Paper Feeder Memory Card CompactFlash Hard Disk Key Counter Network Scanner Kit Network Interface Card ...

Страница 241: ... II 8K and 16K Copy paper can be set in the same way as the standard cassette provided with the main body See page 2 15 IMPORTANT When lifting and transporting this machine be sure to detach the paper feeder in advance NOTE Left cover 4 is located on the left side of the paper feeder for use in clearing paper jams Up to three cassettes can be added for the 18 ppm model and up to two cassettes can ...

Страница 242: ...rted copies are output onto the finisher tray NOTE According to the paper size adjust the finisher tray extension Tray capacity and paper sizes Non stapling 500 sheets A4 11 8 1 2 B5 250 sheets A3 B4 Folio 11 17 Ledger 8 1 2 14 Legal 8 1 2 13 Oficio II Stapling 80 g m or less For stapling of 2 to 4 sheets 130 sheets For stapling of 5 sheets or more 250 sheets Stapling capacity 30 sheets A4 11 8 1 ...

Страница 243: ...according to the paper size NOTE When stapling large paper such as A3 B4 11 17 Ledger and 8 1 2 14 Legal open the process tray extension to prevent the paper from dropping Adding Staples 1 Open the stapler front cover toward your side 2 Pull out the staple holder 3 Remove the empty staple cartridge from the staple holder ...

Страница 244: ...ion direction 5 Push the staple cartridge all the way into the holder and remove the paper tape around the staple cartridge by pulling it 6 Insert the staple holder into the insertion slot as it was Insert it completely until it clicks 7 Close the stapler front cover Clearing Staple Jam 1 Remove the staple holder in the same way as described in Adding Staples Hold knob A of the face plate of the s...

Страница 245: ...according to output tray for easier sorting Specify as the output tray for copy or print jobs Or specify as the default output tray for printing from the copy screen printing from the PC and printing of the received fax data There is a paper indicator in the front of the machine that shows whether there is paper in the Job Separator CAUTION Note that some paper types have a tendency to curl and ma...

Страница 246: ... counter is inserted If the key counter is not inserted Insert key counter will be displayed FAX Kit By installing the FAX kit fax send receive is enabled Also if the optional network scanner kit is used together this machine can be used as a network fax with which data can be transmitted and received through a computer For further details refer to Fax Kit Operation Guide Network Scanner Kit If th...

Страница 247: ...16 MB 32 MB 64 MB 128 MB For printer 32 MB 64 MB 128 MB 256 MB Number of originals that can be scanned A4 originals with of 6 coverage Text Photo mode The values within are those for the machine with the optional network scanner kit installed Memory Card CompactFlash The memory card is a microchip card to which optional fonts macros and forms can be written Hard Disk The hard disk is used for stor...

Страница 248: ...ed paper 64 to 105 g m2 A3 B4 A4 A4 R B5 B5 R A5 R Folio Ledger Legal Letter Letter R Statement Oficio II 8K 16K 300 80 g m2 100 90 to 105 g m2 Supported types Supported paper sizes No of sheets Plain paper 64 to 105 g m2 Recycled paper 64 to 105 g m2 Letter Letter R A4 A4 R 100 80g m2 A5 R A6 R Statement R 50 80g m2 Ledger Legal A3 B4 B5 B5 R B6 R Oficio II Folio Executive R 8K 16K 16K R Custom 3...

Страница 249: ...ction describes guidelines for choosing paper Condition Avoid using paper with bent corners or that is curled dirty or torn Do not use paper that has a rough surface or paper fiber lint or that is especially delicate Use of paper in any of these conditions will not only deliver poor copies but may also cause jams and shorten the useful life of the machine Choose paper with a smooth and even surfac...

Страница 250: ...hich may cause excessive wear of the machine Mixed paper weight i e thickness may cause several sheets to be supplied at once accidentally and may also cause blurring or other printing problems if the toner fails to adhere correctly The recommended basis weight is between 64 and 105 g m2 for the cassettes and between 45 to 160 g m2 for the MP tray MP Tray Cassette or MP Tray A6 R 105 148 mm A3 297...

Страница 251: ...keep the paper a sufficient distance away from wooden or concrete floors Before using paper that has been stored keep it at the proper moisture level for at least 48 hours Do not store paper where it is exposed to heat sunlight or dampness Other Paper Specifications Porosity The density of the paper fibers Stiffness Paper must be stiff enough or it may buckle in the machine causing jams Curl Most ...

Страница 252: ...as laser printers Use the MP tray for thin paper transparencies thick paper envelopes cardstocks and label paper Choosing Special Paper Although special paper that meets the following requirements can be used with the machine print quality will vary considerably due to differences in the construction and quality of special paper Thus special paper is more likely than regular paper to cause printin...

Страница 253: ...es printing evenly over the entire surface may not be possible in some cases Thin envelopes in particular may be wrinkled by the machine in some cases as they pass through Before purchasing envelopes in volume try testing a sample to ensure the print quality Storing envelopes for a long period may cause them to become wrinkled Thus keep the package sealed until you are ready to use them Keep the f...

Страница 254: ...sive may not come in direct contact with any part of the machine and that the labels are not easily peeled from the carrier sheet Adhesives that stick to the drum or rollers and peeled labels remaining in the machine may cause a failure When printing onto labels you must be liable for the print quality and possible trouble Labels consist of three layers as shown in the illustration The adhesive la...

Страница 255: ...le to withstand the heat of printing It must be resistant to silicone oil as well Do not use paper with a treated surface such as glossy paper used for calendars Recycled Paper Recycled paper must conform to the specifications listed on the page 2 of the Appendix however its whiteness may be considered separately NOTE Before purchasing recycled paper in volume try testing a sample to ensure that t...

Страница 256: ... Cardstock Color Colour Prepunched Letterhead Thick Envelope High Quality Custom 1 to 8 Paper Size Cassette Maximum 11 17 A3 Duplex 11 17 A3 Minimum 5 1 2 8 1 2 A5 R MP Tray Maximum 11 17 A3 Minimum 5 1 2 8 1 2 A6 R Zoom Level Manual mode 25 to 400 1 increments Auto mode Preset Zoom Printing Speed A4 Letter A4R LetterR A3 Ledger B4 Legal B5 18 sheets min 13 sheets min 8 sheets min 8 sheets min 16 ...

Страница 257: ... 600 600 dpi Operating Environment Temperature 10 to 32 5 C 50 to 90 5 F Humidity 15 to 80 Altitude 2 500 m 8 202 ft maximum Brightness 1 500 lux maximum Dimension W D H 22 3 8 23 25 64 19 31 32 Main unit only 568 594 507 mm 22 3 8 23 25 64 23 29 32 Main unit only 568 594 607 mm Weight without toner container and waste toner box 72 8 lb 33 kg 88 2 lb 40 kg Space Required W D 40 7 8 25 13 64 Using ...

Страница 258: ...Standard USB Interface Connector 1 USB Hi Speed Network interface 1 10 BASE T 100 BASE TX Memory Standard 128MB Maximum 1152MB Page Description Language PRESCRIBE Item Description Original Feed Method Automatic feed Supported Original Types Sheet originals Paper Size Maximum Ledger A3 Minimum Statement R A5 R Paper Weight 45 to 160 g m2 Loading Capacity 50 sheets 50 to 80 g m2 maximum Mixed origin...

Страница 259: ...16K Supported Paper Paper weight 64 105 g m2 Media types standard recycled Dimensions W D H 22 3 8 21 1 2 12 13 32 568 546 135 mm Weight Approx 13 2 lbs Approx 6 kg Item Description Paper Size Ledger Legal Oficio II Letter Letter R Statement A3 B4 A4 A4 R B5 B5 R A5 R Folio 8K 16K Supported Paper Paper weight 64 80 g m2 Media types standard recycled Dimensions W D H 14 19 64 2 9 64 7 9 64 363 54 1...

Страница 260: ... or less A3 B4 Ledger Legal Oficio II 25 sheets A4 A4 R B5 Letter Letter R 50 sheets Dimensions W D H 12 51 64 17 23 32 6 1 2 325 450 165 mm Weight Approx 17 6 lbs Approx 8 kg Item Description Number of Trays 1 tray Maximum Sheets 100 sheets 80 g m2 Paper Size Ledger Legal Oficio II Letter Letter R Statement A3 B4 A4 A4 R B5 B5 R A5 R Folio Paper Type Paper weight 64 105 g m2 Paper type standard r...

Страница 261: ...cht für die Benutzung im unmittelbaren Gesichtsfeld am Bildschirmarbeitsplatz vorgesehen Um störende Reflexionen am Bildschirmarbeitsplatz zu vermeiden darf dieses Produkt nicht im unmittelbaren Gesichtsfeld platziert werden Item Description Time to Low Power mode default setting 1 minutes Time to Sleep mode default setting 1 minutes Recovery time from Low Power mode 10 seconds or less Recovery ti...

Страница 262: ...computers outside the network that you are on When no specific gateway is designated for a destination IP address data is sent to the host designated as the Default Gateway DHCP Dynamic Host Configuration Protocol Dynamic Host Configuration Protocol DHCP that automatically resolves IP addresses subnet masks and gateway addresses on a TCP IP network DHCP minimizes the load of network management emp...

Страница 263: ...ange this time Multi Purpose MP Tray The paper supply tray on the right side of the machine Use this tray instead of the cassettes when printing onto envelopes Hagaki transparencies or labels NetWare Novell s network management software that is able to run on a variety of operating systems PostScript A page description language developed by Adobe Systems It enables flexible font functions and high...

Страница 264: ...of the network address The term prefix refers to something added to the beginning and in this context indicates the first section of the IP address When an IP address is written the length of the network address can indicated by the prefix length after a forward slash For example 24 in the address 133 210 2 0 24 In this way 133 210 2 0 24 denotes the IP address 133 210 2 0 with a 24 bit prefix net...

Страница 265: ...e 4 19 4 in 1 Mode 4 20 Page Boundary Lines 4 20 Connecting LAN Cable 2 5 Power Cable 2 6 USB Cable 2 6 Connection Method 2 3 Copier basic screen 1 4 Copy Auto Image Rotation 4 29 Border Erase 4 23 Collate 4 8 Combine 4 19 Continuous Scan 4 28 Duplex Copying 4 25 EcoPrint 4 18 Interrupt Mode 4 30 Margin Mode 4 22 Mixed Sized Originals 4 15 Offset 4 9 Original Size 4 12 Paper Selection 4 14 Staple ...

Страница 266: ...ndix 24 IP address 5 13 IPP Appendix 25 J Job Available Status 7 2 Job Accounting 7 1 Job accounting Default Settings 7 13 Job Accounting Mode 7 2 K KC GL Pen Thickness 5 17 KIR Appendix 25 KIR Mode 5 29 KPDL Appendix 25 KPDL AUTO Alternative Emulation Selection 5 18 KPDL Error Printing 5 17 L Label Appendix 16 LAN Cable Connecting 2 5 Left cover 1 7 Left cover handle 1 6 Line Feed LF Action 5 26 ...

Страница 267: ...riginal size indicator plates 1 7 Original Size Selection Send 5 2 Output tray 1 6 Override A4 Letter 5 44 P Page Protect Mode 5 26 Paper Appropriate Paper Appendix 11 Before Loading 2 14 Loading Envelopes 2 20 Loading in the Cassettes 2 15 Loading in the MP Tray 2 17 Size and Media Appendix 10 Special Paper Appendix 14 Specifications Appendix 10 Paper Jam 9 12 Cassette 1 9 13 Cassette 2 9 15 Docu...

Страница 268: ...ner Box 8 6 Resolution Appendix 19 Appendix 20 Resource Protect Mode 5 47 S Separator Cleaning 8 3 Setting Date and Time 2 8 Sleep 3 5 Slider 1 6 Slit Glass Cleaning 8 2 Solving Malfunctions 9 2 Specifications Document Processor Appendix 20 Environmental Specifications Appendix 23 Job Separator Appendix 22 Machine Appendix 18 Paper Feeder Appendix 21 Printer Appendix 20 Stapling Error Detection 5 ...

Страница 269: ...Index OPERATION GUIDE Index 5 W Waste Toner Box Replacement 8 6 Waste toner box 1 7 Wide A4 5 27 Z Zoom Copying Auto Zoom 4 5 Manual Zoom 4 5 Preset Zoom 4 6 Zoom Mode Copy 4 5 ...

Страница 270: ...Index Index 6 OPERATION GUIDE ...

Страница 271: ... Memo ...

Страница 272: ... Memo ...

Страница 273: ...A1 ...

Страница 274: ......

Страница 275: ......

Страница 276: ...Rev 2 2010 1 Printed in China 302KH56012 ...

Отзывы: