


Various fax functions
5
5-8
Konica Minolta 240f
5.3
5
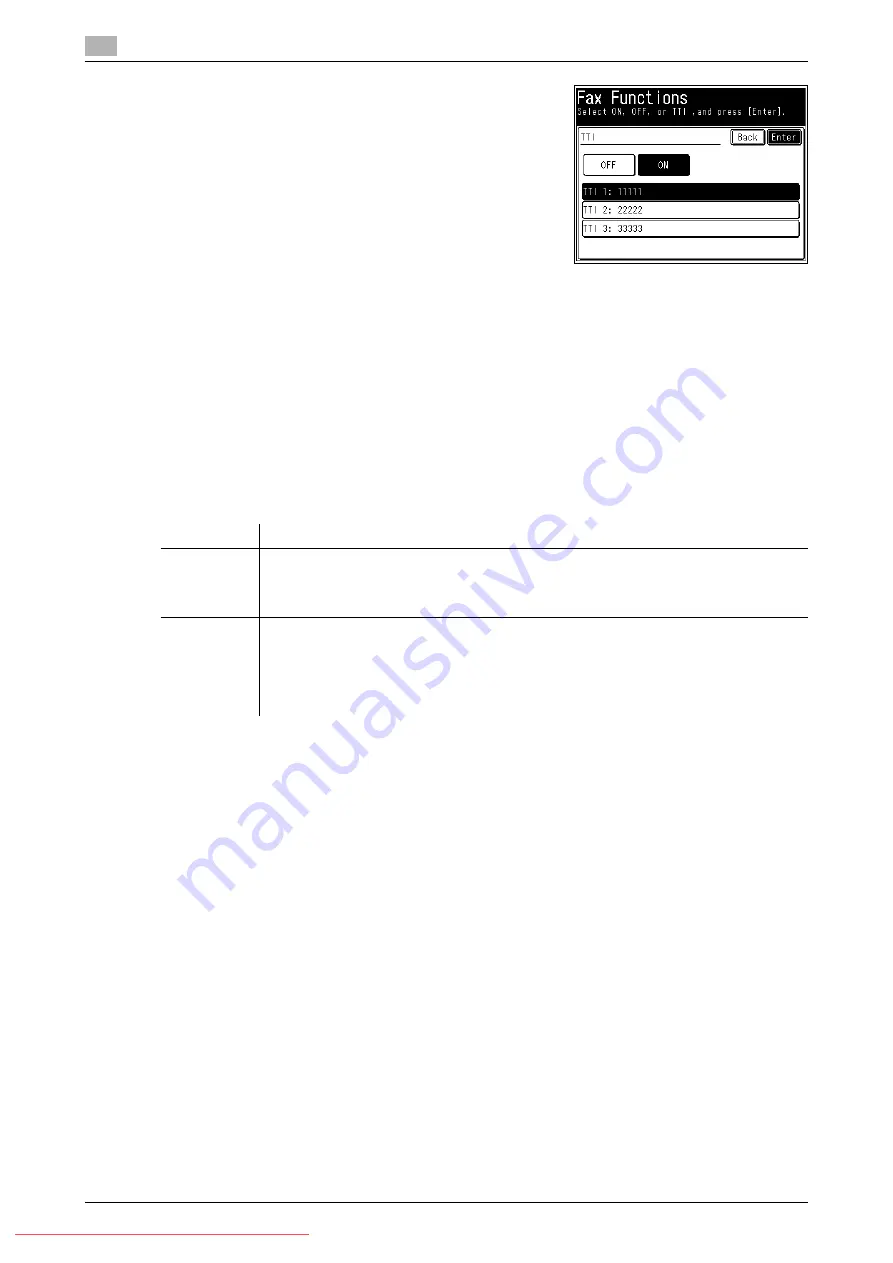
Select the sender name, and press [Enter].
6
Press [Close].
7
Specify the destination, and press <Start>.
%
For details on specifying the destination, refer to page 6-3.
5.3.2
Transmitting a cover page with documents (Cover page)
A cover page containing a simple message can be automatically attached to the documents. You can either
enter a subject and message or use a template registered in advance to input the cover page document. For
details on registering templates, refer to page 8-40.
Data regarding the destination and the sender is automatically entered on the cover page, but the information
that is entered differs according to the method for specifying the destination and the login status.
d
A cover page cannot be attached when performing manual transmission.
You can create new formats for the cover page. A "format" is a cover page template that contains layout data.
Formats enable you to automatically insert the destination name and sender name, and enter the subject and
mail text. For details on creating new formats, refer to Chapter 4, "Creating Cover Pages (Cover Page Editor)"
in the User’s Guide Message Board Operations.
Item
Description
Destination
field
If you specify the destination using the numeric keys, only the fax number is entered in
the destination field. If you specify an address book destination, the information regis-
tered in the address book, such as the company name, department, name, fax number,
and e-mail address, is entered in the destination field.
TTI field
If you have performed a user login, the information registered for the user, such as the
user name and telephone number, is entered in the TTI field. If you have not performed a
user login, the TTI name and TTI number registered in the intial setup are entered in the
TTI field. For details on performing a user login, refer to Chapter 3, "Setting User Authen-
tication" in the User's Guide Administrator Operations. For details on the basic settings,
refer to page 4-3.
Содержание 240f
Страница 1: ...Scan and Fax Operations User s Guide Downloaded From ManualsPrinter com Manuals...
Страница 2: ...Downloaded From ManualsPrinter com Manuals...
Страница 6: ...Contents 4 Konica Minolta 240f Downloaded From ManualsPrinter com Manuals...
Страница 7: ...1 Introduction Downloaded From ManualsPrinter com Manuals...
Страница 8: ...Downloaded From ManualsPrinter com Manuals...
Страница 11: ...2 Basic scan functions Downloaded From ManualsPrinter com Manuals...
Страница 12: ...Downloaded From ManualsPrinter com Manuals...
Страница 29: ...3 Advanced scan functions Downloaded From ManualsPrinter com Manuals...
Страница 30: ...Downloaded From ManualsPrinter com Manuals...
Страница 66: ...Scanning documents using a TWAIN box 3 3 38 Konica Minolta 240f 3 3 Downloaded From ManualsPrinter com Manuals...
Страница 67: ...4 Basic fax functions Downloaded From ManualsPrinter com Manuals...
Страница 68: ...Downloaded From ManualsPrinter com Manuals...
Страница 116: ...Internet fax transmission Internet fax 4 4 50 Konica Minolta 240f 4 5 Downloaded From ManualsPrinter com Manuals...
Страница 117: ...5 Advanced fax functions Downloaded From ManualsPrinter com Manuals...
Страница 118: ...Downloaded From ManualsPrinter com Manuals...
Страница 178: ...Useful internet fax functions 5 5 62 Konica Minolta 240f 5 8 Downloaded From ManualsPrinter com Manuals...
Страница 179: ...6 Specifying destinations Downloaded From ManualsPrinter com Manuals...
Страница 180: ...Downloaded From ManualsPrinter com Manuals...
Страница 195: ...7 Communication management Downloaded From ManualsPrinter com Manuals...
Страница 196: ...Downloaded From ManualsPrinter com Manuals...
Страница 209: ...8 Device settings Downloaded From ManualsPrinter com Manuals...
Страница 210: ...Downloaded From ManualsPrinter com Manuals...
Страница 256: ...Registering other settings 8 8 48 Konica Minolta 240f 8 3 Downloaded From ManualsPrinter com Manuals...
Страница 260: ...1 4 Konica Minolta 240f Downloaded From ManualsPrinter com Manuals...


