background image

67

IM5 Smartphone

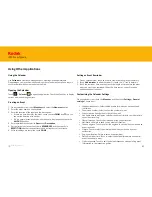
Viewing an Installed Application

1.  On the Settings screen, touch 

Apps

.

2.  In the applications list, do any of the following:

•  Touch the 

Menu key

, and then touch 

Sort by size

. Then touch an application 

to view its details.

•  Select 

Downloaded

Phone storage

Running

, or 

All

 tab at the top of the 

screen. Then touch an application to view its details.

•  Touch an application to view its details directly.

Managing Applications

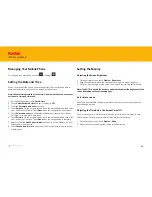
Removing an Installed Application

1.  On the Settings screen, touch 

Apps

.

2.  Touch an application, and then touch 

Uninstall

 to remove the application from 

your mobile phone.

Note:Pre-installed applications can not be deleted.

•  Move files and email attachments to the microSD card.
•  Uninstall the downloaded programs that you no longer use.
•  Reset your mobile phone.

Note: Please back up all your important data before performing a Factory reset.

Ways to Free Up Your Mobile Phone Memory

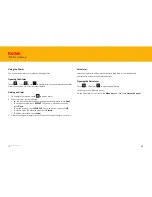
Backing Up My Settings

You can back up your mobile phone’s settings to Google servers, with your Google 
account. If you replace your mobile phone, the settings you have backed up are 
stored on the new mobile phone the first time you sign in with your Google account.

1.  On the Settings screen, touch 

Backup & reset

.

2.  Select the 

Back up my data box

.

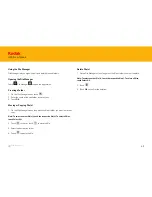
Resetting Your Mobile Phone

Restoring Factory Data

If you reset your phone to the settings that were configured at the factory, all of 
your personal data from internal phone storage, including information about your 
Google Account, any other accounts, your system and application settings, and any 
downloaded applications will be erased. Resetting the phone does not erase any 
system software updates you’ve downloaded or any files on your microSD card, 
such as music or photos.

1.  On the Settings screen, touch 

Backup & reset

 > 

Factory data reset

.

2.  When prompted, touch 

Reset phone

, and then touch 

Erase everything

. The 

mobile phone resets the settings to the original factory settings, and then 
restarts.

Back to contents

Содержание IM5

Страница 1: ...IM5 Smartphone User Guide IM5 Smartphone ...

Страница 2: ...4 Charge the battery 5 Power on and Power off 6 Using the touchscreen 7 Phone keys 8 Lock screen 8 Simple interface and settings 9 Notifications and Status bar 9 Add someone to your Contacts 10 Sending a text message 10 Making a call 11 Receiving a call 11 Accessing the internet 12 Sending an email 12 App store 13 App drawer 13 Play store 13 Google app folder 13 Calendar 14 Flashlight 14 Magnifier...

Страница 3: ... 5 Auto light proximity sensor 6a Front camera 6b Front flash 7 Earpiece 8 Menu key 9 Home key 10 Back key 11 Microphone 12 USB Charger port 13 SD card slot 14 Volume key 15 Rear facing camera 16 Flash 17 Loudspeaker 13 MP 6b 2 5 4 7 1 8 9 11 10 12 13 14 15 16 17 3a 3b 6a Phone Overview Back to contents ...

Страница 4: ... left side of the device The tray will pop out Repeat with SIM slot 2 if required Insert your SD card 1 Use the SIM SD card eject tool to flick open the SD card cover on the right side of the device SIM 1 SIM 2 S I M s l o t 1 S I M s l o t 2 2 Insert the SIM card s as shown 2 Insert the SD card as shown Back to contents ...

Страница 5: ...arranty If the battery has not been used for a long period of time you may not be able to power on your mobile phone immediately after you begin charging the battery Allow the battery to charge for a few minutes with the phone powered off before attempting to power on the phone The on screen charge animation may not be displayed during this period Using data services increases demand on the batter...

Страница 6: ...sked to enter your PIN before the Welcome screen A Wi Fi or Data connection is needed to complete the set up process You will now be prompted to sign in with your existing Google account or set up a new account and complete the set up process Note You can skip the account set up process to complete at another time A Google account is required to use some of the Google services on offer through you...

Страница 7: ...e 64 Touch and Hold Touch an item with your fingertip and continue to press down until your mobile phone responds For example to open the options menu for the active screen touch the screen and hold down until the menu appears Swipe Move your finger across the screen either vertically or horizontally For example swipe left or right to switch between pictures Drag Touch and hold the desired item wi...

Страница 8: ...phone 2 Within an app press the Back key to return to the previous screen 3 From within some apps you can press the Menu key to access app options 2 Slide the Gallery icon to the left to view your photos 3 Your lock screen background will be set by default to pan across full screen photos from among the last 20 images saved in your Camera roll Back to contents ...

Страница 9: ...on in the top right corner of the screen for options to enable Bluetooth Wi Fi and flight mode 3 The light in the top left corner of your phone will flash green when you have a new notification 1 Your KODAK device has a clear and intuitive user interface for easy access to all the most used apps 2 Touch each tile to launch an application 3 To access settings select the settings icon From here you ...

Страница 10: ...ow this contact in your favorite list 1 From the Home screen press the Text icon Then press the New Text Message icon to start composing a message 2 Touch the Type name or number box to display the on screen keyboard Enter the number of the person you wish to text or their name if you have already saved them as a contact Enter your message where is says Type text message 3 When the message is comp...

Страница 11: ...s the blue Call button to start the call 3 To end the call press the red End Call button 1 To receive a call swipe the phone icon right towards the green Answer call symbol 2 To reject a call swipe the phone icon left towards the red End call symbol To send a predefined text swipe the phone icon towards the text symbol 3 Within a call press the Speakerphone icon to put the call on loud speaker Pre...

Страница 12: ...r the search term or the address of the website you are looking for and then press the Enter or Go key on the keyboard to start browsing 1 Press the Gmail icon select your account and press Always You willl be asked to set up a Google account if you have not already done so 1 On the Inbox screen select the Compose icon Touch the To field to display the keyboard and enter the email address es of th...

Страница 13: ...apps already installed on your device press the App Drawer icon on the Home screen 2 From here you can download and install new apps to your device from a secure and curated catalogue of hundreds of high quality apps Google app folder 2 This is an alternative store for downloading Android apps 1 Select the Google app folder to access a range of applications including Google Maps YouTube and Google...

Страница 14: ...Smartphone also includes a magnifying application 2 Select a time to add a new event 3 Fill in the event details and select Done The event will now show in your calendar 2 Select the Magnifier icon and point the camera at the document or item you wish to view You can zoom in or out by sliding the bar at the bottom of the screen Turn on the light by pressing the Light button Back to contents ...

Страница 15: ...en Taking a picture 1 The KODAK IM5 is designed around an excellent and easy to use camera experience Select the Camera icon to start taking pictures Gallery 1 From the Home screen touch the Camera icon Once camera is opened swipe up from the bottom of display to access the tiled photo gallery Here you can scroll through all the images you have taken 2 Select an image to share edit or print it Bac...

Страница 16: ...pp Select an image by pressing on it 2 To edit the image press the Edit icon a pencil symbol You will be given a number of options for editing the picture 1 2 3 3 Or to share a picture press the Share icon from the image to send it to a contact through email text message or social media Back to contents ...

Страница 17: ... Remote icon Press the Allow remote access button to turn the function on 2 To add someone you know as a remote helper select Add new from the connections box Enter the person s email address or choose someone from Contacts and press the icon 3 Once you have selected your chosen helper the screen will show you a list of features they can help with Turn them On and Off as you wish Then press Send B...

Страница 18: ...r status 5 When the helper accepts your invite a notification will be sent to you and their status will show as green 6 The helper can now access features of your phone through a web interface When your helper makes a change you will receive a notification and can choose to accept or reject a change Select Access to show the list of changes made by the helper Back to contents ...

Страница 19: ...IM5 Smartphone Android User Guide IM5 Smartphone ...

Страница 20: ... or software applications provided by a third party that the operations of the software will be uninterrupted or error free or that any defects in the software are correctable or will be corrected User s Manual is provided just to guide the user about the functionality of the device This does not seem to be any certificate of technology Some functions may vary due to modifications and up gradation...

Страница 21: ...product and its accessories described herein rely on the software installed capacities and settings of local network and may not be activated or may be limited by local network operators or network service providers Thus the descriptions herein may not exactly match the product or its accessories you purchase The manufacturer reserves the right to change or modify any information or specifications...

Страница 22: ...ng media to and from your mobile phone 33 Phone Making a call 34 Answering and rejecting a call 36 Other operations during a call 36 Using call log 37 Contacts Contacts 38 Communicating with your contacts 39 Using the onscreen keyboard 39 Messaging SMS and MMS 40 Email 42 Wi FI 44 Browser 45 Bluetooth 46 Entertainment Taking photos and recoding videos 49 Enjoying music 51 Listening to FM radio 53 ...

Страница 23: ...2 Using the file manager 63 Managing your Mobile Phone Setting the date and time 64 Setting the display 64 Setting phone ringtone 65 Setting phone services 65 Setting dual SIM functionality 66 Protecting your mobile phone 66 Managing applications 67 Ways to free up your mobile phone memory 67 Resetting your mobile phone 67 Specifications 68 Environmental Concern 69 KODAK Phone Information 70 ...

Страница 24: ...ital Camera The two SIM slots provide the flexibility to manage both personal and professional SIM requirements with ease Powered by Android and featuring the Google suite of applications you ll be able to enjoy web browsing messaging music and more with the high capacity battery and expandable memory up to 32GB Understanding your Device Back to contents ...

Страница 25: ...ess all the features on your phone It displays application icons widgets shortcuts and other features You can customize the Home screen with different wallpaper and display the items you want Getting to know the Home Screen The home screen has the Launcher icon touch this to view and launch installed applications apps Back to contents ...

Страница 26: ...phone undisturbed for a while the screen will lock automatically Locking and Unlocking the Screen Unlocking the Screen Press the Power key to wake up the screen Then drag the lock icon to the unlock icon to unlock the screen Note If you have set up a screen lock you will be prompted to unlock the screen For details refer to Protecting Your Mobile Phone with a Screen Lock on page 66 Back to content...

Страница 27: ... appears at the top of every screen It displays notifications icons such as missed call or received messages on the left and phone status icons such as battery status on the right along with the current time Display Layout Notification icons Status icons Back to contents ...

Страница 28: ...s on Connected to a Bluetooth device Vibrate mode Ringer is silenced Battery is very low Battery is low Battery is partially drained Battery is full Battery is charging Roaming Airplane mode Receiving location data from GPS Notification Icons New email message New text or multimedia message Alarm is set Upcoming event Data is syncing Problem with sign in or sync Incoming call Missed call Speakerph...

Страница 29: ...arm is activated Open the notification panel to see who the wireless network operator is or to view a message reminder or event notification Notification Panel Opening the Notification Panel 1 When a new notification icon appears on the notification bar touch the notification bar and then drag down to open the notification panel 2 Touch a notification to open the related application Back to conten...

Страница 30: ...To directly close a notification without viewing simply touch and hold the notification and drag it to the left right of the screen To close the notification panel slide the bottom of the panel upwards to close the notifications panel Back to contents ...

Страница 31: ...ing your finger drag the item to Remove 3 When the item turns red release your finger to remove it from the Home screen Widgets A widget lets you preview or use an application You can place widgets on your Home screen as icons or preview windows Several widgets are installed on your phone by default More widgets can be downloaded from Google Play Store To add a widget to one of the screens 1 From ...

Страница 32: ...lpaper 1 From the Home screen touch the Menu key or touch and hold the Home screen 2 Touch WALLPAPERS Wallpapers Renaming a Folder 1 Touch a folder to open it 2 On the title bar of the folder enter the new folder name 3 When complete touch the Back key 3 Scroll through the available options to set a wallpaper of your choice Back to contents ...

Страница 33: ...nserted SD card will also be visible Note If using a MAC you will need to download drivers from http www android com filetransfer Transferring Media to and from Your Mobile Phone Some locations may require you to turn off your phone s wireless connections Rather than powering off your phone you can set it to Airplane mode 1 Press and hold the Power button 2 Touch Airplane mode in the options menu ...

Страница 34: ...ou will not be able to receive other calls using the other SIM card for the duration of that call Contact your network operator to learn whether it supports conference calls and how many participants you can add Phone To make a call you can use the Phone application or select a number from Contacts or Call Log When you are on a call you can touch the Home key to return to the Home screen and use o...

Страница 35: ...ng the contact touch If you have inserted two SIM cards touch the desired network to dial the phone number Note You can also specify the desired network that you want to use for data connection See Set up the Default Network on page 65 Making a Call with the Dialer 1 Touch and then Contacts to display the contact list If you are already within the Dialer touch the Menu key or and select People 2 I...

Страница 36: ...ou are on This feature is known as conference calling You can also set up a conference call with multiple callers Note Contact your network operator to learn whether it supports conference calls and how many participants you can add 1 To initiate a conference call dial the number of the first person to be on the call While you are on that call touch 2 Enter the phone number of the person you want ...

Страница 37: ...ed number or add an incoming number to your contact list Saving an entry to Contacts 1 Touch on the Home screen then touch Call Log tab 2 Touch the entry you want to add 3 Touch 4 Either add to existing contact or touch Create new contact Removing an entry from the list 1 Touch on the Home screen then touch Call Log tab 2 Select the entry that you want to delete 3 Touch the icon to delete Clearing...

Страница 38: ...Next 3 Select the destination location to copy the contacts to and touch Next 4 Select the contacts to copy and touch OK Adding a Contact 1 In the contacts list touch to add a new contact 2 Select the location you want to save the contact to 3 Enter the contact s name and then add any detailed information such as phone number or address 4 When you are finished touch Done to save the contact inform...

Страница 39: ...gs 1 Touch Settings Language input 2 On KEYBOARD INPUT METHODS option touch to customize the Android keyboard settings Using the Onscreen Keyboard Deleting a Contact 1 In the contacts list touch the contact that you want to delete 2 Touch the Menu key and then touch Delete 3 Touch OK to confirm that you want to delete the contact Displaying the Keyboard Panel To enter text use the onscreen keyboar...

Страница 40: ...ia message or touch an existing message thread to open it 2 Enter a phone number in the Type name or number field or touch to select a contact from Contacts As you enter the phone number matching contacts appear You can touch a suggested recipient or continue entering the phone number 3 Touch the composition text box to start entering your message If you touch the Back key while composing a messag...

Страница 41: ... message list touch the Menu key and then touch Settings to customize the message settings Creating and Sending a Multimedia Message 1 On the messaging screen touch 2 Enter a phone number in the Type name or number field or touch to select a contact from Contacts 3 Touch the composition text box to start entering your message 4 Touch the Menu key to display the options panel and then touch Add sub...

Страница 42: ...lar email systems so you can read and work with the same email that you do on a computer in a web browser or with another email application 1 Launch Email application See Opening Email 2 Enter your Email address and Password 3 Touch Next The device will automatically retrieve the email settings To manually set up email touch Manual setup Note If you select Manual setup contact your email service p...

Страница 43: ...essage 1 Touch the email message you want to view and reply to 2 Touch or touch Reply all to reply to the email message Deleting an Email Account 1 Touch the Home key to take you back to the Home screen Touch the Menu key and select SETTINGS 2 Scroll down to ACCOUNTS and select Corporate 3 Touch the email account you want to delete 4 Touch the Menu key or Options and select Remove account Changing...

Страница 44: ...Internet access To use Wi Fi on your mobile phone you need to have access to wireless access points hotspots Obstacles that block the Wi Fi signal will reduce its strength Wi Fi Turning On Wi Fi 1 Touch Settings 2 Drag to the right to enable Wi Fi Back to contents ...

Страница 45: ... wireless network that you have already used you will not be prompted to enter the password again unless you reset your mobile phone to its default settings Tip On the Wi Fi settings screen touch to add a new Wi Fi network Google Chrome is the default browser on your mobile phone Chrome is a simple streamlined browser allowing you to navigate with ease open and switch between an unlimited number o...

Страница 46: ...fer photos on your phone to your PC If you are using Bluetooth remember to stay within 10 meters 33 feet of other Bluetooth devices Be aware that obstacles like walls or other electronic equipment may interfere with your Bluetooth connection Bluetooth Turning On Bluetooth 1 Touch Settings 2 Drag to the right to enable Bluetooth When Bluetooth is turned on the Bluetooth icon appears in the notifica...

Страница 47: ...air your mobile phone with another Bluetooth device as follows 1 Ensure that the Bluetooth function on your mobile phone is enabled 2 Your mobile phone will then search for Bluetooth devices in range or touch SEARCH FOR DEVICES 3 Touch the device you want to pair with your mobile phone 4 Enter the pairing password to complete the connection Note If pairing with a car kit please enable Remote SIM m...

Страница 48: ...martphone Disconnecting or Unpairing a Bluetooth Device 1 Touch Settings 3 On the connected device option touch and then Unpair to disconnect the device 2 Drag to the right to enable Bluetooth Back to contents ...

Страница 49: ...uch to change the camera settings The preview changes as you change the settings 3 Touch to take your photo Viewing Your Photos 1 After taking a photo a thumbnail of the photo you have just taken is shown in the corner of the Capture screen Touch the thumbnail to view it 2 Touch the onscreen button to do any of the following To share the photo touch then touch an application for sharing To delete ...

Страница 50: ...ew 2 Touch the picture to view it in full screen mode When viewing a picture in full screen mode flick the picture left or right to view the previous or next picture 3 To zoom in on the image move your two fingers apart from each other at the location of the screen where you want to zoom in In zoom mode swipe your finger up or down and left or right Tip The picture viewer supports the automatic ro...

Страница 51: ...SB drive and open it 3 Create a folder in the root directory of the microSD card for example Music 4 Copy the music from your computer to the folder you have created 5 After copying music unmount or eject the drive as required by your PC s operating system to safely remove the mobile phone 6 Disconnect the mobile phone from the PC Opening the Media Library Touch Play Music to display the media lib...

Страница 52: ... to play Tip When you are listening to music touch the Back key to use another application Your music continues to play To return to the music controls open the notification panel and then touch the song Adding Music to a Playlist 1 Touch the song and then touch Add to playlist 2 Select a playlist or touch New playlist to add the song to an existing playlist ...

Страница 53: ...M Radio Do any of the following To select the radio station to listen to touch or To manually tune to a frequency touch or To add the current radio station to the Favorite list touch To view the Favorite List touch To turn on the speaker touch and select Speaker To scan for all available channels touch Search To turn off the radio touch to exit out of application Recording the FM Radio To record t...

Страница 54: ... Settings 2 In ACCOUNTS touch Add account 3 Touch Google to create a Google account 4 Touch New to create a new account 5 Enter your name and touch 6 Enter the username and touch The mobile phone will connect to the Google server to check whether the username is available If the username you entered is already in use you will be prompted to choose another one 7 Enter and confirm your Google accoun...

Страница 55: ... Cc Bcc 3 Enter the email subject and compose your message If you want to add a picture attachment touch the Menu key and then touch Attach file to select the picture you want to attach 4 After composing your email touch Replying To or Forwarding an Email 1 On the Inbox screen touch the email that you want to reply to or forward 2 Touch Reply Reply all Reply all or Forward Forward 3 Do one of the ...

Страница 56: ...pening Maps Touch Maps to open the application Searching for Places of Interest 1 While viewing a map touch 2 Enter the place you want to search for in the search box and then touch Note You can also select one option from the suggestions list 3 Your search results will then be displayed Touch the marker and it displays the location name 4 Touch the onscreen buttons to view the location on the map...

Страница 57: ...Live and more Searching for a Video 1 On the YouTube screen touch 2 Enter a search keyword and then touch 3 Scroll through the results and touch a video to watch it TIP You also have the option to view results of recently posted videos Touch All time and then select one of the available options Sharing a Video 1 While viewing a video touch 2 Touch an application for sharing the video link from the...

Страница 58: ...ow installation of the non Market application 1 Touch Play Store 2 Touch a category and then touch the item you want to download 3 On the item details screen read more about the application including overall rating and user comments If you scroll down to the Developer Info section you can see other applications from the same developer or link to the developer s website 4 To install the item touch ...

Страница 59: ...account so your personal email contacts and calendar are always available You could then add a work account so your work related emails contacts and calendar entries are also handy Adding an Account 1 Touch Settings 2 In ACCOUNTS touch Add Account The screen displays your current synchronization settings and a list of your current accounts Note In some cases you may need to obtain account details ...

Страница 60: ...ach account Some applications such as Contacts and Gmail can synchronize data from multiple applications Others such as Calendar synchronize data only from the first Google account you signed into on your phone or from an account associated specifically with that application For some accounts synchronizing is two directional changes that you make to the information on your mobile phone are made to...

Страница 61: ... an event to view its details or event summary 2 Touch Add reminder to add a reminder Or touch the X icon to delete it 3 Touch the reminder time and then touch the length of time before the event when you want to be reminded When the time comes you will receive a notification about the event Customizing the Calendar Settings On any calendar view touch the Menu key and then touch Settings General s...

Страница 62: ...t mode touch REPEAT Touch one or more options then touch Done To set the ringtone touch WAKE UP Touch an option then touch OK To vibrate when the alarm sounds check Vibrate To add an alarm label touch Label 3 After all settings are complete touch the blank area of the alarm to save it Calculator Use the calculator to solve simple arithmetic problems or use its advanced operations to solve more com...

Страница 63: ...the File Manager screen long press the file or folder you want to move or copy Note To select another file s touch the respective file s To select all files touch Select All 2 Touch to copy or touch to move the file 3 Select the destination folder 4 Touch to paste the file Delete File s 1 On the File Manager screen long press the file or folder you want to delete Note To select another file s touc...

Страница 64: ...time Touch Done when the configuration is complete 7 Select or clear the Use 24 hour format check box to switch between 24 hour format and 12 hour format 8 Touch Choose date format to select how you want the date to display on your mobile phone Adjusting the Screen Brightness 1 On the Settings screen touch Display Brightness 2 Drag the slider left to make the screen darker or right to make it brig...

Страница 65: ...n touch OK The ringtone plays when selected Setting Your Phone to Vibrate for Incoming Calls 1 On the Settings screen touch Audio profiles General 2 Select the Vibrate check box to enable your phone to vibrate for incoming calls Set up the Default Network 1 On the Settings screen touch SIM management 2 In DEFAULT SIM touch Voice call Video call Messaging or Data connection and then select the netw...

Страница 66: ...rvice provider about data roaming fees Disable Data Service In WIRELESS NETWORKS select More Mobile networks Data connection and select off Protecting Your Mobile Phone Enable Your SIM Card PIN 1 On the Settings screen touch Security Set up SIM card lock 2 If you have inserted two SIM cards touch the desired SIM card network that you want to set the PIN code 3 Check the Lock SIM card check box 4 E...

Страница 67: ...p Your Mobile Phone Memory Backing Up My Settings You can back up your mobile phone s settings to Google servers with your Google account If you replace your mobile phone the settings you have backed up are stored on the new mobile phone the first time you sign in with your Google account 1 On the Settings screen touch Backup reset 2 Select the Back up my data box Resetting Your Mobile Phone Resto...

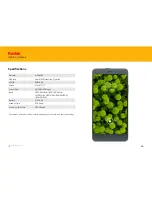
Страница 68: ...C 8GB 8Gb Screen 5 inch TFT Sensor Pixel QUXGA 13 0Mega Band GSM 850 900 1800 1900 MHz WCDMA BAND1 2100 BAND2 1900 BAND5 850 Battery 2150 mAh Standby Time 430 hours Maximum Talk Time 360 Minutes The standby time and maximum talk time depend upon the network signals and settings Back to contents ...

Страница 69: ...stead RECYCLE it Hazards of Improper handling accidental breakage damage and or improper recycling of hazardous elements If this product is improperly handled broken or damaged or carelessly recycled or disposed off in the fire can result in environmental and data security concerns including the following Affect nearly every system in the human body and result in birth defects brain heart liver ki...

Страница 70: ...Information Made for and Distributed by Bullitt Mobile Ltd under license from Eastman Kodak Company The Kodak trademark and trade dress are used under license from Eastman Kodak Company Made in China 2015 Bullitt Mobile Ltd www kodakphones com Eu compliance statement Bullitt Mobile hereby declares that this wireless device is in compliance with the essential requirements and other relevant provisi...

Отзывы: