ENGLISH
Mars Series: Accessibility Features
30
NVR User’s Manual
How to Configure the Cloud Storage Settings
If you already have an active Dropbox account, you need to connect the KGuard Cloud Uploader to your Dropbox.
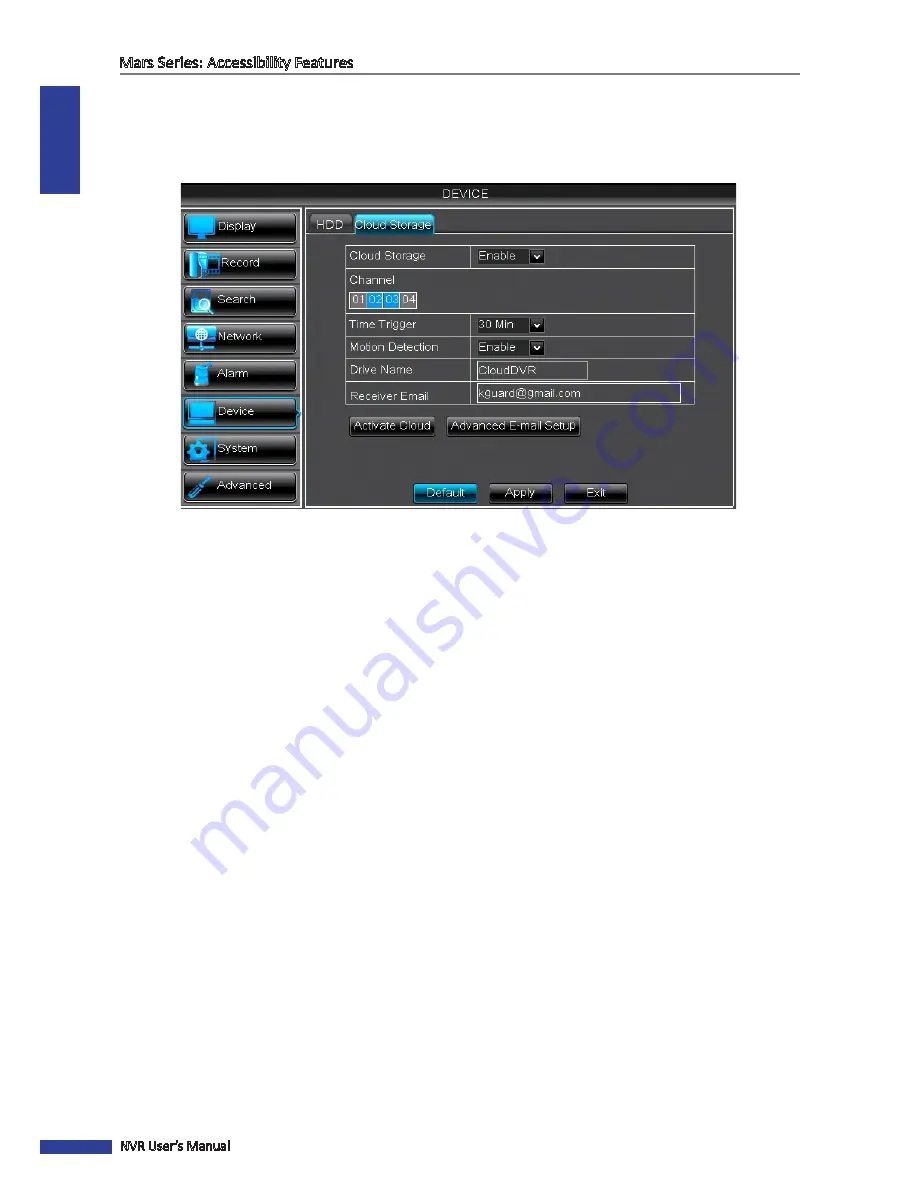
Before making the connection, you need to configure the following settings on your NVR (right-click on Live Viewing
screen,
Main Menu->Device->Cloud Storage
).
• Enable:
Allow cloud settings.
•
Channel:
Select from which channels will snapshots be taken and sent to the cloud storage. Snapshots from the
channels you have not chosen, will not be sent to Dropbox.
• Time Trigger/Motion Detection
: When the
Time Trigger
is set and the
Motion Detection
is disabled then
snapshots are transferred to the Dropbox based on the scheduled time interval.
• When the
Time Trigger
is set and the
Motion Detection
as well then the snapshots are transferred to the
Dropbox on a motion detection and on time interval simultaneously. For example, a camera is installed on the
front door. When someone enters the room, the motion is triggered. The snapshots are then sent to the cloud
storage.
•
Drive Name:
Enter the cloud storage name for your NVR. When linking the KGuard Cloud Uploader to your
Dropbox, the Drive Name will be used as the folder name where KGuard uploads the snapshots.
• Receiver Email:
Enter your e-mail address that is associated with your Dropbox account. The NVR will be sending
the certification e-mail to this e-mail address for asking your acceptance to link the NVR to the Dropbox.
After all settings are complete, click
Apply
and then click
Activate Cloud
. See
“Activate Cloud” on page 32.
If you
successfully receive the cloud storage activation e-mail, you do not need to configure the advanced e-mail settings.
If you need to configure the advanced e-mail settings, click on
Advanced E-mail Setup
button.


