background image

44


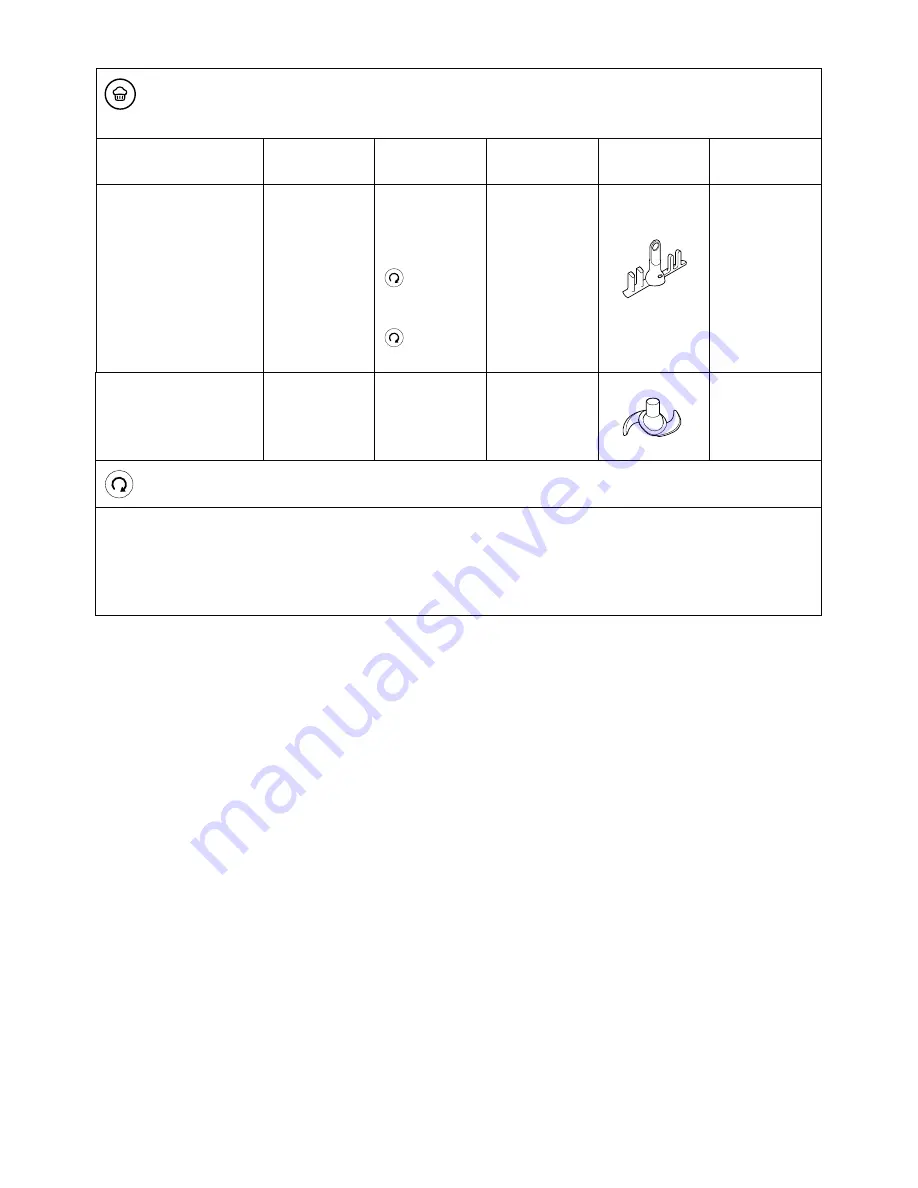
Dessert-programma 

*2

Receptideeën dienen alleen als richtlijn - pas ze aan uw persoonlijke smaak en voorkeuren aan.

Subprogramma

Fase 1

Fase 2

Fase 3

Gebruikt 
hulpstuk

Recepten

DESSERTSAUZEN

Droge 
ingrediënten 
toevoegen

2½ min.

Vloeistof 
toevoegen

98°C

 5

Opwarmen
dan 

 6

10 min.

N.v.t.

Custard,  
crème brûlée 

DEEG

Water 
en gist 
toevoegen

2 min.

Droge 
ingrediënten 
toevoegen

3¼ min.

N.v.t.

Brood


= ingestelde snelheid

Brood maken

O

  Maximaal 400 g (bloemgewicht) / 640 g (totaalgewicht) – anders wordt de machine overbelast.

O

  Gebruik het mes op snelheid 10 om het deeg te kneden.

O

  Kneed niet langer dan 3 minuten.

O

  Gebruik lauw water.

Содержание CCL40

Страница 1: ...TYPE CCL40 instructions istruzioni instrucciones Bedienungsanleitungen gebruiksaanwijzing ...

Страница 2: ...English 2 24 Nederlands 25 49 Français 50 74 Deutsch 75 99 Italiano 100 125 Español 126 151 Português 152 176 Ekkgmij 177 199 ...

Страница 3: ... 3 2 1 1 4 5 7 6 8 1 9 3 5 5 4 3 3 6 6 2 7 8 1 9 7 8 7 6 4 5 3 9 2 3 4 5 6 8 1 2 ...

Страница 4: ...6 DIRECT PREP 5 4 3 2 1 6 9 8 9 7 ...

Страница 5: ...temp 30 180 C 0 8hr 1 12 time speed 11 8 4 3b 3a 5 6 7 10 9 1a 1b 2 ...

Страница 6: ...ay screen symbols explained 10 manual mode 11 12 using the pre set programmes 13 19 Main Meal programme 14 Sauce programme 15 Steam programme 16 17 Soup programme 18 Stir Fry programme 18 Dessert programme 19 recommended usage chart 20 care and cleaning 21 service and customer care 22 troubleshooting guide 23 24 English ...

Страница 7: ...been removed from the bowl The knife blade is sharp handle with care O Keep hands and utensils out of the bowl whilst connected to the power supply O When leaving the appliance unattended in the cooking mode pay close attention to the following ensure the instructions are followed with regards to temperatures and maximum quantities to process make sure the unit and cord are positioned out of reach...

Страница 8: ... bowl will remain hot long after the heating has stopped Use caution when handling and use a work surface protection mat when placing the bowl on heat sensitive surfaces O Be careful of steam escaping from the bowl particularly when removing the lid or filler cap during the cooking mode or after cooking O Do not remove the lid or filler cap whilst liquid is boiling O Use oven gloves to remove the ...

Страница 9: ...ge to your cooking food processor O Always use the bowl release buttons 5 before attempting to remove the cooking bowl O Misuse of your appliance can result in injury O Appliances can be used by persons with reduced physical sensory or mental capabilities or lack of experience and knowledge if they have been given supervision or instruction concerning use of the appliance in a safe way and if they...

Страница 10: ...topped Steamer attachment O This attachment produces steam which can burn you O Do not get burnt by steam coming out of your steamer especially when removing the lid O Take care when handling the parts any liquid or condensation will be very hot Use oven gloves O Cook meat fish and seafood thoroughly And never cook them from frozen O If you are using the steamer tray base and shelf put meat poultr...

Страница 11: ...ng bowl 2 Start Stop button Direct Prep display screen graphics 3 temperature selection 4 hot temperature warning 5 text display 6 time selection 7 speed selection 8 cooking mode Direct Prep 9 pusher measuring cup feed tube 1 Direct Prep lid 2 drive shaft 3 disc 1 extra fine grating disc if supplied 2 fine grating disc if supplied 3 coarse grating disc 4 thin slicing disc 5 thick slicing disc if s...

Страница 12: ...f each stage and once cooking has finished the unit will beep and automatically go into the Keep Warm cycle for 30 minutes Follow the instructions on the screen to move to the next stage 9 To stop the unit at any time press the Start Stop button and then remove the lid Take care as the bowl and lid will be hot To resume cooking refit the lid press the Start Stop button O Manual mode at the end of ...

Страница 13: ...ove the filler cap if grating or slicing straight into the bowl 2 Remove the Direct Prep outlet cover 3 Fit the tower 8 on to the Direct Prep drive outlet by aligning the then push down and turn clockwise to secure in place 4 Holding by the centre grip push the desired cutting disc on to the drive shaft Each disc is numbered for identification and the number should be uppermost when the disc is pu...

Страница 14: ...e disc after processing O When grating food placed upright will come out shorter than food placed horizontally Display screen symbols explained Hot warning indicator Below 60 C no red bar Above 60 C solid red bar Text display shows status information recipes information and error messages Shows temperature selected OFF 30 C Æ 180 C Note In manual mode Press the temperature button for 3 seconds dur...

Страница 15: ...n the time button and the and buttons for 3 seconds speed Twelve speed settings are available which enable you to select the appropriate setting for individual recipes Some recipes will require constant stirring to stop ingredients from sticking to the bottom of the bowl whereas others will benefit from intermittent stirring to maintain the consistency of the food Higher speed settings are availab...

Страница 16: ...processing speed is reached The button will operate for a maximum of 2 minutes before automatically switching off To stop the operation before the 2 minutes has elapsed either press the Cancel button or press the Chop button again O The filler cap should always be fitted when using the chopping function After selecting a programme or manually setting the required function press the Start Stop butt...

Страница 17: ...n Adjusting the sub programmes O During each stage the temperature time and speed settings can be adjusted if required Press the Start Stop button 1 and select the setting to be adjusted Use the and buttons to change the setting then press the Start Stop button to resume cooking O Use the spatula supplied to scrape down the ingredients in between each stage The number of available stages for each ...

Страница 18: ...ins Chicken risotto CASSEROLES Add oil 140 C 3 Heating Add meat 180 C 4 2 mins then 140 C 3 3 mins Add veg 140 C 1 10 mins Add liquid 98 C 1 2 hours Beef casserole VEGETARIAN DISHES Add oil 140 C 3 Heating Add veg 120 C 3 10 mins Add liquid 98 C 3 30 mins N A Chickpea stew SLOW COOK 95 C Æ 90 C Heating Æ 2 hrs N A N A Fit bowl plug selected speed Note During the heating cycle on each stage HEATING...

Страница 19: ... or oil 80 C 0 1 min 15 secs Add flour 110 C 6 5 mins Add liquid 98 C 6 15 mins Béchamel sauce cheese sauce parsley sauce COMPOTES RELISHES Add oil 140 C 3 Heating Add fruit or veg 120 C 3 10 mins Add sugar flavourings 98 C 4 30 mins PUREE Add veg Blend liquid 100 C 3 Heating then 98 C 4 10 mins Æ 2 mins N A Carrot puree selected speed Note During the heating cycle on each stage HEATING will be sh...

Страница 20: ...ence steaming The unit will beep when the steaming point is reached Note O The time will not start counting down until the water has reached the steaming point The time shown on the display will flash until the the steaming point is reached Hints Tips O The temperature is fixed at 100 C and speed options cannot be selected O The cooking times are a guide only Always check that food is thoroughly c...

Страница 21: ...25 Broccoli 800g Cut into florets 15 25 Cauliflower 1 5kg Cut into florets 15 25 Carrots 800g Thinly slice 20 30 Sweet potato 1 5kg Cut into 3cm cubes 20 30 Chicken Boneless breast 12 2kg 20 30 Fish Fillets or steak 8 1 4kg 20 25 Whole fish e g trout 600g Clean gut and scaled 20 30 Sweet steamed pudding homemade 1 2 litre 14cm diameter pudding basin 1 2 hrs Top up with water after 1hr Suet pudding...

Страница 22: ... liquid 98 C 2 30 mins Lamb broth chunky soups selected speed Note During the heating cycle on each stage HEATING will be shown on the display screen and the time will not start to count down until the correct temperature is reached Stir Fry programme 1 Recipe ideas for guidance adapt to personal taste and preference Stage 1 Stage 2 Stage 3 Stage 4 Tool used Recipe ideas Add oil 140 C 3 Heating Ad...

Страница 23: ...ngredients 2 mins Add liquid 98 C 5 Heating then 6 10 mins N A Custard crème brûlée DOUGH Add water and yeast 2 mins Add dry ingredients 3 mins N A Bread selected speed Bread making O Do not exceed 400g flour weight 640g total weight you may overload the unit O Use the knife blade at speed 10 to knead the dough O Do not knead for longer than 3 minutes O Use luke warm water ...

Страница 24: ... ice 12 25 30 secs Up to 250g 12 cubes Chopping cauliflower e g for cauliflower rice 12 20 secs Up to 500g 1 head cut into florets All in one cake mixes 12 20 30 secs Up to 600g total weight 3 egg mix Drinks and smoothies 12 60 secs 1 litre Cold Blending 12 1 2 mins 2 6 litres Bread Dough 10 3 mins 640g total weight 400g flour weight Egg whites 8 9 3 4 mins 2 8 70 280g Whipping cream 9 1 1 mins 20...

Страница 25: ...n rinse thoroughly under the tap 5 Ensure the seal is refitted to the drive shaft or bowl plug correctly before refitting to the bowl lid O Always dismantle the lid before cleaning 1 Remove the filler cap 2 Push the lid inner section out 3 Remove the seal from the lid inner section O After washing fit the seal back on to the outer lid section with the thicker edge uppermost and reverse the above p...

Страница 26: ... or the website specific to your Country O Designed and engineered by Kenwood in the UK O Made in China IMPORTANT INFORMATION FOR CORRECT DISPOSAL OF THE PRODUCT IN ACCORDANCE WITH THE EUROPEAN DIRECTIVE ON WASTE ELECTRICAL AND ELECTRONIC EQUIPMENT WEEE At the end of its working life the product must not be disposed of as urban waste It must be taken to a special local authority differentiated was...

Страница 27: ...lug seal not fitted correctly Check bowl seal is in place and fitted correctly Timer not counting down on display screen During the heating stage the timer will not count down until the correct temperature is reached Temperature set above 100 C but water content of food preventing temperature going above 100 C Normal operation Reduce or select correct temperature Temperature of bowl contents does ...

Страница 28: ...D or MOTOR STALLED Appliance overloaded Reduce the quantity in the bowl Display shows error message starting with E Appliance not functioning correctly Switch off and unplug the unit Then plug back in and restart If the problem persists contact your nearest authorised Kenwood Service Centre To find up to date details of your nearest Kenwood service centre visit www kenwoodworld com or the website ...

Страница 29: ...geven symbolen 35 handmatige stand 36 37 de ingestelde programma s gebruiken 38 44 Hoofdmaaltijd programma 39 40 Saus programma 40 Stoom programma 41 42 Soep programma 43 Roerbak programma 43 Dessert programma 44 tabel met aanbevolen snelheden 45 46 verzorging en reiniging 46 47 onderhoud en klantenservice 47 problemen oplossen 48 49 Nederlands ...

Страница 30: ... giet zodat u geen brandwonden oploopt door hete ingrediënten O Het mes is zo ontworpen dat het op de draaias past en mag alleen worden verwijderd wanneer de kom leeg is Het mes is scherp ga er dus altijd voorzichtig mee om O Steek geen handen of keukengerei in de kom wanneer de stekker in het stopcontact steekt O Als u de machine in de kookstand zonder toezicht laat werken moet u goed op het volg...

Страница 31: ... niet overschrijden Verwijder alle overtollige vloeistof of extra water uit de voedingsmiddelen voordat u ze aan de olie toevoegt O Zorg ervoor dat het motorgedeelte het snoer en de stekker nooit nat worden O Wees voorzichtig wanneer u een onderdeel van de machine verplaatst of aanraakt terwijl het in de kookstand wordt gebruikt of na het koken Dit geldt vooral voor de kom het deksel en de hulpstu...

Страница 32: ...ne raakt beschadigd en kan letsel veroorzaken als er teveel druk op het vergrendelingsmechanisme wordt uitgeoefend O Tijdens het gebruik moet deze machine op een horizontaal oppervlak staan weg van de rand Plaats de machine niet onder overhangende keukenkastjes O Deze machine kan niet worden bediend met een externe timer of een afzonderlijke afstandsbediening O Zorg er altijd voor dat de voedingsm...

Страница 33: ...ld als het apparaat niet correct wordt gebruikt of als deze instructies niet worden opgevolgd Direct Prep hulpstuk O De schijven zijn erg scherp wees voorzichtig wanneer u ze plaatst verwijdert en reinigt Houd het meselement altijd aan de vingergreep vast houd uw vingers uit de buurt van de snijrand zowel tijdens de verplaatsing als tijdens de reiniging O Verwijder het deksel nooit voordat de schi...

Страница 34: ...t het rauwe sap niet op ondergelegen voedingsmiddelen kan druppelen O U mag nooit gekookte rijst in het stoomplaathulpstuk opnieuw opwarmen voordat u de stekker in het stopcontact steekt O Controleer of de elektriciteitsvoorziening dezelfde spanning heeft als op de onderkant van het apparaat wordt aangegeven O WAARSCHUWING DIT APPARAAT MOET GEAARD ZIJN O Dit apparaat voldoet aan EG Verordening 193...

Страница 35: ... snelheidsselectie 8 kookstand symbool Direct Prep 9 stamper meetbeker toevoerbuis 1 Direct Prep deksel 2 draaias 3 schijf 1 extra fijne raspschijf indien meegeleverd 2 fijne raspschijf indien meegeleverd 3 grove raspschijf 4 snijschijf dunne plakken 5 snijschijf dikke plakken indien meegeleverd 4 slingerplaat 5 onderstel 6 uitlaat voedingsmiddelen 7 verlengtrechter 8 toren 9 opbergzak voor schijv...

Страница 36: ...t deksel omlaag en draai het naar links totdat het uitgelijnd is met de handvatten van de kookkom De machine functioneert niet tenzij het deksel goed is bevestigd en vergrendeld 7 Druk op de start stop knop 1 van de kookkom om het kookproces te starten 8 Ingestelde programma s na afloop van elke fase en zodra het koken is afgelopen piept de machine en gaat hij automatisch 30 minuten op de warmhoud...

Страница 37: ...es weer wilt horen zet u de machine uit en weer aan de Direct Prep gebruiken de snijschijven Niet alle hier vermelde schijven zitten in uw doos omdat de meegeleverde schijven afhangen van het specifieke machinemodel Lees het deel onderhoud en klantenservice voor informatie over hoe u een schijf kunt kopen die niet met uw machine is meegeleverd De snijschijven worden geïdentificeerd aan de nummers ...

Страница 38: ...s met de Til het hulpstuk omhoog O Schakel de machine altijd uit voordat u het deksel van de Direct Prep verwijdert belangrijk O De toren kan alleen naar rechts worden gedraaid Probeer de toren nooit naar links te draaien omdat hij dan beschadigd raakt O Als er geen ingrediënten uit de uitlaat komen schakelt u de machine uit en controleert u of de voedingsmiddelen zich onder de schijf hebben opgeh...

Страница 39: ... tijdens de werking 3 seconden ingedrukt om te schakelen tussen de ingestelde temperatuur en de actuele temperatuur De ingestelde tijd in uren minuten en seconden De tijd kan worden ingesteld van 5 seconden Æ 8 uren en telt af zodra de start stop knop wordt ingedrukt Als er geen tijd in de handmatige stand is ingesteld zal de tijd optellen De ingestelde snelheidsfunctie De snelheid kan worden inge...

Страница 40: ...len tot maximaal 8 uren O Als u de machine wilt resetten op 00 00 houdt u de tijdknop en de knoppen en 3 seconden ingedrukt speed Er zijn twaalf snelheidsinstellingen waarmee u de juiste instelling voor individuele recepten kunt selecteren Sommige recepten moeten voortdurend worden geroerd om te voorkomen dat de ingrediënten aan de bodem van de kom blijven plakken terwijl andere recepten slechts a...

Страница 41: ...de gewenste verwerkingssnelheid wordt bereikt De knop functioneert maximaal 2 minuten voordat hij automatisch uitschakelt Als u de werking wilt stoppen voordat de 2 minuten zijn verstreken drukt u op Annuleren of opnieuw op Snijden O Bevestig altijd de vuldop wanneer u de snijfunctie gebruikt Nadat u een programma hebt gekozen of de gewenste functie met de hand hebt ingesteld drukt u eenmaal op de...

Страница 42: ... kunnen de temperatuur tijd en snelheidsinstellingen naar wens worden aangepast Druk op de start stop knop 1 en selecteer de instelling die moet worden aangepast Gebruik de knoppen en om de instelling te veranderen en druk op de start stop knop om door te gaan met koken O Gebruik de meegeleverde spatel om de ingrediënten tussen de verschillende programmafasen van de komwand naar beneden te schrape...

Страница 43: ...eistof toevoegen 98 C 3 30 min N v t N v t N v t Rundvleesstoofpot RISOTTO Olie toevoegen 140 C 3 Opwarmen Rijst toevoegen 140 C 4 4 min Groente en vlees toevoegen 140 C 4 2 min dan 3 3 min Vloeistof toevoegen 98 C 4 9 min Kip risotto STOOFSCHOTELS Olie toevoegen 140 C 3 Opwarmen Vlees toevoegen 180 C 4 2 min dan 140 C 3 3 min Groente toevoegen 140 C 1 10 min Vloeistof toevoegen 98 C 1 2 hours Run...

Страница 44: ... 3 10 min Suiker en smaakstoffen toevoegen 98 C 4 30 min PUREE Groente Mengen en vlees toevoegen 100 C 3 Opwarmen dan 98 C 4 10 min Æ 2 min N v t Wortelpuree ingestelde snelheid Opmerking Tijdens de verwarmingscyclus van elke fase wordt OPWARMEN op het display weergegeven De tijd begint pas af te tellen zodra de juiste temperatuur is bereikt Hoofdmaaltijd programma 7 Opmerking Tijdens de verwarmin...

Страница 45: ...merking O De tijd begint pas af te tellen wanneer het water het stoompunt heeft bereikt De tijd die op het scherm wordt weergegeven knippert totdat het stoompunt is bereikt Hints Tips O De temperatuur staat vast op 100 C en de snelheidsopties kunnen niet worden gekozen O De kooktijden dienen slechts als richtlijn Zorg ervoor dat het eten goed gaar is voordat u het serveert O Als het eten nog niet ...

Страница 46: ...dunne plakjes snijden 15 25 Broccoli 800 g In roosjes snijden 15 25 Bloemkool 1 5 kg In roosjes snijden 15 25 Wortelen 800 g In dunne plakjes snijden 20 30 Zoete aardappel 1 5 kg In blokjes van 3 cm snijden 20 30 Kipfilet 12 2 kg 20 30 Vis filetstuk of steak 8 1 4 kg 20 25 Hele vis bijv forel 600 g Wassen en alle ingewanden en schubben verwijderen 20 30 Zoete gestoomde pudding zelfgemaakt 1 2 lite...

Страница 47: ...2 10 min Vloeistof toevoegen 98 C 2 30 min LLambouillon dikke soepen ingestelde snelheid Opmerking Tijdens de verwarmingscyclus van elke fase wordt OPWARMEN op het display weergegeven De tijd begint pas af te tellen zodra de juiste temperatuur is bereikt Roerbak programma 1 Receptideeën dienen alleen als richtlijn pas ze aan uw persoonlijke smaak en voorkeuren aan Fase 1 Fase 2 Fase 3 Fase 4 Gebru...

Страница 48: ...nten toevoegen 2 min Vloeistof toevoegen 98 C 5 Opwarmen dan 6 10 min N v t Custard crème brûlée DEEG Water en gist toevoegen 2 min Droge ingrediënten toevoegen 3 min N v t Brood ingestelde snelheid Brood maken O Maximaal 400 g bloemgewicht 640 g totaalgewicht anders wordt de machine overbelast O Gebruik het mes op snelheid 10 om het deeg te kneden O Kneed niet langer dan 3 minuten O Gebruik lauw ...

Страница 49: ... g Gebaksdeeg boter met bloem mengen Water toevoegen om gebak ingrediënten te mengen 12 15 sec 15 sec 150 200 g bloemgewicht Chocola fijnsnijden bijv om te smelten 12 40 sec Tot 200 g IJs vergruizelen 12 25 30 sec Tot 250 g 12 klontjes Bloemkool fijnsnijden bijv voor bloemkoolrijst 12 20 sec Tot 500 g 1 bloemkool in roosjes gesneden All in one cakemix 12 20 30 sec Tot 600 g totaalgewicht mengsel m...

Страница 50: ...rkant van de kom naar links los 2 Verwijder de draaias 1 of de komplug 3 Verwijder en reinig de afdichtring 2 of 1 4 Maak de komaandrijving of de komplug met heet zeepsop schoon en spoel het element goed onder de kraan 5 Zorg ervoor dat de afdichting weer goed op de draaias of komplug wordt geplaatst voordat u de kom terugzet Deksel O Verwijder altijd het deksel voordat u gaat schoonmaken 1 Verwij...

Страница 51: ...t product is gedekt door een garantie die voldoet aan alle wettelijke regels voor bestaande garanties en consumentenrechten die gelden in het land waar het product is gekocht O Als uw Kenwood product niet goed functioneert of als u defecten opmerkt kunt u het naar een erkend Service Center van KENWOOD sturen of brengen Voor informatie over het KENWOOD Service Center in uw buurt gaat u naar www ken...

Страница 52: ...erking De afdichting is niet goed in het deksel aangebracht Raadpleeg verzorging en reiniging voor informatie over het bevestigen van de afdichting De roersnelheid kan niet worden verhoogd De temperatuur van de kom of van de ingrediënten is hoger dan 105 C Normale werking Roersnelheid beperkt tot snelheid 6 wanneer de temperatuur van de kom of van de ingrediënten hoger is dan 105 C Vloeistof lekt ...

Страница 53: ... TRILLINGEN verschijnt op het scherm Ongelijkmatige lading in de kom veroorzaakt te veel trillingen Reduceer de hoeveelheid of verspreid de ingrediënten regelmatig in de kom en start de machine opnieuw Op het display staat MOTOR OVERVERHIT De machine is oververhit geraakt Schakel de machine uit en haal de stekker uit het stopcontact Laat de machine 30 minuten afkoelen en steek de stekker weer in h...

Страница 54: ...oles sur l écran D affichage 60 Mode manuel 61 62 Utilisation des programmes automatiques 63 69 Programme plat principal 64 Programme sauces 65 Programme cuisson à la vapeur 66 67 Programme soupes 68 Programme sauté wok 68 Programme desserts 69 Tableau des utilisations recommandées 69 70 Entretien et nettoyage 71 72 Service après vente 72 Guide de dépannage 73 74 Français ...

Страница 55: ...ssures des ingrédients O Le Couteau hachoir a été conçue pour demeurer sur l axe d entraînement et ne doit être retirée que lorsque le contenu a été versé hors du bol Les lames sont tranchantes maniez les avec précaution O Veillez à maintenir vos mains et tout ustensile hors du bol tant que l appareil demeure branché O Lorsque vous laissez l appareil sans surveillance en mode cuisson faites très a...

Страница 56: ...r des aliments à l huile O Ne mouillez jamais le bloc moteur le cordon d alimentation ou la prise O Faites attention lorsque vous manipulez ou touchez une quelconque partie de l appareil tant qu il fonctionne en mode cuisson ou immédiatement après la cuisson Et plus particulièrement le bol le couvercle et les accessoires car ils demeurent toujours chauds bien après que l appareil a été éteint O Ut...

Страница 57: ...ouche Démarrer Pause ou Annuler O Si le mécanisme de verrouillage est soumis à une force excessive l appareil sera endommagé et susceptible de provoquer des blessures O Lorsque vous utilisez cet appareil veillez à ce qu il soit placé sur une surface plane éloignée du bord Ne le disposez pas juste au dessous de placards en hauteur O Cet appareil n est pas conçu pour fonctionner avec un minuteur ext...

Страница 58: ...l qu à des fins domestiques Kenwood décline toute responsabilité dans les cas où l appareil est utilisé incorrectement ou que les présentes instructions ne sont pas respectées Accessoire Direct Prep O Les disques sont très tranchants manipulez les avec soin lorsque vous les installez les retirez ou les nettoyez Saisissez toujours par l encoche pour le doigt loin du bord tranchant lorsque vous mani...

Страница 59: ...sson dans le panier inférieur de sorte que le jus des aliments ne puisse pas tomber sur les aliments du dessous O Ne réchauffez pas du riz déjà cuit dans le panier vapeur de votre cuiseur vapeur avant de brancher l appareil O Assurez vous que votre alimentation électrique correspond à celle qui est indiquée sur la partie inférieure de votre appareil O AVERTISSEMENT CET APPAREIL DOIT ÊTRE RELIÉ À L...

Страница 60: ...on Touche Mixer 1 Touche Start Stop marche arrêt bol de cuisson 2 Touche Start Stop marche arrêt Direct Prep symboles de l écran de contrôle 3 affichage de la température 4 symbole bol chaud 5 affichage des textes 6 affichage de la durée 7 affichage de la vitesse 8 mode sans surveillance Direct Prep 9 poussoir gobelet doseur cheminée d alimentation 1 couvercle du Direct Prep 2 axe d entraînement 3...

Страница 61: ...sation Couteau hachoir Pour hacher des ingrédients avant de les cuire et pour les transformer en purée une fois la cuisson terminée Mélangeur Pour des recettes nécessitant de mélanger délicatement sans briser les ingrédients Emulsionneur Pour fouetter des ingrédients légers tels que des blancs d œuf de la crème de la mayonnaise et la sauce hollandaise 5 Ajoutez les ingrédients devant être traités ...

Страница 62: ...aites chauffer de l huile O La viande crue et les légumes durs doivent être coupés en petits morceaux avant d être insérés dans le bol O Utilisez le Direct Prep pour râper ou émincer les ingrédients directement dans le bol voir la section utilisation de votre Direct Prep O Pour éviter que les aliments accrochent ou brûlent utilisez toujours l un des accessoires fournis lorsque vous faites des rece...

Страница 63: ...peut être installée en la faisant glisser à l intérieur de la sortie des aliments 6 Remarque lorsque chacune des positions est atteinte un clic se fait entendre et le dessin correspondant est aligné sur le présent sur l appareil 9 Coupez les aliments pour les passer dans la cheminée d alimentation et 10Appuyez sur la touche Start Stop du Direct Prep et simultanément appuyez uniformément avec le po...

Страница 64: ...e de température pendant 3 secondes tandis que l appareil fonctionne pour permuter entre la température sélectionnée et celle actuelle Indique la durée sélectionnée en heures minutes et secondes La durée peut aller de 5 secondes Æ 8 heures et le décompte démarre lorsque la touche Start Stop est appuyée Si aucune durée n est sélectionnée en mode manuel le minuteur lance le décompte Indique la vites...

Страница 65: ...er le compteur sur 00 00 appuyez et maintenez enfoncée la touche de durée et les touches et pendant 3 secondes speed Douze types de vitesse sont disponibles selon vos recettes Certaines recettes nécessitent un mélange constant pour éviter que les ingrédients n accrochent au fond du bol tandis que d autres requièrent un mélange intermittent pour conserver la consistance des aliments Des vitesses pl...

Страница 66: ...à ce que la vitesse désirée soit atteinte La touche fonctionne pendant un maximum de 2 minutes avant de s éteindre automatiquement Pour arrêter l opération avant la fin des 2 minutes appuyez une nouvelle fois soit sur la touche Annuler soit sur la touche Mixer O Le bouchon du couvercle doit toujours être installé lorsque vous utilisez la fonction Mixer Après avoir sélectionné un programme ou réglé...

Страница 67: ... modifier le paramètre puis appuyez sur la touche Start Stop pour reprendre la cuisson O Utilisez la spatule fournie pour racler les ingrédients vers le bas entre chaque phase du programme Le nombre d étapes disponibles pour chaque sous programme varie Le tableau ci dessous présente les plages de réglages de température de durée et de vitesse disponibles pour chaque étape Étape Plage de températur...

Страница 68: ...1 10 minutes Ajoutez le liquide 98 C 1 2 heures Plat au bœuf PLATS VÉGÉTARIENS Ajoutez de l huile 140 C 3 Chauffer Ajoutez les légumes 120 C 3 10 minutes Ajoutez le liquide 98 C 3 30 minutes N A Ragoût aux pois chiche CUISSON BASSE TEMPERATURE 95 C Æ 90 C Chauffer Æ 2 heures N A N A l adaptateur fond plat vitesse sélectionnée Remarque pendant le cycle de chauffe à chaque étape CHAUFFE apparaît à l...

Страница 69: ...s Ajoutez de la farine 110 C 6 5 minutes Ajoutez le liquide 98 C 6 15 minutes Sauce béchamel sauce au fromage sauce au persil COMPOTES ET CHUTNEYS Ajoutez de l huile 140 C 3 Chauffer Ajoutez les fruits ou les légumes 120 C 3 10 minutes Ajoutez le sucre et les aromes 98 C 4 30 minutes PUREE ET PESTO Ajoutez les Mélangez légumes et le liquide 100 C 3 Chauffer puis 98 C 4 10 minutes Æ 2 minutes N A P...

Страница 70: ...uisson à la vapeur est atteint Remarque O Le minuteur ne déclenche pas le compte à rebours tant que l eau n a pas atteint le point d ébullition L heure affichée sur l écran se met à clignoter jusqu à ce que le point d ébullition soit atteint Astuces conseils O La température est fixée à 100 C et les choix des vitesses ne peuvent pas être sélectionnés O Les durées de cuisson sont fournies à titre i...

Страница 71: ...ement 15 25 Brocolis 800 g Découpez en bouquets 15 25 Chou fleur 1 5 kg Découpez en bouquets 15 25 Carottes 800 g Émincez finement 20 30 Patate douce 1 5 kg Coupez en cubes de 3 cm 20 30 Poulet Poitrine désossée 12 2 kg 20 30 Poisson Filets ou Steak 8 1 4 kg 20 25 Poisson entier par exemple une truite 600 g Nettoyez évidez et écaillez le poisson 20 30 Flan sucré cuit à la vapeur fait maison 1 2 li...

Страница 72: ...Sous pro gramme Étape 1 Étape 2 Étape 3 Étape 4 Acces soire utilisé Idées de recette INGRÉDIENTS 1 INGRÉDIENTS 2 INGRÉDIENTS 3 INGRÉDIENTS 4 SOUPES RAPIDES Ajoutez Mélangez les légumes et le liquide 100 C 1 30 minutes Æ 2 minutes N A N A Soupe de légumes VELOUTÉS Ajoutez de l huile 140 C 3 Chauffer Ajoutez les légumes 180 C 2 5 minutes Ajoutez le Mélangez liquide 98 C 3 20 minutesÆ 2 minutes Soupe...

Страница 73: ... de recettes adaptez selon vos goûts et préférences personnels Sous programme Étape 1 Étape 2 Étape 3 Accessoire utilisé Idées de recette CRÈMES Ajoutez des Ingrédients secs 2 minutes Ajoutez le liquide 98 C 5 Chauffer puis 6 10 mins N A Crème crème brûlée PATES Ajoutez l eau et la levure 2 minutes Ajoutez des Ingrédients secondes 3 minutes N A Pain vitesse sélectionnée Pour faire du pain O Ne pas...

Страница 74: ...econdes Jusqu à 500 g 1 tête découpée en petits bouquets Mélanges à gâteau tout en un 12 20 30 secondes Jusqu à 600 g de poids total mélange à base de 3 œufs Boissons et smoothies 12 60 secondes 1 litre Mélanges froids 12 1 2 minutes 2 6 litres Pâte à pain 10 3 minutes 640 g de poids total 400 g de farine Blancs d œuf 8 9 3 4 minutes 2 8 70 280 g Crème fouettée 9 1 1 minutes 200 g 600 g Mayonnaise...

Страница 75: ... 1 et lavez le à la main 4 Brossez et nettoyez les pièces à l eau chaude savonneuse puis rincez soigneusement sous l eau du robinet 5 Assurez vous que le joint est correctement réinstallé sur l axe d entraînement ou l adaptateur fond plat avant de le réinstaller sur le bol Couvercle O Démontez toujours le couvercle avant de le nettoyer 1 Retirez le bouchon 2 Sortez la partie intérieure du couvercl...

Страница 76: ...u l apporter à un centre de réparation KENWOOD autorisé Pour trouver des détails actualisés sur votre centre de réparation KENWOOD le plus proche veuillez consulter www kenwoodworld com ou le site internet spécifique à votre pays O Conçu et développé par Kenwood au Royaume Uni O Fabriqué en Chine AVERTISSEMENTS POUR L ÉLIMINATION CORRECTE DU PRODUIT CONFORMÉMENT AUX TERMES DE LA DIRECTIVE EUROPÉEN...

Страница 77: ... du couvercle n est pas correctement installé sur le couvercle Reportez vous à la section entretien et nettoyage pour savoir comment installer le joint La vitesse de mixage ne peut pas être augmentée La température du bol ou des ingrédients est supérieure à 105 C Fonctionnement normal La vitesse de mixage est limitée à la vitesse 6 lorsque la température du bol des ingrédients est supérieure à 105...

Страница 78: ...lorsque l appareil fonctionne et le message VIBRATIONS EXCESSIVES apparaît à l écran Une charge inégale des aliments dans le bol provoque des vibrations excessives Réduisez la quantité ou répartissez uniformément les aliments dans le bol et redémarrez l appareil L écran affiche MOTEUR EN SURCHAUFFE L appareil a trop chauffé Éteignez et débranchez l appareil Laissez refroidir pendant 30 minutes pui...

Страница 79: ...p Aufsatzes 83 84 Erläuterung der Display Symbole 85 Manueller Modus 86 87 Verwendung der Programme 88 94 Hauptgericht Programm 89 90 Soßen Programm 90 Dampfgar Programm 91 92 Suppen Programm 93 Sautiern Programm 93 Dessert Programm 94 Empfehlungstabelle 94 95 Pflege und Reinigung 96 97 Kundendienst und Service 97 Fehlerbehebung 98 99 Deutsch ...

Страница 80: ... Verbrennungen aufgrund heißer Spritzer zu vermeiden O Das Schlagmesser ist so ausgelegt dass es fest auf der Antriebswelle sitzt und sollte erst nach Entleeren der Schüssel abgenommen werden Vorsicht das Schlagmesser ist sehr scharf O Hände und Utensilien nicht in die Schüssel halten während das Gerät an den Netzstrom angeschlossen ist O Wenn Sie das Gerät im Kochmodus unbeaufsichtigt lassen bitt...

Страница 81: ...in das Öl gelegt wird O Antriebseinheit Netzkabel und Netzstecker niemals nass werden lassen O Vorsicht beim Handhaben oder Berühren irgendwelcher Teile des Geräts im Kochmodus oder nach dem Kochen Das gilt vor allem für die Schüssel den Deckel und Zubehörteile da sie noch lange nach Ausschalten des Geräts HEISS bleiben O Schüssel beim Abnehmen und Tragen an ihren Griffen anfassen Topflappen zum H...

Страница 82: ... wird beschädigt und kann Verletzungen verursachen wenn der Verriegelungsmechanismus mit zu viel Kraftaufwand betätigt wird O Bei Gebrauch dieses Geräts sicherstellen dass es auf einer ebenen Oberfläche und nicht direkt an der Kante steht Nicht unter Hängeschränken aufstellen O Dieses Gerät ist nicht für den Betrieb mit einer externen Zeitschaltuhr oder einer separaten Fernbedienung vorgesehen O V...

Страница 83: ...lassen dass ein Kind danach greifen könnte O Das Gerät nur für seinen vorgesehenen Zweck im Haushalt verwenden Kenwood übernimmt keine Haftung bei unsachgemäßer Benutzung des Geräts oder Nichteinhaltung dieser Anleitungen Direct Prep Aufsatz O Vorsicht beim Einsetzen Herausnehmen und Reinigen der Arbeitsscheiben sie sind sehr scharf Bei Gebrauch und Reinigung immer am Fingergriff weg von den Kling...

Страница 84: ...eben Sie beim Benutzen von Dampfgarbecken und sieb Fleisch Geflügel und Fisch in den unteren Teil damit die rohen Säfte nicht auf darunter befindliches Dampfgargut tropfen können O Wärmen Sie keinen gekochten Reis in Ihrem Dampfgar Aufsatz auf Vor dem Anschluss O Sicherstellen dass die Netzspannung mit den Angaben auf der Unterseite des Geräts übereinstimmt O WARNUNG DIESES GERÄT MUSS GEERDET SEIN...

Страница 85: ...Taste Direct Prep Display Symbole 3 Temperaturauswahl 4 Achtung heiße Temperatur 5 Textanzeige 6 Zeiteinstellung 7 Geschwindigkeitsauswahl 8 Kochmodus Direct Prep Aufsatz 9 Stopfer Messbecher Füllschacht 1 Direct Prep Deckel 2 Antriebswelle 3 Arbeitsscheibe 1 Raspelscheibe extrafein wenn im Lieferumfang 2 Raspelscheibe fein wenn im Lieferumfang 3 Raspelscheibe grob 4 Schneidscheibe dünne Scheiben ...

Страница 86: ...rwendung Schlagmesser Zum Zerkleinern von Zutaten vor dem Kochen und Pürieren nach dem Kochen Rührelement Für Rezepte bei denen ein langsames Rühren ohne Zerkleinerung der Zutaten erforderlich ist Schneebesen Zum Schlagen von leichten Zutaten wie Eiweiß Sahne Mayonnaise und Sauce Hollandaise 5 Geben Sie die Zutaten hinein die verarbeitet oder gekocht werden sollen 6 Setzen Sie den Deckel und die E...

Страница 87: ...und hartes Gemüse sollten vor dem Hinzugeben in die Schüssel in kleine Stücke zerschnitten werden O Den Direct Prep Aufsatz zum Raspeln oder Schneiden von Zutaten direkt in die Schüssel verwenden siehe Abschnitt Direct Prep Aufsatz O Bei der Zubereitung von Speisen auf Milchbasis stets eines der Verarbeitungselemente verwenden um zu verhindern dass Zutaten festkleben oder einbrennen O Zutaten in g...

Страница 88: ...n einen geeigneten Behälter In Position kann die Auslassverlängerung 7 auf den Schnittgutauslass 6 gesteckt werden Hinweis In jeder der Positionen rastet der Aufsatz hörbar ein wenn das Symbol auf den Pfeil am Gerät trifft 9 Schneiden Sie das Schnittgut so zu so dass es in den Füllschacht passt 10Drücken Sie die Direct Prep Start Stopp Taste und schieben Sie das Schnittgut gleichmäßig mit dem Stop...

Страница 89: ...ischen ausgewählter und tatsächlicher Temperatur hin und her zu schalten Zeigt die ausgewählte Zeit in Stunden Minuten und Sekunden an Die Zeit kann von 5 Sekunden Æ 8 Stunden eingestellt werden und zählt abwärts sobald die Start Stopp Taste gedrückt wird Wenn im manuellen Modus keine Zeit eingestellt ist zählt die Zeit aufwärts Zeigt die ausgewählte Geschwindigkeit an Geschwindigkeiten rangieren ...

Страница 90: ...hine mit Kochfunktion aufwärts zu einem Maximum von 8 Stunden Zum Zurücksetzen auf 00 00 die Zeittaste sowie die Tasten und 3 Sekunden gedrückt halten speed Es stehen zwölf Geschwindigkeitseinstellungen für verschiedene Rezepte zur Auswahl Einige Rezepte erfordern ständiges Rühren damit die Zutaten sich nicht am Schüsselboden festsetzen bei anderen ist Rühren mit Unterbrechungen angebracht um die ...

Страница 91: ...beitungsgeschwindigkeit erreicht wird Nach maximal 2 Minuten schaltet sich das Gerät automatisch ab Um den Betrieb vor dem Ende der 2 Minuten zu stoppen entweder die Abbrechen Taste drücken oder die Zerkleinerungstaste erneut betätigen O Bei Verwendung der Zerkleinerungsfunktion sollte stets die Einfüllkappe aufgesetzt sein Nach Auswahl eines Programms oder Einstellung der gewünschten Funktion von...

Страница 92: ... können in jeder Phase Temperatur Zeit und Geschwindigkeitseinstellungen geändert werden Dazu die Start Stopp Taste 1 drücken und die Einstellung wählen die geändert werden soll Mit den Tasten und die Einstellung ändern und dann die Start Stopp Taste drücken um den Kochvorgang fortzusetzen O Zwischen jeder Programmphase die Zutaten mit dem zugehörigen Spatel von den Seiten der Schüssel nach unten ...

Страница 93: ...hinzugeben 98 C 3 30 Minuten N A N A N A Rindereintopf RISOTTO Öl hinzugeben 140 C 3 Aufheizen Reis hinzugeben 140 C 4 4 Minuten Gemüse Fleisch hinzugeben 140 C 4 2 Minuten dann 3 3 Minuten Flüssigkeit hinzugeben 98 C 4 9 Minuten Hühnchen Risotto EINTÖPFE Öl hinzugeben 140 C 3 Aufheizen Fleisch hinzugeben 180 C 4 2 Minuten dann 140 C 3 3 Minuten Gemüse hinzugeben 140 C 1 10 Minuten Flüssigkeit hin...

Страница 94: ...ürze hinzugeben 98 C 4 30 Minuten PÜREE Gemüse Pürieren Flüssigk hinzugeben 100 C 3 Aufheizen dann 98 C 4 10 Minuten Æ 2 Minuten N A Karottenpüree ausgewählte Geschwindigkeit Hinweis Während des Aufheizvorgangs in jeder Phase wird AUFHEIZEN auf dem Display angezeigt und die Zeit zählt erst dann herunter wenn die richtige Temperatur erreicht ist ausgewählte Geschwindigkeit Hinweis Während des Aufhe...

Страница 95: ... Taste um den Dampfgarvorgang zu starten Das Gerät piept sobald der Dampfpunkt erreicht ist Hinweis O Die Zeit zählt erst dann herunter wenn das Wasser zu dampfen beginnt Die auf dem Display angezeigte Zeit blinkt bis der Dampfpunkt erreicht ist Tipps und Hinweise O Die Temperatur ist auf 100 C festgelegt und Geschwindigkeitsoptionen stehen nicht zur Auswahl O Die Garzeiten dienen lediglich zur al...

Страница 96: ...chen teilen 15 25 Blumenkohl 1 5 kg In Röschen teilen 15 25 Karotten 800 g In dünne Scheiben schneiden 20 30 Süßkartoffeln 1 5 kg In 3 cm große Stücke schneiden 20 30 Hühnchenbrust entbeint 12 2 kg 20 30 Fisch Filets oder Steak 8 1 4 kg 20 25 Ganzer Fisch z B Forelle 600 g Säubern ausnehmen und entschuppen 20 30 Dampfgegarter süßer Pudding hausgemacht 1 2 Liter 14 cm Durchmesser Puddingform 1 2 St...

Страница 97: ...bitte nach eigenem Geschmack und Bedarf ändern Unterprogramm Phase 1 Phase 2 Phase 3 Phase 4 Verwen detes Zubehör Rezept vorschläge ZUTATEN 1 ZUTATEN 2 ZUTATEN 3 ZUTATEN 4 SCHNELLE SUPPEN Gemüse Pürieren Flüssigk hinzugeben 100 C 1 30 Minuten Æ 2 Minuten N A N A Gemüsesuppe CREMIGE SUPPEN Öl hinzugeben 140 C 3 Aufheizen Gemüse hinzugeben 180 C 2 5 Minuten Flüssigkeit Pürieren hinzugeben 98 C 3 20 ...

Страница 98: ...ch eigenem Geschmack und Bedarf ändern Unterprogramm Phase 1 Phase 2 Phase 3 Verwende tes Zube hör Rezept vorschläge DESSERTSOSSEN Trockene Zutaten hinzugeben 2 Minuten Flüssigkeit hinzugeben 98 C 5 Aufheizen dann 6 10 Minuten N A Vanillesoße Crème Brûlée TEIG Wasser und Hefe hinzugeben 2 Minuten Trockene Zutaten hinzugeben 3 Minuten N A Brot ausgewählte Geschwindigkeit Brotzubereitung O Nicht 400...

Страница 99: ... Schneller Kuchenteig alles in einem 12 20 30 Sek Bis zu 600 g Gesamtgewicht mit 3 Eiern Getränke und Smoothies 12 60 Sek 1 Liter Mischen kalter Zutaten 12 1 2 Minuten 2 6 Liter Brotteig 10 3 Minuten 640 g Gesamtgewicht 400 g Mehlgewicht Eiweiß 8 9 3 4 Minuten 2 8 70 g 280 g Schlagsahne 9 1 1 Minuten 200 g 600 g Mayonnaise 12 1 1 Minuten Mischung aus 2 4 Eiern Rezept für Müsliriegel Phase 1 Butter...

Страница 100: ...ßem Wasser und Spülmittel sauber bürsten und dann unter fließendem Wasser gründlich abspülen 5 Vor dem erneuten Einsetzen der Antriebswelle oder des Schüsselpfropfens in die Schüssel sicherstellen dass der Dichtungsring richtig eingesetzt ist Deckel O Den Deckel vor dem Reinigen stets zerlegen 1 Die Einfüllkappe entfernen 2 Den inneren Deckelteil herausdrücken 3 Den Dichtungsring vom Innendeckel e...

Страница 101: ...dworld com bzw auf der Website für Ihr Land O Gestaltet und entwickelt von Kenwood GB O Hergestellt in China WICHTIGER HINWEIS FÜR DIE KORREKTE ENTSORGUNG DES PRODUKTS IN ÜBEREINSTIMMUNG MIT DER EG RICHTLINIE ÜBER ELEKTRO UND ELEKTRONIK ALTGERÄTE WEEE Am Ende seiner Nutzungszeit darf das Produkt NICHT mit dem Hausmüll entsorgt werden Es muss zu einer örtlichen Sammelstelle für Sondermüll oder zu e...

Страница 102: ...t beim Verarbeiten Dichtungsring nicht richtig in den Deckel eingesetzt Zum Einsetzen des Dichtungsrings siehe Reinigung und Pflege Rührgeschwindigkeit lässt sich nicht erhöhen Temperatur der Schüssel oder Zutaten über 105 C Normaler Betrieb Rührgeschwindigkeit auf 6 begrenzt wenn Temperatur von Schüssel oder Zutaten 105 C überschreitet Schüsselboden leckt beim Verarbeiten Dichtungsring sitzt nich...

Страница 103: ...erneut starten Starke Bewegung bei Betrieb und auf dem Display wird ZU STARKE VIBRATION angezeigt Ungleichmäßige Befüllung der Schüssel löst starkes Vibrieren aus Menge reduzieren oder Zutaten besser in der Schüssel verteilen und Gerät neu starten Auf dem Display erscheint MOTOR ÜBERHITZT Gerät ist überhitzt Gerät ausschalten und Stecker ziehen 30 Minuten abkühlen lassen und dann wieder anschließe...

Страница 104: ...lay 110 modalità manuale 111 112 utilizzo programmi preimpostati 113 120 Programma piatto principale 114 115 Programma salse 116 Programma cottura a vapore 117 118 Programma zuppa 119 Programma sautè 120 Programma dessert 120 tabella usi consigliati 121 122 manutenzione e pulizia 122 123 manutenzione e assistenza tecnica 123 guida alla ricerca dei guasti 124 125 Italiano ...

Страница 105: ... contenuto della ciotola per evitare di bruciarsi schizzandosi con i cibi caldi O La lama è stata progettata per rimanere fissata sull alberino e deve essere rimossa soltanto una volta che la ciotola sia stata svuotata del suo contenuto La lama è affilata Si raccomanda di maneggiarla con cura O Non mettere le mani o gli accessori nella ciotola finché la spina è collegata alla corrente O Quando l a...

Страница 106: ...er friggere in olio abbondante Quando si frigge in poco olio non superare il livello massimo di 0 5 litri indicato sulla ciotola Rimuovere l eccesso di liquido acqua prima di aggiungere cibi all olio O Non bagnare mai il corpo motore il cavo o la spina O Fare attenzione nel toccare o utilizzare qualsiasi parte dell apparecchio quando lo si usa in modalità cottura o subito dopo averlo utilizzato in...

Страница 107: ...ola O Non utilizzare il coperchio per accendere e spegnere l apparecchio utilizzare sempre il pulsante Avvio Stop o Annulla O L apparecchio può rimanere danneggiato e causare lesioni fisiche se il meccanismo di sicurezza viene sforzato eccessivamente O Utilizzare sempre l apparecchio su una superficie piana e lontano dai bordi Non posizionare l apparecchio al di sotto di uno scaffale O Questo appa...

Страница 108: ...tolato il cavo elettrico c è il rischio che possa essere tirato da un bambino O Utilizzare l apparecchio solo per l uso domestico per cui è stato realizzato Kenwood non si assumerà alcuna responsabilità se l apparecchio viene utilizzato in modo improprio o senza seguire le presenti istruzioni Accessorio Direct Prep O I dischi sono molto affilati maneggiarli con attenzione durante il montaggio la r...

Страница 109: ...izza la base e il ripiano del vassoio della vaporiera posizionare la carne il pollame e il pesce sul cestello più basso in modo che i liquidi degli alimenti crudi non colino sul cibo sottostante O Non riscaldare riso già cotto nel vassoio per la cottura a vapore prima di collegare l apparecchio alla rete elettrica O Assicurarsi che la tensione della vostra rete elettrica sia la stessa di quella in...

Страница 110: ...splay di testo 6 Selezione tempo cottura 7 Selezione velocità 8 Modalità di cottura Direct Prep 9 Pressino per alimenti misurino Tubo di riempimento 1 Coperchio Direct Prep 2 Alberino 3 disco 1 disco per grattugiare extra fine se in dotazione 2 disco per grattugiare fine se in dotazione 3 disco per grattugiare grosso 4 disco per tagliare a fette sottili 5 disco per tagliare a fette spesse se in do...

Страница 111: ...ette dove si desidera rimestare delicatamente senza spezzettare gli ingredienti Frusta Per sbattere ingredienti leggeri come bianco d uovo panna maionese e salsa olandese 5 Aggiungere gli ingredienti da lavorare o cucinare 6 Montare il coperchio e il tappo di riempimento Spingere il coperchio verso il basso e ruotarlo in senso antiorario fino a quando non sarà allineato con i manici della ciotola ...

Страница 112: ... da dessert O Tagliare gli ingredienti a pezzetti di dimensioni simili per facilitare la fase di cottura O Usare la spatola in dotazione per raschiare giù gli ingredienti dai lati della ciotola tra una fase e l altra di un programma Spegnere i segnali acustici O L apparecchio emetterà segnali acustici nelle varie fasi di utilizzo Per disattivarli tenere premuto il pulsante Annulla 9 e nello stesso...

Страница 113: ...n infilare mai le dita nel tubo di riempimento O Utilizzare la spatola in dotazione per guidare eventuali pezzi affettati o grattugiati rimasti nel coperchio giù dall apertura del tappo di riempimento 11Per rimuovere l accessorio ruotare in senso orario fino a quando il simbolo non sarà allineato al simbolo e sollevare O Spegnere sempre l apparecchio prima di rimuovere il coperchio del Direct Prep...

Страница 114: ... passare dalla temperatura selezionata alla temperatura effettiva Mostra il tempo selezionato in ore minuti e secondi Il tempo di lavorazione potrà essere impostato da 5 secondi Æ 8 ore e il contatore procederà a contare alla rovescia non appena sarà premuto il pulsante Avvio Stop Se non verrà impostato il tempo di lavorazione in modalità manuale il contatore procederà a contare in crescendo Mostr...

Страница 115: ...acciare e tenere premuto il pulsante del tempo di cottura e i pulsanti e per 3 secondi speed Sono disponibili dodici valori di velocità che permettono di scegliere l impostazione appropriata per ogni singola ricetta Alcune ricette richiedono un mescolamento costante per evitare che gli ingredienti si attacchino al fondo della ciotola mentre per altre è più adatto un mescolamento intermittente che ...

Страница 116: ...avorazione desiderata Il pulsante funzionerà per un massimo di 2 minuti prima di spegnersi automaticamente Per interrompere il funzionamento prima dello scadere dei 2 minuti premere il pulsante Annulla o premere nuovamente il pulsante Tritare O Montare sempre il tappo di riempimento prima di utilizzare la funzione per tritare Una volta selezionato un programma o la funzione desiderata premere il p...

Страница 117: ...ostazioni della temperatura del tempo di cottura e della velocità se necessario possono essere modificate Premere il pulsante Avvio Stop 1 e selezionare il valore impostato da modificare Utilizzare i pulsanti e per modificare l impostazione quindi premere il pulsante Avvio Stop per riprendere la cottura O Usare la spatola in dotazione per raschiare giù gli ingredienti dai lati della ciotola tra un...

Страница 118: ...C 3 30 minuti N A N A N A Spezzatino di manzo RISOTTO Aggiungere olio 140 C 3 Scaldare Aggiungere riso 140 C 4 4 minuti Aggiungere verdure e carne 140 C 4 2 minuti poi 3 3 minuti Aggiungere liquido 98 C 4 9 minuti Risotto al pollo PIATTI IN CASSERUOLA Aggiungere olio 140 C 3 Scaldare Aggiungere carne 180 C 4 2 minuti poi 140 C 3 3 minuti Aggiungere verdure 140 C 1 10 minuti Aggiungere liquido 98 C...

Страница 119: ...o di cottura non comincerà a contare alla rovescia fino a quando non sarà stata raggiunta la temperatura corretta Cottura lenta Rimuovere l alberino della ciotola sbloccando il dado dell alberino 6 sulla parte inferiore della ciotola Quindi sollevare Inserire il tappo della ciotola accertandosi che sia installata la guarnizione 1 e ruotare il dado dell alberino in senso orario per fissarlo in posi...

Страница 120: ...ggiungere liquido 98 C 6 15 minuti Salsa besciamella salsa al formaggio salsa al prezzemolo COMPOSTE E SALSE Aggiungere olio 140 C 3 Scaldare Aggiungere frutta o verdura 120 C 3 10 minuti Aggiungere zucchero e aromi 98 C 4 30 minuti PUREE Aggiungere Frullare verdure e liquido 100 C 3 Scaldare poi 98 C 4 10 minuti Æ 2 minuti N A Purea di carote velocità selezionata N B Durante il ciclo di riscaldam...

Страница 121: ...to e premere il pulsante Avvio Stop per cominciare a cuocere a vapore L apparecchio emetterà un segnale acustico quando sarà raggiunto il punto di generazione del vapore Nota bene O Il contatore non comincerà a contare alla rovescia fino a quando l acqua non avrà raggiunto il punto di evaporazione Il tempo di cottura mostrato sul display lampeggerà fino a quando non sarà raggiunto il punto di evap...

Страница 122: ...30 Petti di pollo disossati 12 2 kg 20 30 Pesce filetti o bistecca 8 1 4 kg 20 25 Pesce intero es trota 600 g Pulire rimuovere le interiora e le scaglie 20 30 Sformato dolce a vapore fatto in casa Scodella per cuocere sformati a vapore da 1 2 litri diametro di 14 cm 1 2 ore Riaggiungere acqua dopo 1 ora Sformato a vapore di carne di manzo o di agnello fatto in casa Scodella per cuocere sformati a ...

Страница 123: ...re verdure 180 C 2 5 minuti Aggiungere Frullare liquido 98 C 3 20 minuti Æ 2 minuti Crema di funghi MINESTRONI Aggiungere olio 140 C 3 Scaldare Aggiungere carne 180 C 4 2 minuti poi 3 3 minuti Aggiungere verdure 140 C 2 10 minuti Aggiungere liquido 98 C 2 30 minuti Brodo di agnello minestre a pezzi velocità selezionata Nota bene Durante il ciclo di riscaldamento di ciascuna fase verrà visualizzata...

Страница 124: ... alla rovescia fino a quando non sarà stata raggiunta la temperatura corretta Programma dessert 2 Ricette puramente indicative adattare a seconda del gusto personale Sotto programma Fase 1 Fase 2 Fase 3 Utensile utilizzato Ricette CREME DA DESSERT Aggiungere ingredienti asciutti 2 minuti Aggiungere liquido 98 C 5 Scaldare poi 6 10 minuti N A Crema pasticcera crème brûlée IMPASTO Aggiungere acqua e...

Страница 125: ...farina Aggiungere acqua per combinare insieme gli ingredienti dell impasto 12 15 sec 15 sec Peso farina 150 g 200 g Sminuzzare cioccolato es per scioglierlo 12 40 sec Fino a 200 g Tritare il ghiaccio 12 25 30 sec Fino a 250 g 12 cubetti Sminuzzare il cavolfiore Es per il riso al cavolfiore 12 20 sec Fino a 500 g 1 testa tagliata in cimette Miscele per torta tutto in uno 12 20 30 sec Fino a 600 g d...

Страница 126: ...o 2 Quindi sollevare fuori l alberino 1 o il tappo della ciotola 3 Rimuovere e lavare l anello di tenuta 2 o 1 4 Spazzolare per pulire il gruppo alberino ciotola o il tappo della ciotola con acqua calda saponata e poi risciacquare abbondantemente sotto il rubinetto 5 Assicurarsi che la guarnizione sia rimontata sull alberino o sul tappo della ciotola correttamente prima di rimontarli sulla ciotola...

Страница 127: ...ne guida alla risoluzione problemi o di visitare il sito www kenwoodworld com O NB L apparecchio è coperto da garanzia nel rispetto di tutte le disposizioni di legge relative a garanzie preesistenti e ai diritti dei consumatori vigenti nel Paese ove l apparecchio è stato acquistato O In caso di guasto o cattivo funzionamento di un apparecchio Kenwood si prega di inviare o consegnare di persona l a...

Страница 128: ...zione del coperchio non è stata montata correttamente Consultare la sezione manutenzione e pulizia per istruzioni su come montare la guarnizione Non si riesce ad incrementare la velocità di mescolamento La temperatura della ciotola o degli ingredienti è superiore a 105 C Funzionamento normale La velocità di mescolamento è limitata a 6 quando la temperatura della ciotola o degli ingredienti supera ...

Страница 129: ...te durante il funzionamento e messaggio VIBRAZIONI ECCESSIVE visualizzato sullo schermo Carico non distribuito uniformemente nella ciotola che causa vibrazioni eccessive Ridurre la quantità o risistemare il cibo nella ciotola e riavviare l apparecchio Il display visualizza il messaggio SURRISCALDAMENTO MOTORE Apparecchio surriscaldato Spegnere e staccare la spina dell apparecchio dalla presa di co...

Страница 130: ...la 136 modo manual 137 138 uso de los programas preestablecidos 139 146 programa para comidas principales 140 141 programa para salsas 142 programa de cocción al vapor 143 144 programa para sopas 145 programa para saltear 146 programa para postres 146 tabla de usos recomendados 147 148 cuidado y limpieza 148 149 servicio técnico y atención al cliente 149 guía de solución de problemas 150 151 Españ...

Страница 131: ...ntes calientes O La cuchilla se ha diseñado para mantenerse en el eje motor y solo debe quitarse una vez que el contenido se haya retirado del bol La cuchilla está muy afilada manéjela con cuidado O Mantenga las manos y los utensilios alejados del bol mientras el aparato esté conectado a la toma de corriente O Cuando deje el aparato desatendido en el modo cocción preste mucha atención a lo siguien...

Страница 132: ...ntos al aceite O No permita que se mojen la unidad de potencia el cable ni el enchufe O Tenga cuidado al manipular o tocar cualquier pieza del aparato cuando se esté utilizando en el modo cocción o después de cocinar en especial el bol la tapa y los utensilios ya que permanecen CALIENTES durante mucho tiempo después de que el aparato se haya desconectado O Use las asas para quitar y transportar el...

Страница 133: ...ce siempre el botón inicio parada o cancelar O Este aparato se estropeará y puede producir lesiones si el mecanismo de enclavamiento se ve sometido a una fuerza excesiva O Al utilizar este aparato asegúrese de que esté colocado sobre una superficie plana alejado de cualquier borde No lo ponga debajo de armarios colgantes O Este aparato no está pensado para ser manejado mediante un temporizador ext...

Страница 134: ...lgue de un lugar donde un niño pueda cogerlo O Utilice este aparato únicamente para el uso doméstico al que está destinado Kenwood no se hará cargo de responsabilidad alguna si el aparato se somete a un uso inadecuado o si no se siguen estas instrucciones Accesorio Direct Prep O Los discos están muy afilados manéjelos con cuidado al colocarlos quitarlos y limpiarlos Sosténgalos siempre por el asa ...

Страница 135: ... la carne y el pescado en la cesta inferior para que su jugo crudo no pueda gotear sobre la comida de abajo O No recaliente arroz cocido en el accesorio de cocción al vapor antes de enchufar el aparato O Asegúrese de que el suministro de energía eléctrica sea el mismo que el que se muestra en la parte inferior del aparato O ADVERTENCIA ESTE APARATO DEBE CONECTARSE A TIERRA O Este dispositivo cumpl...

Страница 136: ...gráficos de la pantalla 3 selección de la temperatura 4 advertencia de temperatura caliente 5 pantalla de texto 6 selección del tiempo 7 selección de la velocidad 8 modo cocción Direct Prep 9 empujador vaso de medir tubo de entrada de alimentos 1 tapa del Direct Prep 2 eje motor 3 disco 1 disco rallador extrafino si se incluye 2 disco rallador fino si se incluye 3 disco rallador grueso 4 disco reb...

Страница 137: ...hacia abajo y gire en sentido contrario a las agujas del reloj hasta que quede alineada con las asas del bol de cocción El aparato no funcionará a menos que esté enclavado correctamente 7 Pulse el botón de inicio parada 1 del bol de cocción para iniciar el proceso de cocción 8 Programas preestablecidos al final de cada fase y una vez que la cocción haya finalizado la unidad emitirá un pitido y ent...

Страница 138: ...ados dependen de la variante del modelo Consulte la sección servicio técnico y atención al cliente para obtener información sobre cómo comprar un disco no incluido en el paquete Los discos de corte se pueden identificar por los números que llevan marcados del siguiente modo Disco n º 1 rallado extrafino para queso parmesano Disco n º 2 rallado fino para queso y hortalizas verduras y fruta firmes D...

Страница 139: ... Desenchufe siempre el aparato antes de quitar la tapa del Direct Prep importante O La torre solo se puede girar en el sentido de las agujas del reloj No intente forzarla en sentido contrario a las agujas del reloj ya que esto puede dañar la torre O Si la comida no sale por la salida de alimentos apague el aparato y compruebe que no haya comida atascada debajo del disco y que la placa de expulsión...

Страница 140: ...te 3 segundos durante el funcionamiento para cambiar entre la temperatura seleccionada y la temperatura efectiva Muestra el tiempo seleccionado en horas minutos y segundos El tiempo se puede ajustar desde 5 segundos Æ 8 horas y la cuenta atrás empezará una vez que se pulse el botón de inicio parada Si no se ajusta ningún tiempo en modo manual el tiempo contará hacia adelante Muestra que la función...

Страница 141: ...rante 3 segundos speed Hay disponibles doce ajustes de velocidad que le permiten seleccionar el ajuste apropiado según cada receta Algunas recetas necesitarán que los alimentos se remuevan constantemente para evitar que algunos ingredientes se peguen en el fondo del bol mientras que para otras recetas será mejor que los alimentos se remuevan de forma intermitente para mantener la consistencia de l...

Страница 142: ...dad de procesamiento deseada El botón funcionará durante un máximo de 2 minutos antes de desconectarse automáticamente Para detener el funcionamiento antes de que hayan transcurrido los 2 minutos pulse el botón cancelar o vuelva a pulsar el botón cortar O El tapón de llenado siempre debe estar colocado al utilizar la función cortar Después de seleccionar un programa o de fijar manualmente la funci...

Страница 143: ...ada fase los ajustes de temperatura tiempo y velocidad se pueden ajustar si es necesario Pulse el botón de inicio parada 1 y seleccione el ajuste que se debe ajustar Utilice los botones y para cambiar el ajuste y luego pulse el botón de inicio parada para reanudar la cocción O Utilice la espátula que se facilita para raspar los ingredientes de los lados entre cada fase del programa El número de fa...

Страница 144: ...Añadir el líquido 98 C 1 20 minutos No procede Guiso de pollo PLATOS FÁCILES Añadir aceite hortal verdu carne y líquido 98 C 3 30 minutos No procede No procede No procede Estofado de ternera RISOTTO Añadir el aceite 140 C 3 Calentar Añadir el arroz 140 C 4 4 minutos Añadir las hortal verdu y la carne 140 C 4 2 minutos luego 3 3 minutos Añadir el líquido 98 C 4 9 minutos Risotto de pollo GUISOS Aña...

Страница 145: ...Potaje de garbanzos COCCIÓN LENTA 95 C Æ 90 C Calentar Æ 2 horas No procede No procede Poner el tapón del bol velocidad seleccionada Nota durante el ciclo de calentamiento en cada fase se mostrará CALENTANDO en la pantalla y el tiempo no empezará la cuenta atrás hasta que se alcance la temperatura correcta Cocción lenta Quite el eje motor del bol desbloqueando la tuerca del eje 6 en la parte infer...

Страница 146: ...undos Añadir la harina 110 C 6 5 minutos Añadir el líquido 98 C 6 15 minutos Salsa bechamel salsa de queso salsa de perejil COMPOTAS Y CONDIMENTOS Añadir el aceite 140 C 3 Calentar Añadir la fruta o las hortal verdu 120 C 3 10 minutos Añadir el azúcar y los aromatizantes 98 C 4 30 minutos PURÉ Añadir las Mezclar hortal verdu y el líquido 100 C 3 Calentar luego 98 C 4 10 minutos Æ 2 minutos No proc...

Страница 147: ...go pulse OK Seleccione el tiempo de cocción al vapor deseado y pulse el botón de inicio parada para empezar la cocción al vapor La unidad emitirá un pitido cuando se alcance el punto de cocción al vapor Nota O El tiempo no empezará la cuenta atrás hasta que el agua haya alcanzado el punto de cocción al vapor El tiempo mostrado en la pantalla parpadeará hasta que se alcance el punto de cocción al v...

Страница 148: ... Boniato 1 5 kg Córtelo en dados de 3 cm 20 30 Pollo pechuga deshuesada 12 2 kg 20 30 Pescado filetes o rodajas 8 1 4 kg 20 25 Pescado entero p ej trucha 600 g Límpielo destrípelo y quítele las escamas 20 30 Pudín dulce al vapor casero Cuenco para pudín diámetro de 14 cm de 1 2 litros 1 2 horas Añada agua después de 1 hora Pudín de sebo casero Ternera o cordero Cuenco para pudín diámetro de 14 cm ...

Страница 149: ... CREMAS Añadir el aceite 140 C 3 Calentar Añadir las hortal verdu 180 C 2 5 minutos Añadir el Mezclar líquido 98 C 3 20 minutos Æ 2 minutos Crema de champiñones CALDOS Añadir el aceite 140 C 3 Calentar Añadir la carne 180 C 4 2 minutos luego 3 3 minutos Añadir las hortal verdu 140 C 2 10 minutos Añadir el líquido 98 C 2 30 minutos Caldo de cordero sopas con tropezones p velocidad seleccionada Nota...

Страница 150: ...eso total puede sobrecargar la unidad O Utilice la cuchilla a velocidad 10 para amasar la masa O No amase durante más de 3 minutos O Utilice agua tibia Programa para saltear 1 Ideas para recetas a modo de guía Adáptelas a su gusto y preferencias personales Fase 1 Fase 2 Fase 3 Fase 4 Utensilio utilizado Ideas para recetas Añadir el aceite 140 C 3 Calentar Añadir las hortal verdu y la carne 160 C 4...

Страница 151: ...a masa para pasteles 12 15 segundos 15 segundos Peso de la harina 150 g 200 g Trocear chocolate p ej para derretirlo 12 40 segundos Hasta 200 g Picar hielo 12 25 30 segundos Hasta 250 g 12 cubitos Cortar coliflor p ej para arroz con coliflor 12 20 segundos Hasta 500 g 1 coliflor cortada en cabezuelas Preparados para tartas en un solo paso 12 20 30 segundos Peso total hasta 600 g mezcla de 3 huevos...

Страница 152: ...tor 6 en la parte inferior del bol girándola en sentido contrario a las agujas del reloj 2 Luego saque el eje motor 1 o el tapón del bol 3 Retire y lave el anillo de cierre 2 o 1 4 Limpie el ensamblaje del eje motor del bol o el tapón del bol con un cepillo y agua caliente con jabón y a continuación aclárelo bien debajo del grifo 5 Asegúrese de que el anillo de cierre se vuelva a acoplar al eje mo...

Страница 153: ...o antes de solicitar ayuda consulte la sección guía de solución de problemas en el manual o visite www kenwoodworld com O Tenga en cuenta que su producto está cubierto por una garantía que cumple con todas las disposiciones legales relativas a cualquier garantía existente y a los derechos de los consumidores vigentes en el país donde se adquirió el producto O Si su producto Kenwood funciona mal o ...

Страница 154: ... tapa durante el procesamiento El anillo de cierre no está acoplado correctamente a la tapa Consulte cuidado y limpieza para ver cómo se acopla el anillo La velocidad de remoción no se puede aumentar Temperatura del bol o de los ingredientes por encima de 105 C Funcionamiento normal La velocidad de remoción se limita a velocidad 6 cuando la temperatura del bol o de los ingredientes está por encima...

Страница 155: ... en marcha Movimiento fuerte durante el funcionamiento y en la pantalla se muestra VIBRACIÓN EXCESIVA Carga desigual en el bol que causa una vibración excesiva Reduzca la cantidad o redistribuya los alimentos en el bol y vuelva a poner la unidad en marcha La pantalla muestra MOTOR SOBRECALENTADO El aparato se ha sobrecalentado Desconecte y desenchufe la unidad Deje que se enfríe durante 30 minutos...

Страница 156: ...ímbolos do ecrã 162 modo manual 163 164 utilizar os programas pré programados165 171 Programa Refeição Principal 166 167 Programa Molhos 167 Programa Vapor 168 169 Programa Sopas 170 Programa Saltear 170 Programa Sobremesas 171 quadro de utilização recomendada 172 cuidados e limpeza 173 assistência técnica e serviços ao cliente 174 guia de avarias 175 176 Português ...

Страница 157: ...s quentes O A unidade de lâmina foi concebida para ser mantida no eixo de accionamento e deve ser apenas removida depois do conteúdo da taça ter sido retirado A unidade de lâmina está afiada use a com cuidado O Mantenha as mãos e utensílios longe da taça enquanto o aparelho estiver ligado à corrente eléctrica O Se deixar o aparelho sem vigilância no modo de cozinhar deve prestar atenção especial a...

Страница 158: ...tes de os adicionar ao óleo O Nunca deixe a unidade motriz o cabo eléctrico ou a ficha eléctrica apanharem humidade O Tenha cuidado ao manusear ou tocar em qualquer parte do aparelho quando este está a ser usado no modo de cozinhar ou após cozinhar Especialmente a taça a tampa e os utensílios uma vez que se mantêm QUENTES até muito depois do aparelho ter sido desligado O Utilize as pegas para remo...

Страница 159: ...r ferimentos se o mecanismo de fixação for submetido a uma força excessiva O Quando utilizar este aparelho assegure se de que ele se encontra numa superfície lisa e afastado de qualquer extremidade Não posicione o aparelho por baixo dos armários superiores da cozinha O Este aparelho não foi concebido para operar com contadores de tempo externo nem por sistema de controlo remoto separado O Assegure...

Страница 160: ...fim doméstico a que se destina A Kenwood não se responsabiliza caso o aparelho seja utilizado de forma inadequada ou caso estas instruções não sejam respeitadas Acessório Direct Prep O Os discos estão muitos afiados deve por isso manipulá los com cuidado quando os encaixar remover ou limpar Segure os sempre pela pega afastando as mãos do gume sempre que os manusear e limpar O Nunca retire a tampa ...

Страница 161: ... por cima dos outros alimentos O Não reaqueça arroz cozinhado no tabuleiro de vapor do seu acessório antes de ligar à corrente O Certifique se de que a corrente eléctrica que vai utilizar corresponde à indicada na parte de baixo da máquina O AVISO ESTE APARELHO DEVE SER LIGADO A UMA TOMADA COM LIGAÇÃO À TERRA O Este aparelho está conforme com a Directiva n º 1935 2004 da Comunidade Europeia sobre ...

Страница 162: ...de temperatura 4 aviso de temperatura quente 5 ecrã de leitura 6 selecção de tempo 7 selecção de velocidade 8 modo de cozedura Direct Prep 9 empurrador copo de medida tubo de alimentação 1 tampa do Direct Prep 2 eixo de accionamento 3 disco 1 disco de ralar extra fino se fornecido 2 disco de ralar fino se fornecido 3 disco de ralar grosso 4 disco de fatiar fino 5 disco de fatiar fino se fornecido ...

Страница 163: ...e enchimento Empurre a tampa para baixo e rode no sentido anti horário até estar alinhada com as pegas da taça de cozedura O aparelho não funcionará se não estiver correctamente engatado 7 Pressione o botão Start Stop 1 para começar o processo de cozedura 8 Programas Pré programados no fim de cada etapa e no final da cozedura a unidade emite um bipe e passa automaticamente para o ciclo Manter Quen...

Страница 164: ...e para obter informações sobre como comprar discos que não estão à partida incluídos Os discos de corte podem ser identificados pelo respectivo número neles inscrito da seguinte forma Disco N º 1 ralar extra fino para queijo parmesão Disco N º 2 ralar fino para queijo e frutos ou vegetais firmes Disco N º 3 ralar grosso para queijo e frutos ou vegetais firmes Disco N º 4 fatiar fino para queijo e ...

Страница 165: ...rodada no sentido horário Não tente forçá la a rodar no sentido anti horário porque vai danificá la O Se os alimentos não estiverem a sair pela saída dos alimentos desligue e confirme que não estão obstruídos por baixo do disco e que o disco dispensador está colocado Limpe quaisquer alimentos presos antes de continuar a processar O Quando não estiver a usar o Direct Prep retire o e tape a entrada ...

Страница 166: ... entre a temperatura seleccionada e a temperatura actual Mostra o tempo seleccionado em horas minutos e segundos O tempo pode ser configurado a partir de 5 segundos Æ 8 horas e fará uma contagem decrescente a partir do momento em que o botão Start Stop é pressionado Em Modo Manual se o tempo não for configurado o relógio faz uma contagem crescente Mostra a função de velocidade que foi seleccionada...

Страница 167: ... durante 3 segundos speed Estão disponíveis 12 configurações de velocidade que lhe permitem seleccionar a configuração apropriada para cada receita Algumas receitas precisam de ser mexidas constantemente para impedir que os ingredientes se colem ao fundo da taça enquanto que outras receitas beneficiarão mais se forem mexidas ocasionalmente para manterem a consistência dos alimentos Estão disponíve...

Страница 168: ...ento desejada O botão funciona durante 2 minutos no máximo e depois desliga se automaticamente Se desejar parar antes de terem decorrido os 2 minutos pressione o botão cancel cancelar ou novamente o botão chop picar O A tampa de enchimento deve estar sempre colocada quando usa a função picar Depois de seleccionar um programa ou manualmente configurar uma função pressione 1 vez o botão start pause ...

Страница 169: ...te cada etapa as configurações da temperatura do tempo e da velocidade podem ser ajustadas Prima o botão Start Stop 1 e seleccione a configuração que deseja ajustar Use os botões e para mudar a configuração e depois p rima o botão Start Stop para continuar a cozedura O Entre cada etapa do programa use a espátula fornecida para rapar para dentro da taça os ingredientes O número de etapas disponívei...

Страница 170: ...quido 98 C 3 30 minutos N A N A N A Guisado de carne RISOTTO Adicionar azeite 140 C 3 Aquecer Adicionar arroz 140 C 4 4 minutos Adicionar vegetais e carne 140 C 4 2 minutos depois 3 3 minutos Adicionar Líquido 98 C 4 9 minutos Risotto de frango ESTUFADOS Adicionar azeite 140 C 3 Aquecer Adicionar carne 180 C 4 2 minutos depois 140 C 3 3 minutos Adicionar vegetais 140 C 1 10 minutos Adicionar Líqui...

Страница 171: ...nutos PURÉ Adicionar Liquidificar vegetais e líquido 100 C 3 Aquecer depois 98 C 4 10 minutos Æ 2 minutos N A Puré de cenoura velocidade seleccionada Nota Durante o ciclo de aquecimento em cada etapa será mostrado no ecrã A AQUECER e o tempo não começa a contar enquanto não atingir a temperatura correcta Programa Refeição Principal 7 continuação Ideias de receitas para sua orientação podem ser ada...

Страница 172: ...e o ponto de vapor Nota O O tempo não começa em contagem decrescente antes de a água ter atingido o ponto de vapor O tempo mostrado no ecrã pisca até a água ter atingido o ponto de vapor Sugestões e Conselhos Práticos O A temperatura está fixada a 100 C e não existem opções de selecção de velocidade O Os tempos de cozedura são meramente indicativos Assegure se sempre de que os alimentos estão comp...

Страница 173: ...ócolos 800g Separados em floretes 15 25 Couve flor 1 5kg Separados em floretes 15 25 Cenouras 800g Fatiadas 20 30 Batata doce 1 5kg Corte em cubos de 3cm 20 30 Frango Peitos sem ossos 12 2kg 20 30 Peixe Filetes ou lombos 8 1 4kg 20 25 Peixe inteiro ex truta 600g Amanhe o peixe retire tripas e escamas 20 30 Pudim doce cozido a vapor caseiro 1 2 litros 14cm de diâmetro Forma de pudim 1h 30 min 2 hor...

Страница 174: ...osto e preferências pessoais Sub programa Etapa 1 Etapa 2 Etapa 3 Etapa 4 Utensílio usado Ideias de receitas INGREDIENTES 1 INGREDIENTES 2 INGREDIENTES 3 INGREDIENTES 4 SOPAS RÁPIDAS Adicionar Liquidificar vegetais e líquido 100 C 1 30 minutos Æ 2 minutos N A N A Sopa de vegetais SOPAS CREMOSAS Adicionar azeite 140 C 3 Aquecer Adicionar vegetais 180 C 2 5 minutos Adicionar Liquidificar Líquido 98 ...

Страница 175: ...nar ingredientes secos 2 minutos Adicionar Líquido 98 C 5 Aquecer depois 6 10 minutos N A Custard crème brûlée MASSA Adicionar água e fermento 2 minutos Adicionar ingredientes secos 3 minutos N A Pão velocidade seleccionada Fazer pão O Não exceder 400g peso da farinha 640g peso total pode sobrecarregar a unidade O Use a unidade de lâmina à velocidade 10 para amassar a massa O Não amasse mais de 3 ...

Страница 176: ...eg Até 250g 12 cubos Picar couve flor ex para arroz de couve flor 12 20 seg Até 500g uma cabeça separada em floretes Preparados completos para bolos 12 20 30 seg Até 600g de peso total mistura com 3 ovos Bebidas e smoothies 12 60 seg 1 litro Misturas a Frio 12 1 2 minutos 2 6 litros Massa para Pão 10 3 minutos 640g de peso total 400g de farinha Claras de ovos 8 9 3 4 minutos 2 8 70 280g Bater nata...

Страница 177: ...rneira 5 Assegure se de que o vedante é correctamente recolocado no eixo de accionamento ou no adaptador da taça antes de recolocar a taça tampa O Desmonte sempre a tampa antes de limpar 1 Remova a tampa de enchimento 2 Empurre para fora a secção da tampa interior 3 Retire o vedante da secção da tampa interior O Depois de lavada recoloque o vedante na secção da tampa exterior com a aresta mais esp...

Страница 178: ... kenwoodworld com ou o website específico do seu país O Concebido e projectado no Reino Unido pela Kenwood O Fabricado na China ADVERTÊNCIAS PARA A ELIMINAÇÃO CORRECTA DO PRODUTO NOS TERMOS DA DIRECTIVA EUROPEIA RELATIVA AOS RESÍDUOS DE EQUIPAMENTOS ELÉCTRICOS E ELECTRÓNICOS REEE No final da sua vida útil o produto não deve ser eliminado conjuntamente com os resíduos urbanos Pode ser depositado no...

Страница 179: ...onamento O anel vedante não está correctamente colocado na tampa Consulte a secção cuidados e limpeza para saber como encaixar correctamente o anel A velocidade de mexer não pode ser aumentada A temperatura da taça ou do seu conteúdo está acima dos 105 C Funcionamento normal A velocidade de mexer está restrita à velocidade 6 quando a temperatura da taça ou do seu conteúdo está acima dos 105 C Está...

Страница 180: ...ão durante o funcionamento e aparece no ecrã VIBRAÇÃO EXCESSIVA Carga irregular na taça provoca vibrações excessivas Reduza a quantidade ou rearranje os alimentos dentro da taça e reinicie a unidade O ecrã mostra MOTOR SOBREAQUECIDO O aparelho sobreaqueceu Desligue retire o fio da tomada eléctrica Deixe arrefecer durante 30 minutos e depois volte a ligar O ecrã mostra MOTOR EM SOBRECARGA ou MOTOR ...

Страница 181: ...όνης 185 μη αυτόματη λειτουργία 186 187 χρήση προρρυθμισμένων προγραμμάτων 188 194 πρόγραμμα Κυρίως Πιάτο 189 πρόγραμμα Σάλτσα 190 πρόγραμμα Μαγείρεμα στον ατμό 191 192 πρόγραμμα Σούπα 193 πρόγραμμα Τηγανητά 193 πρόγραμμα Επιδόρπιο 194 πίνακας συνιστώμενης χρήσης 194 195 φροντίδα και καθαρισμός 196 σέρβις και εξυπηρέτηση πελατών 197 οδηγός αντιμετώπισης προβλημάτων 198 199 Ελληνικά ...

Страница 182: ...να τη χειρίζεστε με προσοχή O Προσέξτε να μην βάζετε τα χέρια σας ή σύνεργα μέσα στο μπολ ενόσω η συσκευή είναι συνδεδεμένη στην παροχή ρεύματος O Όταν αφήνετε τη συσκευή χωρίς επίβλεψη στη λειτουργία μαγειρέματος να προσέχετε πολύ τα εξής βεβαιωθείτε ότι ακολουθείτε τις οδηγίες όσον αφορά τη θερμοκρασία και τις μέγιστες ποσότητες επεξεργασίας φροντίστε η μονάδα και το καλώδιο να βρίσκονται μακριά...

Страница 183: ...εγάλο χρονικό διάστημα μετά τη διακοπή παροχής θερμότητας Να προσέχετε κατά τον χειρισμό και τη χρήση προστατευτικού καλύμματος πάγκου εργασίας όταν τοποθετείτε το μπολ σε θερμοευαίσθητες επιφάνειες O Προσέχετε όταν διαφεύγει ατμός από το μπολ ιδίως όταν αφαιρείτε το καπάκι ή το πώμα μεζούρα κατά τη διάρκεια της λειτουργίας μαγειρέματος ή μετά το μαγείρεμα O Μην αφαιρείτε το καπάκι ή το πώμα μεζού...

Страница 184: ... το μπολ μαγειρέματος O Η κακή χρήση της συσκευής σας μπορεί να προκαλέσει τραυματισμό O Οι συσκευές μπορούν να χρησιμοποιούνται από άτομα με μειωμένες σωματικές αισθητηριακές ή νοητικές ικανότητες ή έλλειψη εμπειρίας και γνώσης εφόσον βρίσκονται υπό επίβλεψη ή τους έχουν δοθεί οδηγίες για την ασφαλή χρήση της συσκευής και εφόσον κατανοούν τους σχετικούς κινδύνους O Τα παιδιά θα πρέπει να βρίσκοντ...

Страница 185: ...μη για να σπρώξετε τα τρόφιμα προς τα κάτω στο σωλήνα τροφοδοσίας μπορεί να προκληθεί ζημιά στο εξάρτημά σας O Αποφεύγετε την επαφή με κινούμενα μέρη Μην βάζετε τα δάχτυλά σας στο άνοιγμα εξόδου των τροφίμων 6 O Προτού αφαιρέσετε το καπάκι από το Direct Prep απενεργοποιήστε τη συσκευή περιμένετε έως ότου ο δίσκος σταματήσει εντελώς να περιστρέφεται Εξάρτημα ατμού O Αυτό το εξάρτημα παράγει ατμό πο...

Страница 186: ...ρμοκρασίας 5 προβολή κειμένου 6 επιλογή χρόνου 7 επιλογή ταχύτητας 8 λειτουργία μαγειρέματος Direct Prep 9 ωστήρας δοσομετρητής σωλήνας τροφοδοσίας 1 καπάκι Direct Prep 2 κινητήριος άξονας 3 δίσκος 1 δίσκος για πολύ λεπτό τρίψιμο εφόσον παρέχεται 2 δίσκος για λεπτό τρίψιμο εφόσον παρέχεται 3 δίσκος για χοντρό τρίψιμο 4 δίσκος κοπής για λεπτές φέτες 5 δίσκος κοπής για χοντρές φέτες εφόσον παρέχεται...

Страница 187: ...νδοασφάλειες 7 Πατήστε το κουμπί Έναρξη Παύση 1 του μπολ μαγειρέματος για να ξεκινήσει η διαδικασία μαγειρέματος 8 Προρρυθμισμένα προγράμματα στο τέλος κάθε σταδίου και αφού τελειώσει το μαγείρεμα θα ακουστεί ένας χαρακτηριστικός ήχος από τη μονάδα η οποία θα μεταβεί αυτόματα στον κύκλο Διατήρηση θερμοκρασίας για 30 λεπτά Ακολουθήστε τις οδηγίες στην οθόνη για να προχωρήσετε στο επόμενο στάδιο 9 Γ...

Страница 188: ...ραλλαγές των μοντέλων Για πληροφορίες σχετικά με τον τρόπο αγοράς δίσκου που δεν περιλαμβάνεται στη συσκευασία σας ανατρέξτε στην ενότητα σέρβις και εξυπηρέτηση πελατών Οι δίσκοι κοπής προσδιορίζονται από τους αριθμούς που εμφανίζονται επάνω τους ως εξής Δίσκος Αρ 1 πολύ λεπτό τρίψιμο για παρμεζάνα Δίσκος Αρ 2 λεπτό τρίψιμο για τυρί και σκληρά φρούτα ή λαχανικά Δίσκος Αρ 3 χοντρό τρίψιμο για τυρί ...

Страница 189: ...τε σταθερά προς τα κάτω με τον ωστήρα O Μην βάζετε ποτέ τα δάχτυλά σας μέσα στο σωλήνα τροφοδοσίας O Χρησιμοποιείτε τη σπάτουλα που παρέχεται για να σπρώχνετε στο άνοιγμα του πώματος μεζούρα τυχόν υπολείμματα τροφών που έχουν απομείνει στο καπάκι 11Για να αφαιρέσετε το εξάρτημα στρέψτε το δεξιόστροφα έως ότου το ευθυγραμμιστεί με το και ανασηκώστε O Απενεργοποιείτε πάντα τη συσκευή όταν αφαιρείτε ...

Страница 190: ...0 00 πατήστε και κρατήστε πατημένο το κουμπί Χρόνου και τα κουμπιά και για 3 δευτ speed Δώδεκα ρυθμίσεις ταχύτητας είναι διαθέσιμες οι οποίες σας επιτρέπουν να επιλέγετε την κατάλληλη ρύθμιση για κάθε συνταγή Για ορισμένες συνταγές απαιτείται διαρκής ανάδευση ώστε να μην κολλούν τα υλικά στον πάτο του μπολ ενώ άλλες ωφελούνται από την ανάδευση κατά διαστήματα ώστε να διατηρείται η ομοιογένεια του ...

Страница 191: ...ί σταδιακά η ταχύτητα μέχρι να επιτευχθεί η επιθυμητή ταχύτητα επεξεργασίας Το κουμπί θα λειτουργήσει για έως και 2 λεπτά προτού απενεργοποιηθεί αυτόματα Για να διακόψετε τη λειτουργία πριν περάσουν τα 2 λεπτά πατήστε το κουμπί Ακύρωση ή πατήστε πάλι το κουμπί Τεμαχισμός O Το πώμα μεζούρα θα πρέπει πάντα να είναι τοποθετημένο στη θέση του κατά τη λειτουργία τεμαχισμού Αφού επιλέξετε ένα πρόγραμμα ...

Страница 192: ...θε στάδιο μπορείτε αν θέλετε να προσαρμόσετε τις ρυθμίσεις θερμοκρασίας χρόνου και ταχύτητας Πατήστε το κουμπί Έναρξη Διακοπή 1 και επιλέξτε τη ρύθμιση που θέλετε να προσαρμόσετε Χρησιμοποιήστε τα κουμπιά και για να αλλάξετε τη ρύθμιση μετά πατήστε το κουμπί Έναρξη Διακοπή για να συνεχιστεί το μαγείρεμα O Να χρησιμοποιείτε τη σπάτουλα που παρέχεται για να ξεκολλάτε τα υλικά από τα τοιχώματα από το...

Страница 193: ...ΓΕΙΡΕΥΤΑ Προσθέστε λάδι 140 C 3 Ζέσταμα Προσθέστε κρέας 180 C 4 2 λεπτά στη συνέχεια 140 C 3 3 λεπτά Προσθέστε λαχανικά 140 C 1 10 λεπτά Προσθέστε υγρό 98 C 1 2 ώρες Μοσχάρι κατσαρόλας ΧΟΡΤΟΦΑΓΙΚΑ ΠΙΑΤΑ Add oil 140 C 3 Ζέσταμα Add veg 120 C 3 10 λεπτά Add liquid 98 C 3 30 λεπτά N A Ρεβυθάδα ΑΡΓΟ ΜΑΓΕΙΡΕΜΑ 95 C Æ 90 C Ζέσταμα Æ 2 ώρες N A N A Τοποθετήστε βύσμα μπολ επιλεγμένη ταχύτητα Σημείωση Κατά...

Страница 194: ...5 δευτ Προσθέστε αλεύρι 110 C 6 5 λεπτά Προσθέστε υγρό 98 C 6 15 λεπτά Μπεσαμέλ σάλτσα τυριού σάλτσα μαϊντανού ΚΟΜΠΟΣΤΕΣ ΣΥΝΟΔΕΥΤΙΚΑ Προσθέστε λάδι 140 C 3 Ζέσταμα Προσθέστε φρούτα ή λαχανικά 120 C 3 10 λεπτά Προσθέστε ζάχαρη και καρυκεύματα 98 C 4 30 λεπτά ΠΟΥΡΕΣ Προσθέστε Ανάμειξη λαχανικά υγρό 100 C 3 Ζέσταμα στη συνέχεια 98 C 4 10 λεπτά Æ 2 λεπτά N A Πουρές καρότου επιλεγμένη ταχύτητα Σημείωση...

Страница 195: ...α στον ατμό Μόλις αρχίσει να δημιουργείται ατμός θα ακουστεί ένας χαρακτηριστικός ήχος από τη μονάδα Σημείωση O Η αντίστροφη μέτρηση θα ξεκινήσει όταν το νερό φτάσει στο σημείο ατμού Ο χρόνος που εμφανίζεται στην οθόνη θα αναβοσβήνει μέχρις ότου το νερό φτάσει στο σημείο ατμού Συμβουλές και μυστικά O Η θερμοκρασία είναι ρυθμισμένη σταθερά στους 100 C και δεν μπορείτε να πραγματοποιήσετε επιλογές τ...

Страница 196: ...τες 15 25 Μπρόκολο 800 γρ Κόψτε σε μπουκέτα 15 25 Κουνουπίδι 1 5 κιλά Κόψτε σε μπουκέτα 15 25 Καρότα 800 γρ Τεμαχίστε σε λεπτές φέτες 20 30 Γλυκοπατάτες 1 5 κιλά Κόβετε σε κύβους 3 εκ 20 30 Φιλέτο στήθος κοτόπουλο 12 2 κιλά 20 30 Ψάρι Φιλέτο ή φέτα 8 1 4 κιλά 20 25 Ψάρι ολόκληρο π χ πέστροφα 600 γρ Καθαρό χωρίς εντόσθια και λέπια 20 30 Γλυκιά πουτίγκα στον ατμό χειροποίητη φόρμα για πουτίγκα 1 2 λ...

Страница 197: ...ό 98 C 2 30 λεπτά Σούπα με ζωμό και κομμάτια αρνιού επιλεγμένη ταχύτητα Σημείωση Κατά τη διάρκεια του κύκλου ζεστάματος σε κάθε στάδιο στην οθόνη θα εμφανίζεται η ένδειξη ΖΕΣΤΑΜΑ και ο χρόνος θα αρχίσει να μετρά αντίστροφα όταν επιτευχθεί η κατάλληλη θερμοκρασία πρόγραμμαΤηγανητά 1 Ιδέες συνταγών ως οδηγός προσαρμόστε τις στα γούστα και στις προτιμήσεις σας Στάδιο 1 Στάδιο 2 Στάδιο 3 Στάδιο 4 Εργα...

Страница 198: ...Μην υπερβαίνετε τα 400 γρ βάρος αλευριού 640 γρ συνολικό βάρος μπορεί να υπερφορτώσετε τη μονάδα O Για να ζυμώσετε τη ζύμη χρησιμοποιήστε τις λεπίδες στην ταχύτητα 10 O Μην αφήνετε τη συσκευή να ζυμώνει για περισσότερα από 3 λεπτά O Χρησιμοποιήστε χλιαρό νερό πίνακας συνιστώμενων ταχυτήτων για μη αυτόματες λειτουργίες Εργαλείο Λειτουργία Συνιστώμενη ταχύτητα θερμοκρασία Χρόνος επεξεργασίας Συνιστώ...

Страница 199: ...υκέτα Μείγματα για κέικ με ανάμειξη όλων των υλικών μαζί 12 20 30 δευτ Συνολικό βάρος 600 γρ μείγμα με 3 αβγά Ροφήματα και smoothies 12 60 δευτ 1 λίτρο Ανάμειξη κρύων υλικών 12 1 2 λεπτά 2 6 λίτρα Ζύμη ψωμιού 10 3 λεπτά Συνολικό βάρος 640 γρ Βάρος αλευριού 400 γρ Ασπράδια αβγών 8 9 3 4 λεπτά 2 8 70 280 γρ Κρέμα σαντιγί 9 1 1 λεπτά 200 γρ 600 γρ Μαγιονέζα 12 1 1 λεπτά Μείγμα με 2 4 αβγά Συνταγή για...

Страница 200: ...ακτύλιος στεγανοποίησης έχει τοποθετηθεί σωστά στον κινητήριο άξονα ή στο βύσμα μπολ προτού τα τοποθετήσετε ξανά στο μπολ καπάκι O Να αποσυναρμολογείτε πάντα το καπάκι πριν από το καθάρισμα 1 Αφαιρέστε το πώμα μεζούρα 2 Πιέστε το εσωτερικό καπάκι προς τα έξω 3 Αφαιρέστε τον δακτύλιο στεγανοποίησης από το εσωτερικό καπάκι O Μετά το πλύσιμο τοποθετήστε πάλι τον δακτύλιο στεγανοποίησης στο εξωτερικό ...

Страница 201: ...κε από την Kenwood στο Ηνωμένο Βασίλειο O Κατασκευάστηκε στην Κίνα ΣΗΜΑΝΤΙΚΕΣ ΠΛΗΡΟΦΟΡΙΕΣ ΓΙΑ ΤΗ ΣΩΣΤΗ ΑΠΟΡΡΙΨΗ ΤΟΥ ΠΡΟΪΟΝΤΟΣ ΣΥΜΦΩΝΑ ΜΕ ΤΗΝ ΕΥΡΩΠΑΪΚΗ ΟΔΗΓΙΑ ΣΧΕΤΙΚΑ ΜΕ ΤΑ ΑΠΟΒΛΗΤΑ ΗΛΕΚΤΡΙΚΟΥ ΚΑΙ ΗΛΕΚΤΡΟΝΙΚΟΥ ΕΞΟΠΛΙΣΜΟΥ AHHE Σто тέλоς тης ωφέλιμης ζωής тоυ то πρоϊόν δεν πρέπει να απορρίπτεται με τα αστικά απορρίμματα Пρέπει να απορριφθεί σε ειδικά κέντρα διαφοροποιημένης συλλογής απορριμμάτων που ...

Страница 202: ...στεγανοποίησης δεν έχει τοποθετηθεί σωστά στο καπάκι Ανατρέξτε την ενότητα φροντίδα και καθαρισμός για να δείτε πώς τοποθετείται ο δακτύλιος στεγανοποίησης Η ταχύτητα ανάδευσης δεν μπορεί να αυξηθεί Η θερμοκρασία του μπολ ή των υλικών υπερβαίνει τους 105 C Κανονική λειτουργία Η ταχύτητα ανάδευσης περιορίζεται στο 6 όταν η θερμοκρασία του μπολ ή των υλικών υπερβαίνει τους 105 C Διαρροή από τη βάση ...

Страница 203: ...ΠΕΡΒΟΛΙΚΕΣ ΔΟΝΗΣΕΙΣ εμφανίζεται στην οθόνη Το ανομοιόμορφα κατανεμημένο φορτίο στο μπολ προκαλεί υπερβολικές δονήσεις Μειώστε την ποσότητα ή μοιράστε ομοιόμορφα τα τρόφιμα μέσα στο μπολ και θέστε ξανά τη μονάδα σε λειτουργία Στην οθόνη εμφανίζεται η ένδειξη ΥΠΕΡΦΟΡΤΩΣΗ ΜΟΤΕΡ Η συσκευή έχει υπερθερμανθεί Θέστε τη συσκευή εκτός λειτουργίας και αποσυνδέστε την από την πρίζα Αφήστε την να κρυώσει για ...

Страница 204: ...200 ...

Страница 205: ...201 ...

Страница 206: ...202 ...

Страница 207: ......

Страница 208: ...HEAD OFFICE Kenwood Limited 1 3 Kenwood Business Park New Lane Havant Hampshire PO9 2NH 132405 2 ...

Отзывы: