-
6
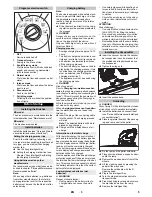
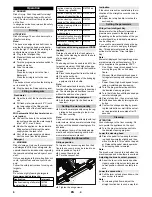
Recommended cleaning processes are
shown on the display at certain cleaning in-
tervals.
Perform the maintenance task shown
on the display.
Press the Info Button, the display will be
reset. The display will be shown again
at certain predefined time intervals.
Note
: A service reset resets all mainte-
nance intervals.
ATTENTION
Risk of damage. Do not sluice the appli-
ance with water and do not use aggressive
detergents.
Drain off dirt water.
Rinse the waste water tank with clean
water or with the rinsing system for the
waste water tank (option).
Remove the coarse dirt sieve from the
waste water tank and clean it.
Clean the outside of the appliance with
a damp cloth which has been soaked in
mild detergent.
Clean protective turbine strainer.
Only BR model: Remove bulk waste
container and empty it.
Only BR model: Clean water distributor
channel (see section „Maintenance work“).
Clean the vacuum lips and the wiping
lips, check for wear and replace if re-
quired.
Check the brushes for wear, replace if
required.
Press the lock of the waste water tank
in and close the cover of the waste wa-
ter tank so that a gap remains open to
facilitate drying.
Charge the battery:
If the charging state of the battery is un-
der 50%, charge the battery fully and
without interruption.
If the charging state of the battery is
over 50%, only recharge the battery if
the entire operation duration will be re-
quired when next used.
When used regularly, charge the bat-
tery fully and without interruption at
least once a week.
Check battery poles for oxidation, brush
off if necessary. Ensure that the con-
nection cable sits firmly.
Clean the seals between waste water
tank and cover and check for tightness,
replace if required.
Check the acid density of the cells if the
batteries are not maintenance-free bat-
teries.
Clean the brush tunnel (only BR model).
For long periods of disuse, only turn the
device off when the battery is fully
charged. Fully recharge the battery at
least every month.
Have the prescribed inspection carried
out by the customer service.
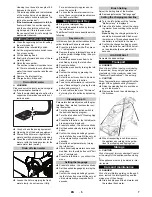
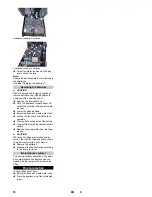
Open the cover of the waste water tank.
Squeeze the locking hooks.
Pull off the float.
Turn the protective turbine strainer in a
counter-clockwise direction.
Remove protective turbine strainer.
Rinse dirt off the protective turbine
strainer with water.
Reattach protective turbine strainer.
Attach float.
Drain the wastewater, see section
"Drain wastewater“.
Open the cover of the waste water tank.
Pull the flexible lock off of the rinsing
system.
Connect the water hose to the rinsing
system.
Close the cover of the wastewater res-
ervoir until it rests on the flexible lock.
Open the water supply and rinse the
wastewater reservoir for about 30 sec-
onds.
Repeat the rinsing process 2 to 3 times.
Shut off the water supply and discon-
nect the hose from the appliance.
Reattach the flexible lock to the connec-
tion. Leave the wastewater reservoir
cover open a crack to let it dry.
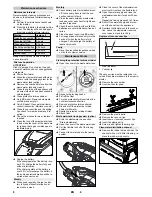
1 Wear indicator
2 Vacuum lip
The vacuum lips must be replaced or re-
versed if they are worn down to the wear in-
dicator.
Remove the vacuum bar.
Unscrew the star grips.
Remove the plastic parts.
Remove the vacuum lips.
Insert new or reversed vacuum lips.
Insert the plastic parts.
Screw in and tighten the star grips.
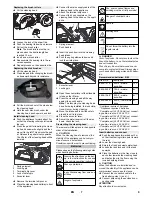
Remove the rubber strip and clean the
channel with a cloth. After cleaning, re-
place the rubber strip evenly.
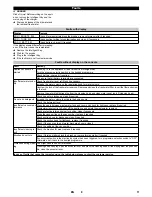
Maintenance schedule
Maintenance intervals
Display
Display all
Clean the vacuum bar 20 hours
Clean the fluff filter
20 hours
Clean water filter.
50 hours
Check the suction lips 100 hours
Check the brushes
100 hours
Service reset
200 hours
After each operation
Weekly
Monthly
Yearly
Maintenance Works
Cleaning the protective turbine strainer
Waste water tank rinsing system (option)
Replace or turn vacuum lips
Clean water distribution channel
8
EN
Содержание B 60 W Bp
Страница 1: ...B 60 W Bp 001 59645740 07 17...
Страница 2: ...2...

