


43
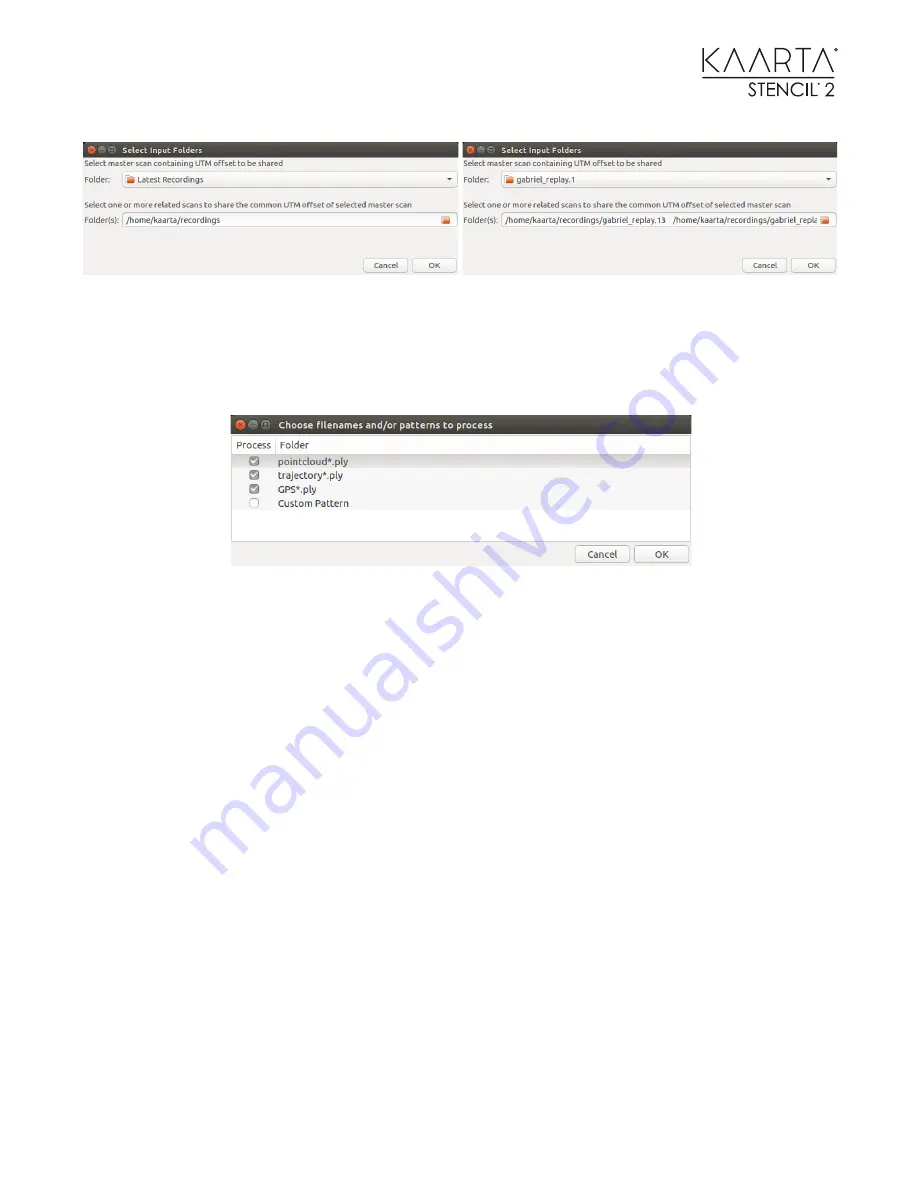
To select the master scan click on the arrow to the right of the browser and select “Other”. This will
open the normal browser panel so you can select the master folder. For the related scans, click on
the folder to the right and select all of the folders you want to align. After clicking OK, you should
see another dialog box that allows you to select any combination of point clouds, trajectories, gps,
and custom files to apply the offsets to.
Each of the folder fields on right side can be modified by clicking on the folder name and typing.
For example, on the pointcloud and trajectory folder names, you could type pointcloud*_loop*.ply
to just run the Alignment Command Line Tool on files that were geo-registered. If you generate
your own custom pattern, be sure you do not select a file that may be selected in one of the other
three checked box names.
To do a quick check, just use the trajectories the first time through, and if you like the result, don’t
select trajectories the second time through, but select the point clouds and gps files.
For each ply file, _offset will added at the end of each name. No existing files are modified. Also, a
scan_info_offset.yaml is created from the target scan’s original, with UTM offset values updated.
You can now load each file into CloudCompare and it should all be relative the same origin point.
If you intend to use the _offset ply file for localization using the Localize using GNSS (BETA) Tool,
you will need to rename the original scan_info.yaml file to save it, and change the
scan_info_offset.yaml to scan_info.yaml in order to load the correct offsets for the offset map.
This tool is only meaningful on geo-registered maps which have been properly rotated by the Loop-
Closure Tool.


