EN
35
A
M
FLASH ADJ.
END
0
4
– – – – –
6
– – – – –
TO MODE MENU
END
TO MODE MENU
PL
AY
/PC
OFF CAMER
A
5S
DS
C
DS
CPLA
Y
4
FLASH ADJ.
2
MANUAL
2
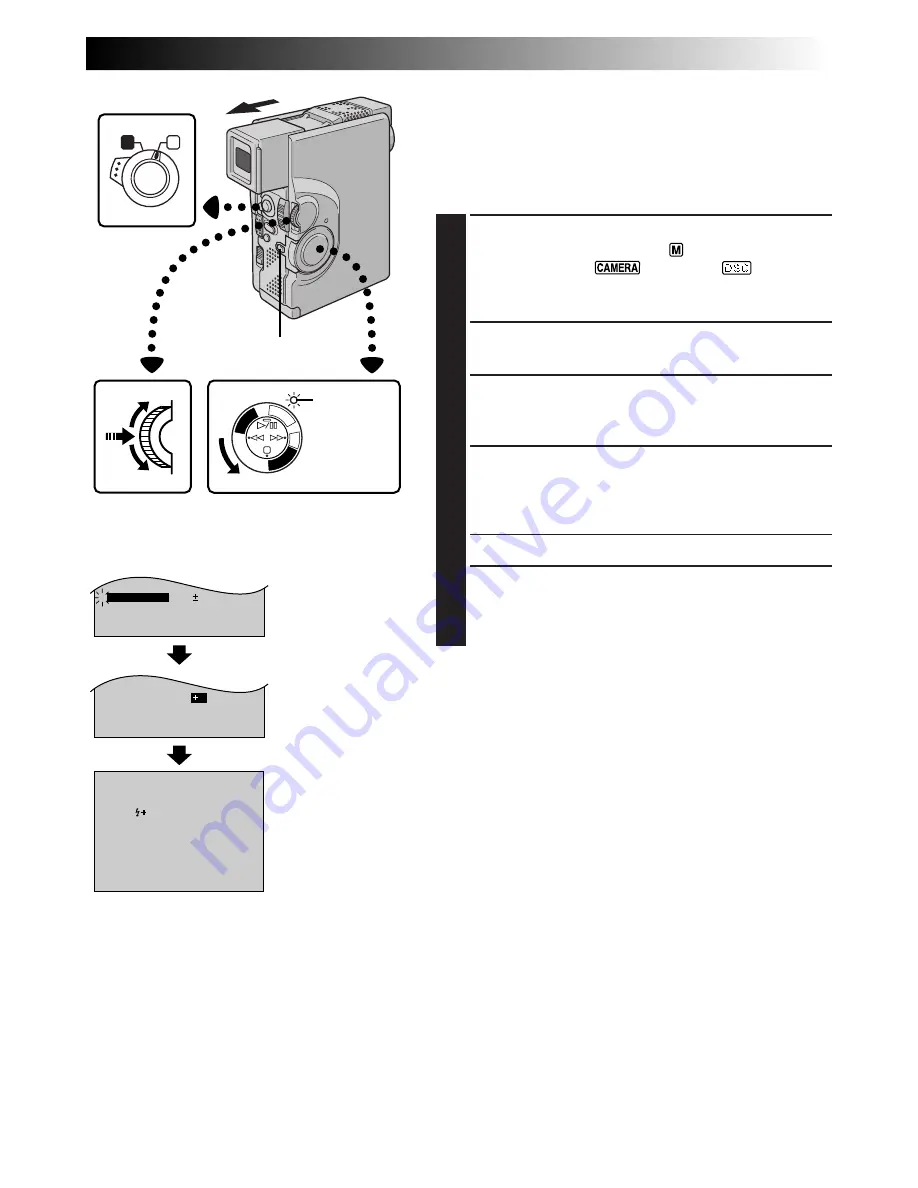
Flash Brightness Adjustment
When a snapshot (
Z
pg. 24, 32) is taken in the dark the
camcorder fires the flash (
Z
pg. 34) and adjusts the
brightness automatically. You can also adjust the flash
brightness manually. When you find that the snapshots
you took look too bright or too dark, adjust it manually.
1
SELECT OPERATION MODE
Set the Operation Switch to “
”. Then, set the
Power Switch to “
”, “5S” or “
” while
pressing down the Lock Button. Pull out the view-
finder fully or open the LCD monitor fully.
2
ACCESS RECORDING MENU
Press
MENU/SET
. The Recording Menu appears.
3
SELECT FUNCTION
Rotate
MENU/SET
to move the highlight bar to
“FLASH ADJ.”, then press it. The parameter blinks.
4
ADJUST BRIGHTNESS OF FLASH
Rotating
MENU/SET
upward increases the number of
the brightness adjustment and rotating
MENU/SET
downward decreases it.
•The adjustment range is from –3 to +3.
5
ACTIVATE BRIGHTNESS OF FLASH
Press
MENU/SET
twice. The flash brightness
adjustment is complete and the normal screen
reappears.
NOTES:
●
When the battery power is low or when “FLASH” is set
to “OFF” in the Mode Menu, the “FLASH ADJ.” setting
cannot be changed.
●
When you change the subject you are shooting or the
shooting location, set it back to ±0 as described in step
4
and take a snapshot to check the flash brightness. After
doing this adjust to your desired brightness.
MENU/SET Dial
Power Switch
Recording Menu
Display
Lock Button
Power lamp
Operation Switch


