background image

Masterpage:Right+

EN


63

Filename [DR-MV1SE_08Navigation.fm]

Page 63

March 11, 2004 7:27 pm

NAVIGATION (DVD DECK ONLY)

Programme information can be registered in the unit’s memory for 
up to 1,300 programmes. It is helpful when finding out on which 
disc the desired programme is recorded.

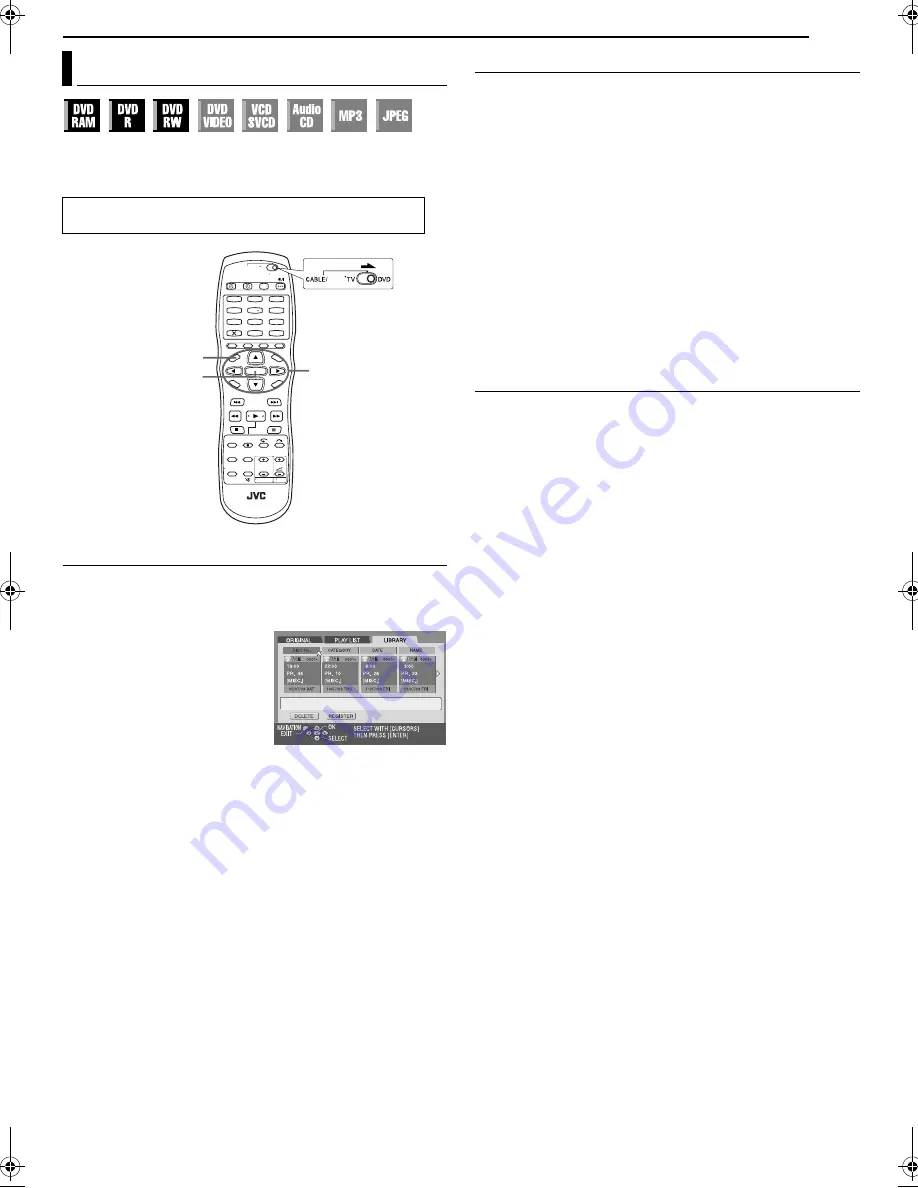
Scan For Programme From Library

1

Press 

NAVIGATION

. The Library Database DVD Navi screen 

appears.

2

Press 

rt w e

 to select “LIBRARY”, then press 

ENTER

.

3

Press 

w e

 to select the 

appropriate sort button to sort the 
information, then press 

ENTER

.

“DISC No.” : Sort by disc number
“CATEGORY” : Sort by category
“DATE” : Sort by date
“NAME” : Sort by name

The sorting order can be switched 
between ascending order and 
descending order by pressing the sort buttons.

4

Press 

w e

 to select the desired programme, then press 

ENTER

.

Playback begins automatically after the selected programme is 
located.

When the disc that contains the selected programme is not 
loaded

A screen prompting you to load the designated disc appears. Place 
the disc whose number is displayed on the screen after pressing 

ENTER

 to close the prompt screen. Then perform steps 

1

 to 

4

.

NOTE:

If a disc registered in the library is recorded or modified on DVD units 
from other manufacturers, it may become impossible to operate 
properly.

Register Disc

1

Load a disc you want to register. 

2

Press 

NAVIGATION

. The Library Database DVD Navi screen 

appears.

3

Press 

rt w e

 to select “LIBRARY”, then press 

ENTER

.

4

Press 

w e

 to select “REGISTER”, then press 

ENTER

.

5

Press 

w e

 to select “REGISTER”, then press 

ENTER

 to confirm 

the registration.

6

Press 

NAVIGATION

 to return to the normal screen.

NOTES:

It is not possible to register discs used for On-Disc Timer 
programming. (

pg. 45)

It is not possible to register discs formatted on devices other than 
JVC’s DVD recorders.

It is not possible to register discs recorded on devices other than 
JVC’s DVD recorders.

It is not possible to register discs when “SAVE AS LIBRARY” is set to 
“OFF”. (

pg. 79)

Delete Information

1

Press 

NAVIGATION

. The Library Database DVD Navi screen 

appears.

2

Press 

rt w e

 to select “LIBRARY”, then press 

ENTER

.

3

Press 

rt w e

 to select the appropriate sort button to sort the 

information, then press 

ENTER

.

4

Press 

w e

 to select a programme you want to delete, then 

press

t

.

5

Press 

rt w e

 to select “DELETE”, then press 

ENTER

.

6

Press 

w e

 to select “DELETE”, then press 

ENTER

 to confirm 

the deletion.

7

Press 

NAVIGATION

 to return to the normal screen.

Modify Library Information

Turn on the TV and select the AV mode.

Slide the 

TV/CABLE/SAT/DVD

 switch to 

DVD

.

1

4

7

2

5

8

0

3

6

9

ENTER

rtw e

NAVIGATION

SAT

DR-MV1SE_00.book  Page 63  Thursday, March 11, 2004  7:28 PM

Содержание DR-MV1

Страница 1: ... VCR TIMER SLOW PREVIOUS NEXT CLEAR SLOW PAUSE STOP PLAY SELECT REMAIN REC CH AUDIO SUBTITLE ANGLE TV VCR REC MODE LIVE CHECK DVD TV CABLE DBS ABC DEF JKL MNO TUV GHI PQRS WXYZ NUMBER TV CH DVD CH NUMBER TV CH DVD CH MEMO MARK PROGRESSIVE SCAN VCR PLUS AUX SET UP RETURN CANCEL NA VIGATION TO P MEN U MENU TV VOL TV CBL DVD TV DVD TV TV CBL DBS DVD 1 4 7 2 5 8 0 3 6 9 ENTER DVD VIDEO RECORDER VIDEO ...

Страница 2: ...imited viewing users only unless otherwise authorized by Macrovision Corporation Reverse engineering or disassembly is prohibited Safety Precautions CAUTION A UNIT IS A CLASS 1 LASER PRODUCT HOWEVER THIS UNIT USES A VISIBLE LASER BEAM WHICH COULD CAUSE HAZARDOUS RADIATION EXPOSURE IF DIRECTED BE SURE TO OPERATE THE UNIT CORRECTLY AS INSTRUCTED WHEN THIS UNIT IS PLUGGED INTO THE WALL OUTLET DO NOT ...

Страница 3: ...room or places with water Also DO NOT place any containers filled with water or liquids such as cosmetics or medicines flower vases potted plants cups etc on top of this unit 7 DO NOT place any naked flame sources such as lighted candles on the apparatus 8 AVOID violent shocks to the unit during transport MOISTURE CONDENSATION Moisture in the air will condense on the unit when you move it from a c...

Страница 4: ...e DVD deck 墌 pg 40 2 Press VCR DVD 3 Operate the VCR deck Operate the DVD deck while recording on the VCR deck 1 Start recording on the VCR deck 墌 pg 52 2 Press VCR DVD 3 Operate the DVD deck Operate the VCR deck while the DVD deck is in timer standby mode 1 Engage the DVD deck s timer mode 墌 pg 43 The VCR deck is automatically selected and the VCR lamp lights up on the unit 2 Operate the VCR deck...

Страница 5: ...N DVD DECK ONLY 57 Library Database DVD Navi 57 Modify Original Information 58 Modify Play List Information 60 Modify Library Information 63 Playback With MP3 JPEG Navigation 64 EDITING 65 Tape Dubbing From VCR To DVD 65 Manual Dubbing From VCR To DVD 66 Disc Dubbing From DVD To VCR 67 Manual Dubbing From DVD To VCR 68 DV Dubbing DVD Deck Only 69 Edit From A Camcorder 70 Edit To Or From Another Re...

Страница 6: ...layed back on a standard DVD player as a DVD VIDEO disc When a DVD RW disc VR mode is finalised 墌 pg 87 it can be played back on a standard DVD player compatible with the VR mode of DVD RW discs Before finalising it is possible to record on unrecorded areas of the disc edit the disc title and programme titles and delete programmes It is impossible to record or edit DVD R RW discs recorded on other...

Страница 7: ...mpatible with conventional CD players can be played Unplayable Discs The following types of discs cannot be played using this unit Do not attempt to play back any kind of disc that is damaged cracked warped or repaired with adhesive tape or discs in unusual shapes heart shaped octagonal or other forms If such discs are accidentally played back it may cause noise that can lead to speaker damage CD ...

Страница 8: ...r recording or playback Once the disc has been finalised these chapter marks are deleted and new chapter marks are assigned automatically approximately every 5 minutes In Video mode even before finalising it is impossible to perform editing operations other than changing the disc name and or title names and deleting programmes and or titles After finalising it is impossible to perform editing oper...

Страница 9: ...ve DVD RAM discs contained in cartridges Double sided discs Remove the disc from the cartridge Align the disc with the grooves on the disc tray as shown in the illustration and insert with the side you wish to play back or record facing down If you insert the disc with Side A facing down programmes are recorded on the side A Single sided discs Remove the disc from the cartridge Align the disc with...

Страница 10: ...r dirt when removed from cartridge then put back in after use Storage Make sure that discs are kept in their cases If discs are piled on top of one another without their protective cases they can be damaged Do not put discs in a location where they may be exposed to direct sunlight or in a place where the humidity or temperature is high Avoid leaving discs in your car Maintenance of discs If there...

Страница 11: ...ndow P Remain Button REMAIN 墌 pg 27 41 Recording Mode Button REC MODE 墌 pg 40 52 Q Record Button 7 墌 pg 40 52 R Pause Button 9 墌 pg 24 49 S Reverse Search Button 3 DVD deck 墌 pg 25 32 Rewind Button 3 VCR deck 墌 pg 49 50 Reverse Slow Button SLOW 墌 pg 26 T Forward Search Button 5 DVD deck 墌 pg 25 32 Fast Forward Button 5 VCR deck 墌 pg 49 50 Forward Slow Button SLOW 墌 pg 26 U Channel Button PR 墌 pg 4...

Страница 12: ...EO or SAT S VIDEO 墌 pg 72 JUST CLOCK is set to ON 墌 pg 85 Set JUST CLOCK to OFF if you mind the noise of the fan D Audio Output Connectors AUDIO OUTPUT LEFT RIGHT 墌 pg 16 71 E Component Video Output Connectors COMPONENT VIDEO OUT DVD deck only 墌 pg 16 F L 1 Input Output Connector L 1 IN OUT 墌 pg 16 71 76 77 G Antenna Input Connector ANTENNA IN 墌 pg 16 H Digital Audio Output Connectors DIGITAL AUDI...

Страница 13: ...ter number being played back are displayed on the Multi Display G Simulated Surround Effect Indicator 3D 墌 pg 36 Lights when a simulated surround effect is set to 3D ON on the on screen bar H Linear PCM Indicator LPCM Lights when XP MODE REC AUDIO is set to LINEAR PCM 墌 pg 79 for recording with DVD RAM DVD R and DVD RW discs and when Linear PCM audio is played I Random Programme Playback Mode Indi...

Страница 14: ...isplay Displays single title playback elapsed time single track playback elapsed time single track remaining time total elapsed time total remaining time and other information in turn M Station Name Display Displays currently selected station name N Audio Mode Display Displays audio that is being input O Channel Position Number Auxiliary Input Indicator L 1 L 2 F 1or SAT Displays currently selecte...

Страница 15: ...1 a Menu Button MENU DVD deck only 墌 pg 25 b w e Button 墌 pg 20 c Enter Button ENTER 墌 pg 20 d Return Button RETURN 墌 pg 28 43 e Forward Skip Button 6 DVD deck 墌 pg 25 32 Index Button 6 VCR deck 墌 pg 50 Next Button NEXT DVD deck only 墌 pg 28 f Forward Search Button 5 DVD deck 墌 pg 25 32 Fast Forward Button 5 VCR deck 墌 pg 49 50 Forward Slow Button SLOW 墌 pg 26 g Pause Button 9 墌 pg 24 49 h Skip Se...

Страница 16: ... unit s AUDIO OUT connectors to the TV s AUDIO input connectors You can obtain high quality component video pictures If your TV is not stereo capable use the unit s AUDIO OUT connectors to connect to an audio amplifier for Hi Fi stereo sound reproduction By using the component video connection you can view the images in the progressive mode For switching to the progressive mode refer to Scan Mode ...

Страница 17: ...and try again from step 1 Auto Clock Set may not function properly depending on the reception condition If no sound accompanies the picture or the audio sounds unnatural on some channels that have been stored by Auto Set Up the TV system setting for those channels may be incorrect Select the appropriate TV system for those channels 墌 pg 84 INFORMATION Auto Set Up After the 1 button on the unit rem...

Страница 18: ...e no TV station transmits a PDC Programme Delivery Control signal the unit can perform neither Auto Clock Set nor Auto Guide Program Number Set If there is a power cut or if you press 1 or SET UP while downloading or set up is in progress it will be interrupted be sure to turn off the unit power once and try again from the beginning Auto Clock Set may not function properly depending on the recepti...

Страница 19: ...r record a TV programme using the SHOWVIEW system the unit will record a TV programme of a different station When programming the timer using the SHOWVIEW system be sure to check the desired channel is selected correctly 墌 pg 43 54 Your unit memorizes all detected stations even if reception of some of them is poor You can delete those stations with an unacceptable picture 墌 pg 84 Delete A Channel ...

Страница 20: ...ly Some DVD discs contain the DVD menu display audio and subtitles in multiple languages With these discs you can set the default language as you like The procedure shows how to set MENU LANGUAGE as an example 1 Press VCR DVD repeatedly so that the DVD lamp lights up on the unit 2 Press SET UP to access the Main Menu screen 3 Press w e to select DVD SET UP then press ENTER 4 Press w e to select LA...

Страница 21: ...ectly 1 Turn on the satellite receiver s power 2 Press SET UP to access the Main Menu screen 3 Press w e to select INITIAL SET UP then press ENTER 4 Press w e to select SAT GUIDE PR then press ENTER 5 Press rt to select SAT BRAND then press ENTER 6 Press rt to select the brand code from the list on page 22 then press ENTER If the brand code you entered is invalid the code field will be reset Enter...

Страница 22: ... to All Channel Mode For details refer to the instruction manual of the satellite receiver When selecting the satellite receiver s channel 墌 step 7 signals from the remote control may interfere with signals transmitted from the Satellite Controller In this case move the remote control as close to the unit s infrared beam receiving window as possible BRAND NAME CODE JVC AMSTRAD ASTON CANAL SATELLIT...

Страница 23: ... bars do not appear however the left and right edges of the pictures will not be shown on the screen 16 9 AUTO Wide television conversion Select this when the aspect ratio of your TV is 16 9 wide TV 16 9 FIX Wide television conversion Select this when the aspect ratio of your TV is fixed to 16 9 wide TV The unit automatically adjusts the screen width of the output signal correctly when playing bac...

Страница 24: ...ed programmes 墌 pg 58 4 Press 9 to pause playback To resume normal playback press 4 5 Press 8 to stop playback When a recordable disc is played playback stops and a programme received with the unit s tuner resumes on the TV screen When a playback only disc is played playback stops and the still image at the time you press 8 remains on the TV screen Pressing 8 again resumes a programme received wit...

Страница 25: ...se direction then resumes playback When a DVD RAM RW R disc is played Example To locate the beginning of the next item press 6 once To locate the beginning of the current item press 2 once To locate the beginning of the previous item press 2 three times When a DVD VIDEO Audio CD or Video CD SVCD disc is played Example To locate the beginning of the next item press 6 once To locate the beginning of...

Страница 26: ...hen RESUME is set to ON Press 1 to turn off the unit Press x to take out the disc Press 8 in stop mode Press TOP MENU to display the top menu then start playback by selecting an item etc Press MENU to display the disc menu then start playback by selecting an item etc When RESUME is set to DISC RESUME Set RESUME to OFF 墌 pg 79 Press 8 in stop mode Press TOP MENU to display the top menu then start p...

Страница 27: ...IN press rt to select FR then press w e to select the desired recording time 墌 pg 42 It is not possible to switch the recording mode during playback or while recording 8 Video CD SVCD Audio CD During playback or in stop mdde Total remaining time Current track elapsed time Current track remaining time Total elapsed time back to the beginning NOTE When a PBC compatible Video CD SVCD disc is loaded d...

Страница 28: ...his case perform the following steps using the remote control to switch DIGITAL AUDIO OUT from DOLBY DIGITAL PCM to PCM ONLY A Press SET UP to access the Main Menu screen B Press w e to select DVD SET UP then press ENTER C Press w e to select AUDIO OUTPUT then press ENTER D Press rt to select DIGITAL AUDIO OUT then press ENTER E Press rt to select PCM ONLY then press ENTER 墌 pg 78 F Press SET UP t...

Страница 29: ...ng or timer recording another programme but the unit also allows you to play back from the beginning of a programme while continuing to record the same programme Recording playback Status Display Press DISPLAY The current status is superimposed on the TV screen Live Memory Playback Playback High speed read out Recording High speed writing High speed spin Image figure of DVD RAM disc Current record...

Страница 30: ...e to perform ITR even if you press 7 during Live Memory Playback 墌 pg 41 Press 8 to display the programme being recorded then perform ITR settings Playback may be paused for a moment during Live Memory Playback which does not interfere with recording Live Memory Playback cannot be performed while recording the source from DV input When LIVE CHECK is pressed to display the picture currently being r...

Страница 31: ... meter display Live Memory Playback mark Playback title number Disc used Bar meter see below Title name Playback counter Recording title number Recording counter display remaining elapsed time Present time Recording channel Playback mark Recording mode Recording mark Live Check picture Recording mark Station Name While stopped During playback While recording Live Memory Playback Live Memory Playba...

Страница 32: ...ecording H 9 Pressing once pauses playback still picture playback Pressing repeatedly advances the still picture frame by frame I Pressing once skips back for approximately 7 seconds and resumes playback Pressing repeatedly skips back continuously as many times as pressed It is useful when watching sports programmes etc J Pressing once skips forward for approximately 30 seconds and resumes playbac...

Страница 33: ...s for Programme Playback 墌 pg 37 K Select this for Random Playback 墌 pg 38 L Select this to control the switching interval of the slide show 墌 pg 38 NOTE Although examples of the on screen bar are provided here only for 3 types of discs the on screen bar will be displayed for whichever disc indicated in the left column Basic Operation On The On screen Bar Example When selecting Picture Control fun...

Страница 34: ... with PBC function Repeat Playback may not work properly depending on the type of the disc being used A B Repeat Playback You can repeat the desired part During playback 1 Press ON SCREEN twice to access the on screen bar 2 Press w e to select 3 Press ENTER at the beginning of the desired part you want to repeat point A The elapsed playing time of the point A appears 4 Press ENTER at the end of th...

Страница 35: ... or chapter search does not work on the disc Before you press ENTER playback may start automatically when you enter the section s number depending on the disc This function is not possible for a Video CD SVCD with PBC function Time Search You can play back a disc from the desired point by specifying the elapsed playing time from the beginning of a title DVD RAM DVD R DVD RW and DVD VIDEO or a disc...

Страница 36: ...lated Surround Effect does not affect the DVD VIDEO bitstream signal from the DIGITAL AUDIO OUTPUT connector When Simulated Surround Effect is activated the settings of ANALOG AUDIO OUT and D RANGE CONTROL are disabled 墌 pg 78 Adjusting The Picture Quality You can obtain optimal picture quality by selecting an appropriate picture mode 1 Press ON SCREEN twice to access the on screen bar 2 Press w e...

Страница 37: ...gressive scan is output only from COMPONENT VIDEO OUT connector Programme Playback You can play back up to 30 tracks in the desired order While stopped 1 Press ON SCREEN twice to access the on screen bar 2 Press w e to select PRGM then press ENTER The programme table appears under on screen bar 3 Press the number keys to enter the track numbers in the desired order Examples A To select track 5 pre...

Страница 38: ...not be played back more than once during Random Playback Select The Switching Interval Of The Slide Show You can control the switching interval of the slide show 1 Press ON SCREEN twice to access the on screen bar 2 Press w e to select then press ENTER The pop up window appears under the selected item 3 Press rt to select the desired option then press ENTER Each time you press rt the interval chan...

Страница 39: ...tinuing To change the level 2 Press rt to select PARENTAL LEVEL then press ENTER 3 Press rt to select the desired level then press ENTER To change the country code 4 Press rt to select COUNTRY CODE then press ENTER 5 Press rt to select your country code then press ENTER See Country Area Code List for Parental Lock 墌 pg 97 6 Press the number keys to enter the same password as in step 8 of To Set Pa...

Страница 40: ...sc Some programmes can only be recorded one time When recording is started an index of the first part of recording is automatically recorded 墌 pg 57 To record satellite programmes refer to page 48 To delete the index refer to page 59 Recording sometimes may stop or cannot be performed even if there is enough available capacity remaining on the disc Recording Resume Function If there is a power out...

Страница 41: ...de if your unit is connected to the TV via the RF connection VCR mode is disengaged then the VCR indicator lights off and TV appears on the front display panel The programme received on the TV s tuner is displayed on the TV screen 2 Slide the TV CABLE SAT DVD switch to TV 3 Press PR repeatedly to select the desired channel NOTE If a decoder is connected to the unit 墌 pg 77 you can select a scrambl...

Страница 42: ...ding time of FR JUST mode is the same as the recording time of FR480 mode When timer programming a long programme in FR JUST mode on a disc whose remaining time is short it is recommended checking the disc remaining time in FR480 mode to see if the remaining time is enough for the programme Even if more than one programme are timer programmed in FR JUST mode only the first one is recorded In order...

Страница 43: ... timer lamp lights up on the unit and the VCR deck is automatically selected When the VCR deck is in timer standby mode the unit is automatically turned off To disengage the timer mode press DVD TIMER again NOTES There may be cases that SHOWVIEW Timer programming function prolongs the stop time of the programming When two successive programmes are recorded on a DVD RW disc with SHOWVIEW Timer prog...

Страница 44: ... limited programme is received during timer recording the unit enters Record Pause mode Recording starts again if it is switched to a recordable broadcast during the time you programmed VPS PDC Recording Now available from some TV stations PDC Programme Delivery Control and VPS Video Programme System are services designed to assure safe accurate timer recording With this system special code signal...

Страница 45: ...imer programming To programme another timer repeat steps 3 12 To Timer record The Programme With The Programmed Disc 1 Load a programmed disc 2 Press DVD TIMER The unit turns off and appears on the front display panel The DVD timer lamp also lights up on the unit and the VCR deck is automatically selected When the VCR deck is in timer standby mode the unit is automatically turned off To disengage ...

Страница 46: ...l drama every Friday in SP mode Example 2 To record a 15 minute serial drama every morning in XP mode Example 3 To record a 90 minute serial drama every Sunday in SP mode The first programme is overwritten by the third The second programme is overwritten by the forth Overwritten Blank Overwritten 1st 2nd 1st 2nd 3rd 4th 3rd 1st 2nd 3rd 4th 5th 6th 7th 8th Areas treated as blank cannot be played ba...

Страница 47: ...nd this overlap press PROG CHECK to finish the timer programme setting The programme with the lower programme number will be recorded and the other one will not be recorded correctly If no changes are made for approximately 1 minute the unit will return to the normal screen 2 Press rt to select the desired programme to be cancelled or changed To cancel the programme Press CANCEL THE TIMER PROGRAMI...

Страница 48: ...n progress turns off the unit s power and disengages the Automatic Satellite Programme Recording mode If there are more than one satellite programmes you wish to record with Automatic Satellite Programme Recording it is not possible to set different recording modes for each programme Depending on the type of satellite receiver the unit may not record a slight portion of the beginning of the progra...

Страница 49: ...ideo heads using a dry cleaning cassette ECL 3F when Rough poor picture appears while a tape is played back The picture is unclear or no picture appears USE CLEANING CASSETTE appears on the screen only with O S D set to AUTO 墌 pg 80 NOTE The heads get dirty in the following cases in an environment prone to extreme temperature or humidity in a dusty environment flaw dirt or mold on video tapes cont...

Страница 50: ...tedly the unit rewinds the pictures continuously and resumes playback Skip Search During playback press 1 to 6 times to skip over unwanted sections Each press initiates an approximately 30 second period of fast motion playback Normal playback resumes automatically To resume normal playback press 4 Index Search Your unit automatically marks index codes at the beginning of each recording This functi...

Страница 51: ...t is capable of recording three soundtracks HI FI L HI FI R and NORM and will play back the one you select During Playback Pressing AUDIO changes the soundtrack as follows NOTES HIFI L j h R should normally be selected In this mode Hi Fi stereo tapes are played back in stereo and the normal audio track is played back automatically for tapes with only normal audio For instructions on recording ster...

Страница 52: ...he TV s tuner NOTE It is required that the remote control is set to be able to operate the TV in advance 墌 pg 74 1 During recording press TV VCR to select TV mode if your unit is connected to the TV via the RF connection VCR mode is disengaged then the VCR indicator lights off and TV appears on the front display panel The programme received on the TV s tuner is displayed on the TV screen 2 Slide t...

Страница 53: ...aural audio while receiving a NICAM broadcast press AUDIO until NORM appears on the TV screen NOTE O S D must be set to ON or the on screen displays will not appear 墌 pg 53 To Record Stereo and Bilingual Programmes A2 Stereo programmes are automatically recorded in stereo on the Hi Fi audio track with the normal audio track recording mixed L and R channel sound Bilingual programmes are automatical...

Страница 54: ...ights up on the unit and the DVD deck is automatically selected When the DVD deck is in timer standby mode the unit is automatically turned off To disengage the timer mode press VCR TIMER again NOTES To Timer Record Weekly Or Daily Serials in step 5 press number key 9 for weekly serials or number key 8 for daily serials Monday Friday Either WEEKLY or DAILY appears on the TV screen Pressing the but...

Страница 55: ...AILY appears on the TV screen Pressing the button again makes the corresponding indication disappear You can programme this unit to timer record as many as 8 programmes If you try to programme the unit to record a ninth PROGRAMME FULL appears on the TV screen To record the extra programme you must first cancel any unnecessary programmes 墌 pg 56 In case of a power failure after programming the unit...

Страница 56: ...the overlapping programmes Overlapping programmes blink on the TV screen 2 Press rt to select the programme to modify then press ENTER or e You can only select one of the overlapping programmes NOTE If you do not mind this overlap press PROG CHECK to finish the timer programme setting The programme with the lower programme number will be recorded and the other one will not be recorded correctly If...

Страница 57: ... meanings Using Library Database DVD Navi system you can easily modify registered information edit the programme or play list as well as search for the beginning of each programme About registration of information The following information is automatically registered for each programme when ordinary recording or timer recording is performed then stored in an area specified on the unit index reduce...

Страница 58: ...back press 4 7 Press 8 to stop playback Modify Index 1 Press NAVIGATION The Library Database DVD Navi screen appears 2 Press rt w e to select ORIGINAL then press ENTER 3 Press rt w e to select one programme you want to modify then press t 4 Press rt w e to select MODIFY then press ENTER 5 Press w e to select MODIFY INDEX 6 Search for the picture from the programme by pressing the appropriate butto...

Страница 59: ...teps 1 to 2 of Modify Index 墌 pg 58 before continuing 2 Press rt w e to select a programme you want to protect then press t 3 Press w e to select PROTECT then press ENTER appears To cancel the protection repeat 2 3 again 4 Press NAVIGATION to return to the normal screen NOTE All the programmes on a disc will be deleted once the disc is formatted even if they are protected titles 墌 pg 59 Delete Pro...

Страница 60: ...e deleted part after deletion Play List It is a collection of the scenes A play list can be freely edited and played back without ever changing any original recording data Using the random access of a DVD disc which allows video data to be instantly read no matter where it is on the disc a play list includes information such as the timer counter for the playback start point and end point indexes f...

Страница 61: ...ted scene 9 Press w e to select EXECUTE then press ENTER The selected scene is added To modify the points A Press w e to select CLEAR then press ENTER B Repeat steps 5 8 as necessary 10 Press NAVIGATION to return to the normal screen NOTE There may be a discrepancy of several seconds between the scene you intend to edit and the scene which is actually edited Move Scenes 1 Perform steps 1 to 3 of C...

Страница 62: ...index small still pictures of the desired play list When you want the plural play lists to be played back continuously press MEMO after selecting the desired play lists The numbers of the playback order appear on the index You can select up to 30 play lists When you want to correct the order move the arrow on the desired index and press MEMO The number disappears and the unit re numbers the other ...

Страница 63: ...come impossible to operate properly Register Disc 1 Load a disc you want to register 2 Press NAVIGATION The Library Database DVD Navi screen appears 3 Press rt w e to select LIBRARY then press ENTER 4 Press w e to select REGISTER then press ENTER 5 Press w e to select REGISTER then press ENTER to confirm the registration 6 Press NAVIGATION to return to the normal screen NOTES It is not possible to...

Страница 64: ... ENTER The unit starts playback from the selected item The unit stops when all items in the selected group are played back NOTES If you press SELECT 4 instead of ENTER in step 4 the unit starts playback from the first file of the group JPEG files are played back as a slide show at the set intervals 墌 pg 38 If a file name includes any 2 byte character the unit may not show the file name correctly P...

Страница 65: ... shuts off To stop dubbing press 8 NOTES If you set the dubbing direction incorrectly you could erase an important recording that you wanted to dub It is recommended to conduct a test with unimportant cassettes first The superimposed indication during the operation or dubbing is not recorded It is not possible to dub a tape with a copy protection signal If the recording capacity of disc become ful...

Страница 66: ...6 Press 8 to stop recording on the DVD deck Then press VCR DVD and press 8 to stop playback on the VCR deck NOTES If you set the dubbing direction incorrectly you could erase an important recording that you wanted to dub It is recommended to conduct a test with unimportant cassettes first There may be a discrepancy of several seconds between where you intend dubbing to start and where it actually ...

Страница 67: ...e resume points There may be a discrepancy of several seconds between where you intend dubbing to start and where it actually stars The superimposed indication during the operation or dubbing is not recorded When the end of the tape is reached during dubbing the tape is ejected and both deck stops When the progressive mode is set DVD does not light up on the front display panel Press PROGRESSIVE S...

Страница 68: ...bbing 6 Press 8 to stop recording on the VCR deck Then press VCR DVD and press 8 to stop playback on the DVD deck NOTES It is not possible to start dubbing if the unit retains a memory of the resume points Press 8 twice to clear the resume points There may be a discrepancy of several seconds between where you intend dubbing to start and where it actually stars The superimposed indication during th...

Страница 69: ...k on the external DV equipment and recording on the unit should start simultaneously When the playback from the beginning is not possible the DV DUBBING controller cannot be used Perform dubbing without using the DV DUBBING controller 墌 below To pause dubbing press w e to select then press ENTER Both the unit and the external DV equipment pause dubbing Pressing 9 on the unit also works the same wa...

Страница 70: ...r slightly before the actual point from where you wish to start dubbing 6 Press 7 on the unit to start recording Or press and hold 7 and press 4 on the remote control The dubbing starts 7 Press 8 on the unit then stop playback on the camcorder NOTES All necessary cables can be obtained from your dealer Refer to the camcorder s instruction manual for operating procedure The quality of dubbed pictur...

Страница 71: ...ECODER connector set L 2 SELECT to VIDEO or S VIDEO 墌 pg 72 4 Press REC MODE repeatedly to set the recording mode 5 Engage the Play mode of the source player 6 Engage the Record mode of the recording deck 7 Stop recording on the recording deck then stop playback on the source player NOTES All necessary cables can be obtained from your dealer For Y C signal input output be sure to use a 21 pin SCAR...

Страница 72: ... VIDEO SCART RGB or COMPONENT it is not possible to set L 1 INPUT to S VIDEO If L 2 SELECT is set to DECODER it is not possible to set L 1 INPUT to S VIDEO If L 2 SELECT is set to DECODER it is only possible to set L 1 OUTPUT to SCART VIDEO Component video signals are not output from the L 1 IN OUT connector When Progressive scan mode is engaged it is not possible to select the setting of L 1 OUTP...

Страница 73: ...INPUT VIDEO S VIDEO VIDEO When connecting an appliance to the VIDEO input connector set to VIDEO S VIDEO When connecting an appliance to the S VIDEO input connector set to S VIDEO You can dub selected audio from a DVD or Audio CD disc to a digital audio device However it is not possible to dub copy protected discs Example Dubbing to an MD 1 Connect the unit and a digital audio device using either ...

Страница 74: ...addition to JVC TVs other manufacturer s TVs can also be controlled IMPORTANT Although the supplied remote control unit is compatible with JVC televisions as well as many other models it may not work with your TV or in some instances may have limited function capability Keep pressing SET UP down during step 1 1 Enter your TV s brand code using the number keys then press ENTER 2 Press 1 on the unit...

Страница 75: ... receiver you do not have to repeat this step until you replace your remote control s batteries Some brands of satellite receiver have more than one code If the satellite receiver does not function with one code try entering another 3 Press the corresponding button to operate the satellite receiver 1 PR number keys For some brands of satellite receiver you must press ENTER after having pressed the...

Страница 76: ...S VIDEO 墌 pg 72 You can use the Automatic Satellite Programme Recording function 墌 pg 48 with this connection DVD deck only To record a programme via the satellite receiver select L 2 mode by pressing PR so that L 2 appears on the front display panel To receive a scrambled broadcast descramble the signal with the decoder connected to the satellite receiver For details refer to the instruction manu...

Страница 77: ...ingual programme recorded on a DVD RAM or DVD RW VR mode disc In this case perform the following steps using the remote control to switch DIGITAL AUDIO OUT from DOLBY DIGITAL PCM to PCM ONLY A Press SET UP to access the Main Menu screen B Press w e to select DVD SET UP then press ENTER C Press w e to select AUDIO OUTPUT then press ENTER D Press rt to select DIGITAL AUDIO OUT then press ENTER E Pre...

Страница 78: ... channel stereo audio with the unit s AUDIO OUTPUT connectors connected to a stereo amplifier receiver or TV set or in case you want to record the audio from a DVD VIDEO disc to a Mini Disc etc DOLBY SURROUND Select this when listening to multichannel surround audio with the unit s AUDIO OUTPUT connectors connected to an amplifier receiver with a built in surround decoder or a surround decoder 8 D...

Страница 79: ...ors press ON SCREEN again When you use this unit as the source player for editing be sure to set SUPERIMPOSE to OFF before starting 墌 pg 79 When you select AUTO during playback the operation mode indicators may be disturbed depending on the type of disc being used 8 GRAY BACK OFF ON When this function is set to ON the TV screen becomes all grey when receiving a channel not in use NOTE When you wan...

Страница 80: ...tte is used for recording B E S T is re performed Pressing the unit s 7 button while BEST is displayed does not start Instant Timer Recording 墌 pg 53 8 PICTURE CONTROL AUTO EDIT SOFT SHARP This feature helps you to adjust the playback picture quality according to your preference Normally select AUTO AUTO Picture quality is adjusted automatically EDIT Minimizes picture degradation during editing re...

Страница 81: ...cally correct vertical vibration in the picture when playing back unstable recordings made on another recorder NOTES When you finish viewing a tape be sure to set this function to OFF Regardless of the setting this function has no effect during recording and during special effects playback The on screen display may jitter vertically when this function is set to ON To watch recordings with close ca...

Страница 82: ...ITIAL SET UP then press ENTER 3 Press w e to select AUTO CH SET then press ENTER 4 Press rt w e to select your country s name then press ENTER 5 Press rt w e to select the language of your choice 6 Press ENTER twice When you have connected the unit to a TV offering T V Link via a fully wired 21 pin SCART cable 墌 pg 18 the unit automatically performs the Preset Download and the T V LINK screen will...

Страница 83: ... MANUAL CH SET then press ENTER The Confirmation screen appears 4 Press rt w e to select a blank position in which you want to store a channel then press ENTER twice The Manual Channel Set screen appears 5 Press rt to select BAND then press ENTER 6 Press rt to change the band between CH regular and CC cable then press ENTER 7 Press rt to select CH then press ENTER 8 Press rt to input the channel n...

Страница 84: ...ion names 墌 pg 99 appear as you press rt 6 Press w e to select OK then press ENTER Repeat steps 2 6 as necessary 7 Press SET UP twice to close the Confirmation screen Set Stations B Set station names other than the ones registered in your unit 1 Perform steps 1 and 3 of Manual Channel Set 墌 pg 83 to access the Confirmation screen and then perform steps 2 and 3 of Set Stations A above before contin...

Страница 85: ...on the unit is in the Timer mode a difference of more than 3 minutes exists between the built in clock s time and the actual time the unit is in the Automatic Satellite Programme Recording mode 墌 pg 48 DVD deck only the unit is in the Power Save mode 墌 pg 79 L 2 SELECT is set to SAT VIDEO or SAT S VIDEO 墌 pg 72 DVD deck L 2 SELECT is set to SAT 墌 pg 81 VCR deck If Just Clock is set to ON the unit ...

Страница 86: ...when DISC WILL BE FORMATTED appears on the TV screen VR MODE To be chosen when you want to record erase or edit data on the disc repeatedly VIDEO MODE To be chosen when you want to erase all the data on the disc once played back to record new data or play back the disc on other DVD players 3 Press w e to select YES then press ENTER when DISC WILL BE FORMATTED IN VR MODE VIDEO MODE appears on the T...

Страница 87: ...D R RW discs used and on the conditions of recording it may not be possible to play back the discs In this case play back the discs on this unit Additional recordings become impossible Finalise A DVD R RW Disc 1 Perform steps 2 to 4 of Format A DVD RAM Disc 墌 pg 86 before continuing 2 Press rt to select FINALISE then press ENTER Press w e to select YES then press ENTER when DISC WILL BE FINALISED ...

Страница 88: ... connector and L 1 IN OUT connector You can lock the disc tray to prohibit the unwanted disc ejection by children To lock tray While the unit is turned off press and hold 8 then press x on the unit LOCKED appears on the front display panel and the disc tray is locked To unlock tray While the unit is turned off press and hold 8 then press x on the unit UNLOCK appears on the front display panel Scan...

Страница 89: ...s not selected Press VCR DVD repeatedly so that the DVD lamp lights up on the unit The TV is not set to the AV mode Set the TV to its AV mode When interlace scanned programme is played back progressive scan mode is selected Press and hold PROGRESSIVE SCAN until disappears from the front display panel The disc is loaded upside down Place the disc on the disc tray with the playback surface facing do...

Страница 90: ...rd Pause mode Press 4 to resume recording There is no cassette loaded or the cassette loaded has had its record safety tab removed Insert a cassette or using adhesive tape cover the hole where the tab was removed L 1 L 2 or F 1 has been selected as the input mode Set to the desired channel The camcorder has not been properly connected Confirm that the camcorder is properly connected The input mode...

Страница 91: ...can t be performed while a timer recording is in progress Wait until it finishes Date and time is not correct Set date and time correctly 墌 pg 85 The timer is not engaged Press VCR TIMER and confirm that the VCR timer lamp lights up on the unit The timer is engaged but there s no cassette loaded Load a cassette with the record safety tab intact The loaded cassette has had its record safety tab rem...

Страница 92: ...e loaded disc Recording and or editing cannot be performed with a loaded DVD RAM disc The number of titles exceeds 99 The number of play lists exceeds 999 To set the timer programme the clock must be set in advance 墌 pg 85 You can programme this unit to timer record as many as 8 programmes To programme more you need to cancel a timer programme already set 墌 pg 47 On Disc Timer Programming has been...

Страница 93: ...timer recording is about to begin while playback continues An attempt has been made to record copy protected contents An attempt has been made to record copy once contents on a disc that is not CPRM compatible such as DVD R The unit has detected invalid contents at the start or in the middle of playback An attempt has been made to start DV dubbing when a digital video camera is not properly connec...

Страница 94: ...rmat one CD R RW can contain about 10 times as much data volume as a regular CD can 8 MPEG A family of Standards for compressing audio visual information MPEG standards include MPEG 1 MPEG 2 and MPEG 4 Video CD and MP3 are based on MPEG 1 while DVD is based on MPEG 2 MPEG stands for Moving Picture coding Experts Group 8 Multiangle By recording multiple scenes progressing at the same time in a sing...

Страница 95: ... Dolby Digital and DTS Digital Surround Bit stream Selectable in digital audio output setting menu Signal system PAL color signal and EIA monochrome signal 525 lines 60 fields Recording system DA4 Double Azimuth head helical scan system Format VHS NTSC standard Maximum recording time SP 210 min with ST 210 video cassette EP 30 min with ST 210 video cassette Signal to noise ratio 45 dB Horizontal r...

Страница 96: ...ti CO Corsican LN Lingala ST Sesotho CS Czech LO Laothian SU Sundanese CY Welsh LT Lithuanian SW Swahili DZ Bhutani LV Latvian Lettish TA Tamil EL Greek MG Malagasy TE Telugu EO Esperanto MI Maori TG Tajik ET Estonian MK Macedonian TH Thai EU Basque ML Malayalam TI Tigrinya FA Persian MN Mongolian TK Turkmen FJ Fiji MO Moldavian TL Tagalog FO Faroese MR Marathi TN Setswana FY Frisian MS Malay MAY ...

Страница 97: ...ados EC Ecuador IL Israel BD Bangladesh EE Estonia IN India BE Belgium EG Egypt IO British Indian Ocean Territory BF Burkina Faso EH Western Sahara IQ Iraq BG Bulgaria ER Eritrea IR Iran Islamic Republic of BH Bahrain ES Spain IS Iceland BI Burundi ET Ethiopia IT Italy BJ Benin FI Finland JM Jamaica BM Bermuda FJ Fiji JO Jordan BN Brunei Darussalam FK Falkland Islands Malvinas JP Japan BO Bolivia ...

Страница 98: ...on UA Ukraine MP Northern Mariana Islands RO Romania UG Uganda MQ Martinique RU Russian Federation UM United States Minor Outlying Islands MR Mauritania RW Rwanda US United States MS Montserrat SA Saudi Arabia UY Uruguay MT Malta SB Solomon Islands UZ Uzbekistan MU Mauritius SC Seychelles VA Vatican City State Holy See MV Maldives SD Sudan VC Saint Vincent and the Grenadines MW Malawi SE Sweden VE...

Страница 99: ...R MOVE MTV MTV1 MTV2 MTV3 NGEO N24 N3 N TV NBC NDR NED1 NED2 NED3 NET5 NEWS NICK NOVA NRK1 NRK2 ODE ORF1 ORF2 PHOE POLS PREM PRIM PRO7 RAI1 RAI2 RAI3 RET4 RTB1 RTB2 RTL RTL2 RTL4 RTL5 RTL7 RTLK RTP RTV4 SAT1 SBS6 SERV SF1 SF2 JIM TV JSTV KA2 KABEL1 KANAL2 KANAL5 KBH KANAL KINDER KANAL LA7 LIBERTY TV LOCAL M6 MBR MCM MDR MOVIE MTV MTV1 MTV2 MTV3 NATIONAL G NEWS24 NORD3 N TV NBC SUPER NDR NED1 NED2 ...

Страница 100: ...guage Set 20 Mode Set VHS deck B E S T 80 COLOUR SYSTEM 81 L 2 SELECT 81 N Next Function Memory 51 O On Disc Timer Programming 45 One Touch Replay 32 On screen bar 33 On screen Language Set 20 P Pan Scan 23 Play List 60 Playback 24 39 49 51 Playback Control PBC 28 Program Playback 37 Q Quick Rewind A Little 50 R Random Playback 38 Recordable playable discs 6 Recording 40 52 Recording Medium And Fo...

Страница 101: ...EN 101 Memo ...

Страница 102: ...102 EN Memo ...

Страница 103: ...EN 103 Memo ...

Страница 104: ...DR MV1 COPYRIGHT 2004 VICTOR COMPANY OF JAPAN LTD E 104 EN EN Printed in Beijing 0304MNH ID BJ ...

Отзывы: