4. Operation 11
4. Operation
4.1 Basic Operation
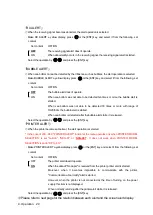
Turning Power ON/OFF [PWR/PANEL]
・
To turn on power, press the [PWR/PANEL] key for about three seconds.
・
To turn off power, press the [PWR/PANEL] key and the [BRILL] key for about three seconds.
Adjusting Control Panel Illumination [PWR/PANEL]
・
On echo sounder working, press the [PWR/PANEL] key, the brightness level is displayed in the bar graph.
・
The brightness of the operation panel changes into nine stages including OFF.
・
Whenever the key is pressed, a white part in the bar graph increases
and brightness goes up.
・
Whenever the key is pressed, a black part in the bar graph
increases and brightness goes down.
・
Press the [CLR] key or leave it for ten seconds, the bar graph is not displayed.
Adjusting Screen Brilliance [BRILL]
・
On echo sounder working, press the [BRILL] key, the brightness level is displayed in the bar graph.
・
The brightness of the LCD display changes into ten stages excluding OFF.
・
Whenever the key is pressed, a white part in the bar graph
increases and brightness goes up.
・
Whenever the key is pressed, a black part in the bar graph
increases and brightness goes down.
・
Press the [CLR] key or leave it for ten seconds, the bar graph is not displayed.
Range Control [RANGE+] [RANGE-]
・
The range change of this equipment is seven stages of 10, 20, 50,100,200,500,800m.
・
Whenever [RANGE +] key is pressed, the range is switched to the deep end.
・
Whenever [RANGE-] key is pressed, the range is switched to shallow one.
・
Keep pressing [RANGE+] key and [RANGE-] key to the setting of auto range at the same time for about
three seconds. Moreover, auto range can be set from the menu. (Refer to 4.3 Display Setting.)
・
When auto range setting it,
“
AUTO" is displayed on the screen. However, when the manual operation is set,
nothing is displayed.
・
When you release auto range, press [RANGE+] key or [RANGE-] key.
・
After auto range releases it, it operates by range when releasing it. It doesn't return to range before setting
auto range.
Note
:
Sea bottom might not be displayed according to the setting of draft.
When sea bottom is not displayed, depth is not displayed.
PANEL
B
R
I
L
L
Содержание JFE-680 -
Страница 2: ......
Страница 9: ...External View External View vii NO ALERT ...
Страница 18: ...1 5 System Configuration 1 Introduction 6 alert alert alert alert alert alert alert ...
Страница 46: ...4 Operation 34 2 HISTORY print mode 3 LOG print mode 24hours history 30minutes log 1hour time mark ...
Страница 54: ...5 1 Installing the Recorder Unit Flush Mount Equipment Figure 3 1 5 Installation 42 Unit mm ...
Страница 55: ...Wall Mount Equipment Figure 3 2 5 Installation 43 Unit mm ...
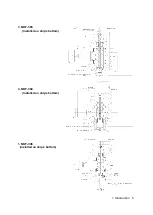
Страница 57: ...NKF 345 5 Installation 45 ...
Страница 58: ...NKF 392C 5 Installation 46 ...
Страница 59: ...NKF 393 5 Installation 47 ...
Страница 60: ...NKF 394 5 Installation 48 ...
Страница 61: ...NKF 396 5 Installation 49 ...
Страница 79: ...Appendix Noise Bubble Noise Bubble Interruption Interference Noise from other ship Plankton layer Appendix 67 ...
Страница 84: ......
Страница 85: ......


