background image

16

Verbinden Sie nun, wie beim Höhenruder beschrieben, das Seiten-
rudergestänge mit dem Seitenruder.

As above, connect the plastic clevis to the control horn on the rud-
der.

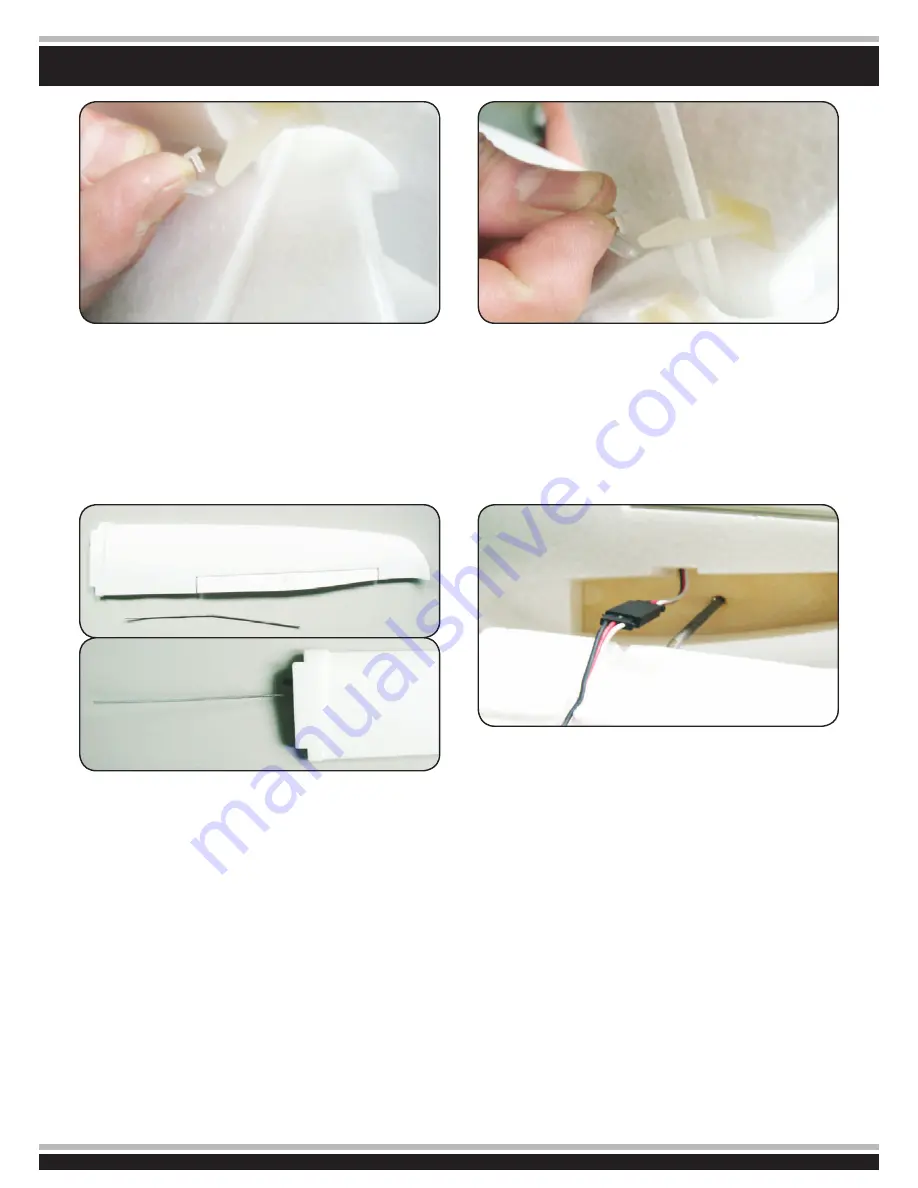
Führen Sie das andere Ende der Verbindungstange im Rumpf ein 
und führen die Verbindungsstange die Aussparung der Holzplatte 
im Rumpf. Nun führen Sie das Kabel für das Querruderservo in den 
Rumpf ein und verbinden es mit dem Empfängerkabel. Schieben 
Sie nun die Tragflächenhälfte bündig an den Rumpf an.

Insert the other end of the metal spar into the round hole of woo-
den plate inside the fuselage.
Leave enough room to connect the servo plug for the left hand 
aileron servo into the socket on the left side of the fuselage. Check 
the black wire of the plug lines up with the black wire of the socket.
Now push the wing all the way into the fuselage.

Verbinden Sie das Höhenrudergestänge mit dem Ruderhorn am 
Höhenruder. Stecken Sie den Gabelkopf in das äußerste Loch im 
Ruderhorn.

When the epoxy has set, connect the plastic clevis to the elevator 
control horn. Connect clevis to the outermost hole in the control 
horn.

Stecken Sie die Verbindungsstange in die linke Tragflächenhälfte 
ein.
Schieben Sie die Verbindungsstange etwa bis zur Mitte der Tragflä-
chenhälfte ein.

Locate the metal spar and left hand wing panel. Gently push the 
metal spar into the left main wing panel till the half spar is fully 
inserted.

Содержание 00 7280 PNP

Страница 1: ...anleitung griffbereit auch nach Abschluss der Montagearbeiten Safety precautions This radio control model is not a toy Not suitable for persons under 14 years First time builders should seek advice pe...

Страница 2: ...ie H nde von Kleinkindern gelangen Betreiben Sie dieses Flugmodell niemals auf nassen Fl chen die elektronischen Bestandteile k nnten besch digt werden Wenn dieses Modell das erste ferngesteuerte Flug...

Страница 3: ...n or over damp surfaces this may damage the electronics If this model is the first radio controlled model which you are attempting to build or fly you should secure the assistance of an experienced mo...

Страница 4: ...mationen finden Sie auch unter www jamara com Downloads Konformit tserkl rung Einschl gige EG Richtlinien R TTE Funktechnische Einrichtungen 1999 5 EG nur RTF Elektromagnetische Vertr glichkeit EMV 20...

Страница 5: ...mara com Downloads Konformit tserkl rung Relevant EEC Directives Radio Telecom Terminal Equipment R TTE 1999 5 EC only RTF Elektromagnetische Vertr glichkeit EMV 2004 108 EC WEEE Waste Electrical and...

Страница 6: ...ungef hrlich und bed rfen einer besonderen Sorgfalt Die Firma JAMARA schlie t daher ausdr cklich jegliche Haftung f r Sch den aus die durch den fehlerhaften Umgang mit den Lithium Polymer Zellen entst...

Страница 7: ...here is a risk of getting fire or acid injuries Overcharging too high power or discharging at low level destroys the cell Protect from mechanical stress squeezing pushing bending drilling Never open o...

Страница 8: ...wordene Komponenten selbst wenn sie wieder trocken sind nicht mehr verwenden Ersetzen Sie diese Teile oder lassen Sie diese von unserem Service berpr fen Dar ber hinaus beachten Sie unbedingt folgende...

Страница 9: ...oid exposing the system to impact or vibration and inspect all of the components regularly for damage to the casing plugs sockets and cables If any component gets damaged or is exposed to water do not...

Страница 10: ...ngen kommen kann Au erdem ist die bertragung im 2 4 GHz Band grunds tz lich st rungsunempfindlicher Andererseits ist aber das Binden ei nes Empf ngers an den zugeh rigen Sender unbedingt notwendig Sen...

Страница 11: ...signal anyway This does however mean that you have to bond all of your receivers to your transmitter but this is a small price to pay for peace of mind Transmitter The transmitter is available with th...

Страница 12: ...ssen auch bei der CX 2 4 GHz der Sender und der Empf nger gebunden aufeinander abgestimmt werden Dieser Vorgang ist absolut wichtig ohne die im Folgen den beschriebene Prozedur funktioniert die Ferns...

Страница 13: ...receiver As with all 2 4 GHz systems the receiver must be bonded to the transmitter This step is vital as if it is not carried out the system will not work Before attempting to use the system proceed...

Страница 14: ...aus dem Modell und lassen ihn abk hlen 3 Laden Sie den Akku unter normalen Temperatur bedingungen decken Sie den Akku nicht ab damit die entsthaende W rme gut abgef hrt werden kann 4 Lassen Sie den Ak...

Страница 15: ...the tail unit to the fuselage and glue to the fuselage Ziehen Sie die Tr gerfolie des Doppelseitigem Klebebands vom Sei tenleitwerk ab Hinweis Das Bild zeigt das Seitenleitwerk mit dem doppel seitige...

Страница 16: ...o connect the servo plug for the left hand aileron servo into the socket on the left side of the fuselage Check the black wire of the plug lines up with the black wire of the socket Now push the wing...

Страница 17: ...e and on the battery will secure the battery in place Installieren Sie nun die rechte Tragfl che in dem Sie die Schritte der Montage der linken Tragfl che wiederholen In like manner install right wing...

Страница 18: ...Schalters am Sender ndern Control surface Before each start you should check the control surface Aileron Looking from the back of the model push the aileron control stick completely to the left The le...

Страница 19: ...nge Wenn die Quer H hen und Seitenruder nicht in Neutral stellung stehen k nnen Sie die Ruderausrichtungen auch durch k rzung der Rudergest nge regulieren Dazu sollten Sie die jeweilige Ruderanlenkun...

Страница 20: ...____________ E mail _______________________________ Bitte senden Sie den Katalog f r mich an folgenden Fachh ndler Please send the catalogue to the following specialist dealer Ihr Fachh ndler Your dea...

Отзывы: