1. CHRONOTHERMOSTAT
Features of the chronothermostat
pg. 3
Contents of the package
pg. 3
Display and control keys
pg. 3
Warnings
pg. 4
List of alarms
pg. 4
Chronothermostat conditions of warranty
pg. 4
Contacts
pg. 4
Battery replacement
pg. 5
Operating modes
pg. 5
Chronothermostat configuration
pg. 6
Automatic temperature setting
pg. 9
Installing the chronothermostat
pg. 10
Technical characteristics of the chronothermostat pg. 12
2. ACTUATOR
Features of the actuator
pg. 14
Contents of the package
pg. 14
Led indicator and front selector switch
pg. 14
Warnings
pg. 14
Technical characteristics of the actuator
pg. 15
Battery replacement
pg. 16
Remote sensor
pg. 16
Room comfort temperature adjustment
pg. 16
Installing the actuator
pg. 17
Manual release
pg. 17
3. TECHNICAL SECTION
3 . 1 (CHRONOTHERMOSTAT)
Chronothermostat - setup
pg. 18
Association of an actuator with the chrono-
thermostat
pg. 19
3 . 2 (ACTUATOR)
Actuator – setup
pg. 20
4. FUNCTION NAVIGATION MAP
pg. 22
5. APPENDIX
pg. 23
INDEX
INSTALLING THE EQUICALOR SYSTEM
1) Identify the zones
Plan out the division of the house into zones, determining
the quantity.
2) Define a position for the chronothermostat
The chronothermostat measures the temperature of the
room where it is installed; therefore, it must be in a position
exposed to good air circulation, at 5 ft above the floor. See
Typical placement of device
on pg. 10
.
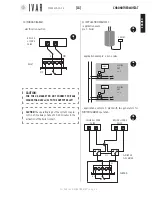
3) Chronothermostat wall installation
Secure the chronothermostat in the desired position and con-
nect it to the boiler. Refer to
Wall installation
on pg. 11.
CAUTION! Make sure to cut-out the mains voltage to the
electrical system before carry out this procedure.
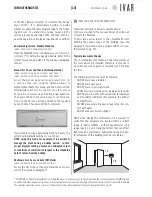
4) Insert the batteries in the chronothermostat
The chronothermostat requires 3 AA 1.5 V Alkaline batteries. To
insert the batteries refer to
Battery replacement
on pg. 5.
5) Setting the language, date and time
Enter the data for first start up, as indicated in the para-
graphs
Current language
,
Date
and
Time (Set time)
on pg.
7. To use the control keypad see
Chronothermostat Con-
figuration
and
Menu Navigation
on pg. 6.
6) Configuring the zones
Set the number of zones in the house, as indicated in the para-
graph
Number of managed zones
on pg. 19. To access the
function refer to
Chronothermostat Configuration
on pg. 6.
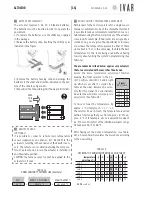
7) Insert the batteries in the actuator
Each actuator requires 3 AA 1.5 V alkaline batteries. To insert
the batteries refer to
Battery replacement
on pg. 16.
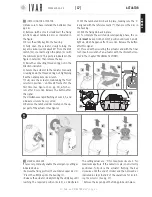
8) Installing the actuator
Install the actuators on their respective radiators. Refer to
Installing the actuator
on pg. 17.
9) Associate all the actuators to the chronothermostat and
test them
Refer to the chapter
Association of an actuator with the
chronothermostat
on pg. 19.
QUICK GUIDE
300546US-10-14
Содержание Equicalor
Страница 46: ...300546US 10 14 ...
Страница 47: ...300546US 10 14 ...
Страница 48: ...300546US 10 14 W W W I V A R U S C O M EQUICALOR IT GB DE FR ES DE BE CZ NO ...


