


Chapter 10: Camera setup
TruVision NVR 11 User Manual
67
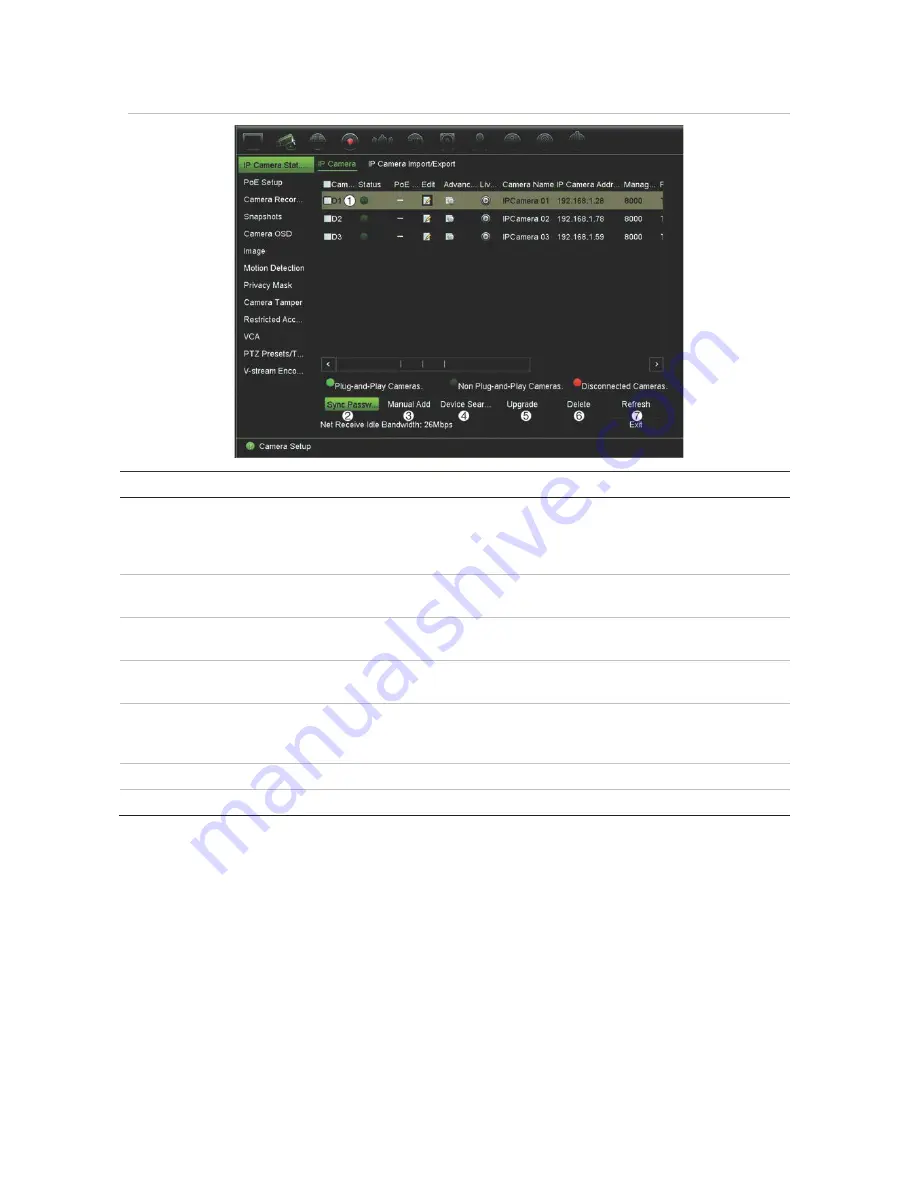
Figure 23: IP Camera Status window
Option
Description
1. IP camera list
This shows the list of IP cameras added to the recorder. The camera
information shown is: Camera No., Status, PoE port, Edit, Advanced Set,
Live View, Camera Name, IP Camera Address, Manage Port, Protocol,
Device Model, Serial Number, and Firmware.
2.
Sync Password
Sets all connected TruVision IP cameras to the same admin password as
the recorder.
3. Manual Add
Add a camera manually to the recorder by entering its IP address and other
required information.
4. Device Search/Add
Search the network for available TruVision or other natively supported IP
cameras. Add an IP camera to the recorder system.
5. Upgrade
Upgrade IP camera software. Insert USB flash drive in the recorder and
select the upgrade file. The camera will automatically reboot once the
software is upgraded.
6. Delete
Delete the selected IP camera from the list.
7. Refresh
Update the information displayed on a camera in the recorder device list.
Adding IP cameras to the recorder
IP cameras and their passwords
When you add an IP camera to the recorder via the LAN or PoE ports, the system
automatically checks the camera’s password to ensure that it is the same as that of the
recorder or that it is 1234. There are two scenarios:
Содержание TruVision NVR 11
Страница 1: ...TruVision NVR 11 User Manual P N 1073397 EN REV B ISS 17APR18...
Страница 4: ......


