


62
63
network control
Operation steps
1 power on your projector.
2 Acquire the ip address, with DhCp set to on
and auto ip allocation set to On. (You may set
DhCp to Off and set up ip address manually
if you are somehow familiar with networking.)
3 enter the network setup menu
(1) press menu button on remote controller
or top of the control panel, press
button to select network icon.
(2) press enTeR button or button and the
network menu displays.
(3) press
button select network settings
and press ENTER to confirm.
(4) press
button to set DhCp On and
press OK button to confirm.
(5) press
button to select Set, press
OK button to wait until the “please wait..”
message disappears.
network control operation
Function: This function is designed to remote control computer in the same LAn.
preparation
1 Required equipment: projector, computer, network cable
2 Connection:
Connect your projector to a router or switch in the LAn with normal or jumper network
cable. in case a normal network cable failed to connect successfully, use a jumper cable
instead.
3 Turn on the computer. The LAN port on computer and projector are flashing after power
on the projector.
note:
●
if you are using the wireless network connection, please check the SSiD / eSSiD and wire-
less ip address in the network Setting status , and write down the information.
network control
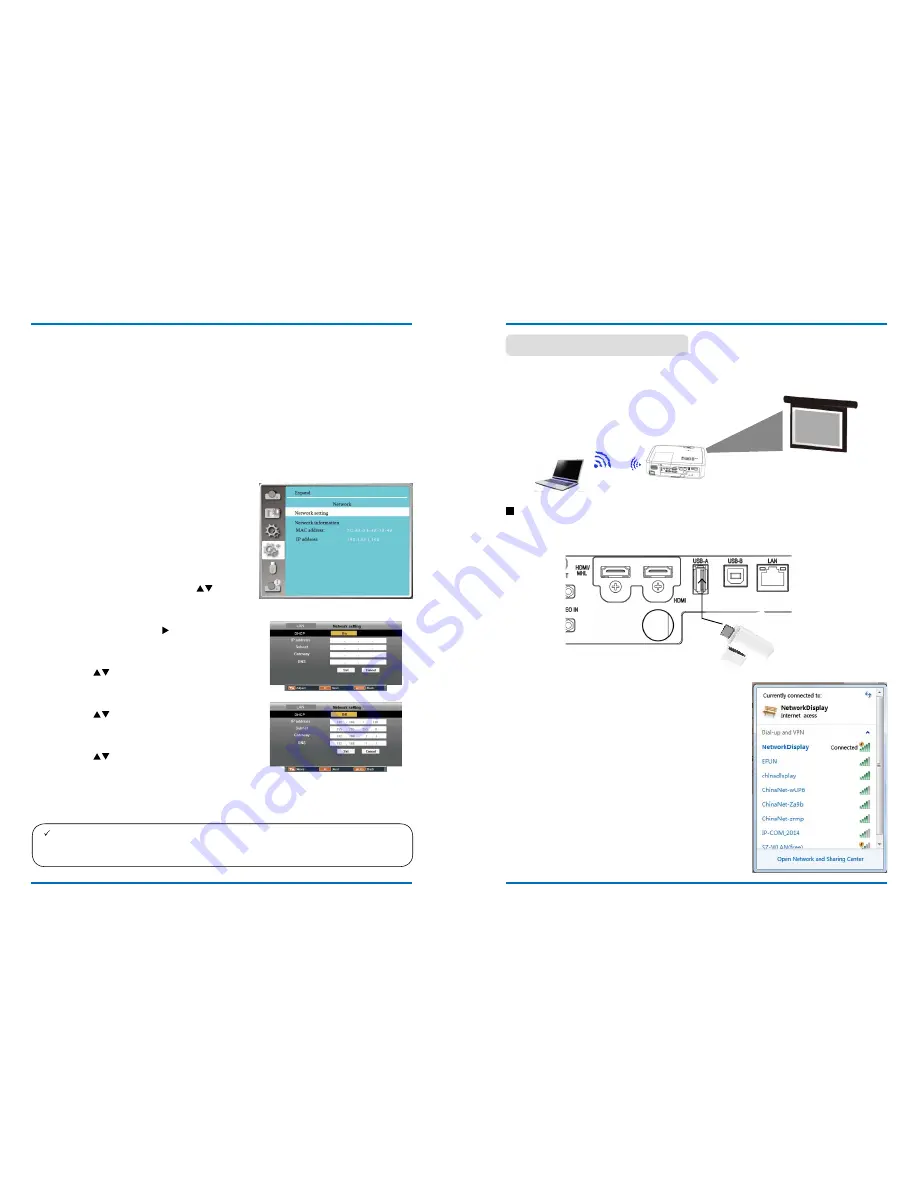
Wi-Fi display enable to connect pC with the projector wirelessly to realize high-speed transmission
between devices, allowing users to enjoy high-definition video display without the need for cables
circumstances.
Wi-Fi display
(
For pC.
)
1. inset the supplied WiFi dongle into the uSB-A port.
●
For this fuction,users need to purchase the WiFi dongle seperately with your suppliers.
2. p
lease find "NetworkDisplay" in the Open Network
and Sharing Center and click "Connect" to connect
the WiFi .
Wireless network setup


