ImpulseRadar PinPointR User Manual V1.5
Page 25 (36)
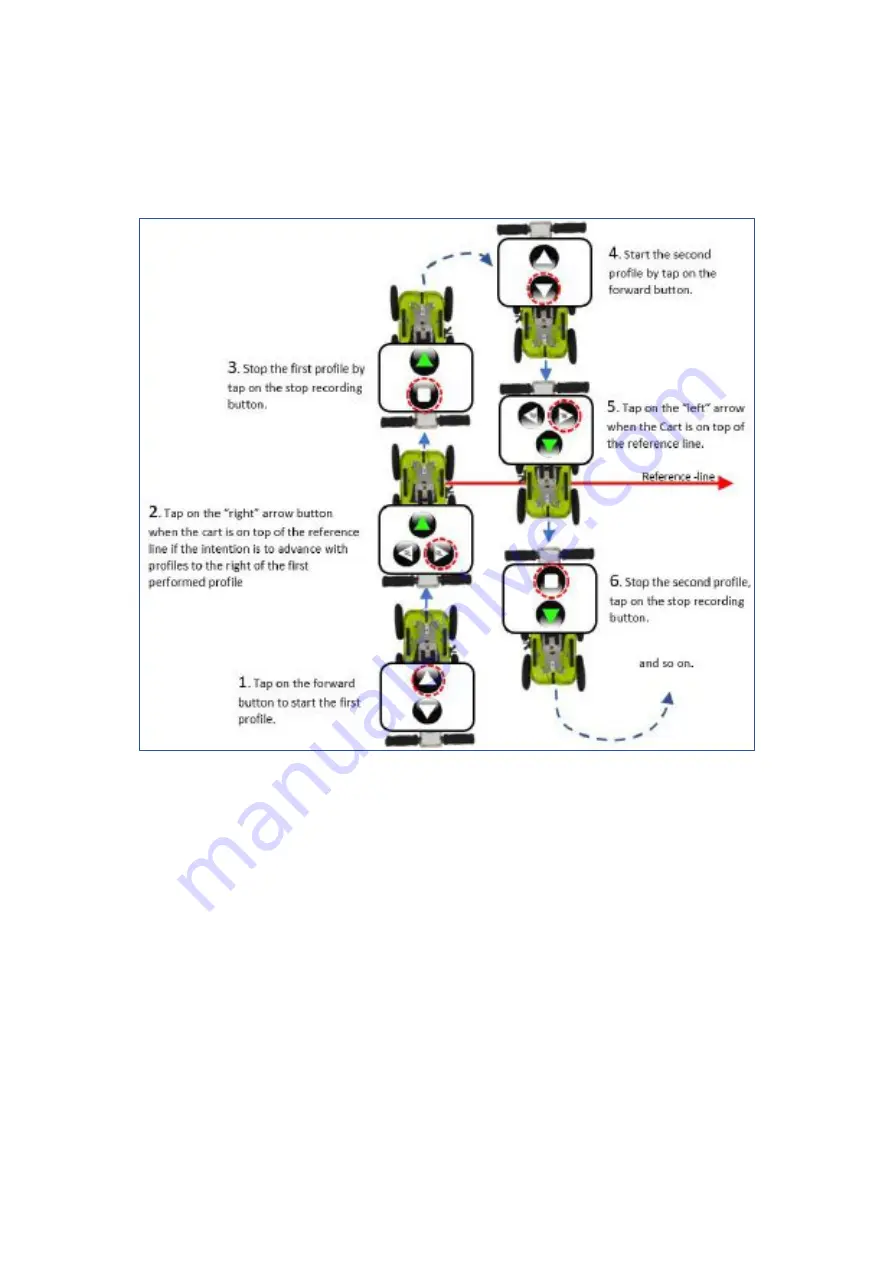
Once the project has started, the data collection screen will appear with directional control buttons,
as shown in
Note:
during data collection, you can still view either the single-channel (low or high frequency) or dual-
channel (low and high frequency) data, just as in the ‘
single-
line project’ mode.
Figure 28
Controls during reference-line projects, forward survey, and profiles to the right of the first profile
Select the direction of the collection (forward/ backwards) and press the appropriate button to start
the profile. Note the example in
illustrates a forward motion of the push-cart for all profiles
in the Reference Line project and requires a 180° turn at the end of each profile.
Instead of turning the push-cart 180° at the end of each profile, you can also reverse the push-cart -
just activate the recording using the reverse arrow on the screen. The selected button will be
highlighted in green to indicate the chosen direction, and additional buttons (left/right) will become
available. These buttons are used for the placement of the reference marker, by indicating the position
of the start point to the direction of travel when crossing the reference-line.
Referring to, the first profile is collected by moving away from position
1.
Upon reaching the reference-
line at point
2
, a reference marker is placed in the data by pressing the ‘right‘ or
“left”
arrow button. If
the decision is to move to
the “right”
with the upcoming profiles, from now on, all profiles in the project
must be moved to the
“
right
”
of the first profile. Make sure that the push-cart is stopped on top of the
Reference line, arrows on the Cart hood must match the Reference line. The profile continues to be
collected until reaching point
3
, at which the stop button is pressed.


