Part 3 - Search
77
Clip Copy
Clip Copy
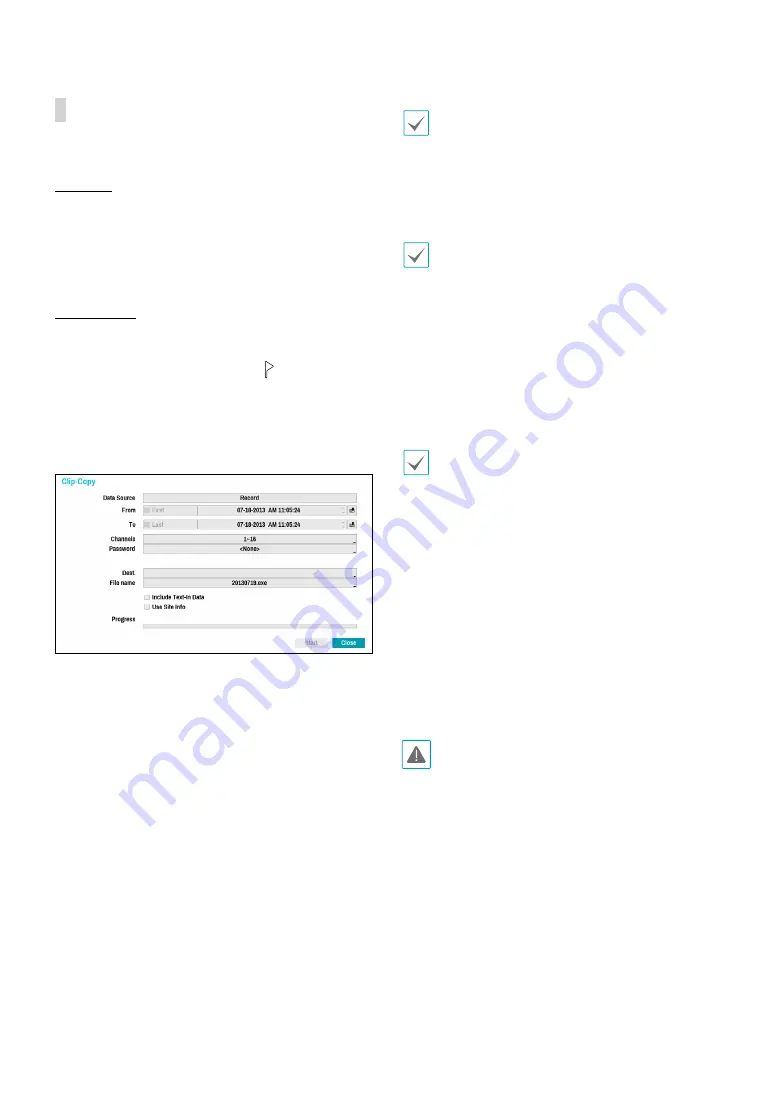
Select Clip-Copy – Clip Copy from the Search menu or
press the remote control’s CLIP COPY button while in
Live or Playback mode to open up the Clip Copy setup
window. Specify the From and To settings.
A-B Clip Copy
Designate a start point and an end point and copy the
data in between. Select Clip-Copy – A-B Clip Copy from
the Search menu to set point A. The
icon will appear
on the status indicator area on the upper right corner
of the screen. Select Clip-Copy – A-B Clip Copy once
again to set point B. The Clip Copy Setup window will
appear. Select A and B points are automatically applied
as From and To values.
●
Channels: Specify which channel to save the
recording to.
●
Password: Enable password protection for the saved
video clip and assign a password.
●
Dest.: Select which storage media to use. If NetFS
feature is in use, you can upload video clips to the
registered FTP site.
File name: Designate a name for the file. The name may
be up to 63 characters in length.
Special characters such as \, /, :, ;, *, ?, !, “, <, >, and | are
not permitted.
●
Include Text-In Data: Enabling this option will save
the video clip along with any available text-in data.
●
Use Site Info: Adds Site info to the Clip Copy file’s
name.
Special characters contained in the location info (such
as \, /, :, ;, *, ?, !, “, <, >, and |) will be replaced with _
when the information is added to the file name.
Selecting Start displays a calculation on the size of the
data to be copied. Check the calculation and then select
Continue to proceed. While Clip Copy is in progress, you
can select Cancel to cancel the process or select Close
to allow the window to run in the background. Selecting
Close does not cancel Clip Copy. Once the process is
complete, you will be prompted with a confirmation
window.
•
One-Touch Clip Copy configures the storage range
automatically based on the storage drive's capacity.
If there is insufficient space available on the selected
storage device, you will only be able to Clip Copy
an amount of data equaling the remaining space
available on the storage device.
•
The NVR displays the volume as 30GB regardless of
the actual disk volume and the maximum size limit
on Clip Copy files is 30GB. Clip Copying a segment
that is more than 2GB in size produces multiple files
that are up to 2GB in size, each.
•
Clip Copy files can be played back on Windows
systems. For more information, refer to the IDIS
Center operation manual.
•
For USB flash memory devices, the NVR supports the
FAT32 file format only.
Do not disconnect the USB cable or power off the USB
device while USB Clip Copy is in progress. Doing so
can cause the NVR to malfunction or critically damage
the external USB device's file system. You may be
prompted with an error message when trying to back
up on the device. If so, you will need to restart the NVR.
If the USB hard disk's file system has been damaged,
restarting the NVR will not solve the problem and
the aforementioned error message will continue to
be displayed each time you attempt a backup. If this
is the case, you will need to format the HDD or use a
recovery program to repair the damage to the drive's
file system.


