44
MAINTENANCE
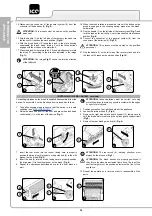
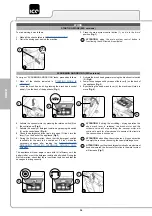
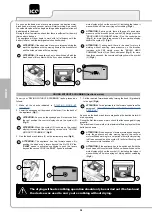
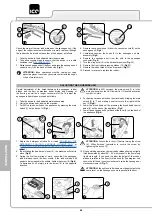
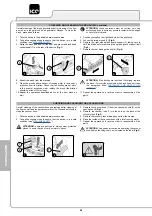
CHECKING AND CLEANING THE SOLUTION TANK CAP-FILTER
A thorough cleaning of the solution tank filter guarantees a longer
life span of the appliance's water circuit system, ensuring a better
floor cleaning performance. Proceed as follows to clean the solution
tank's cap-filter:
1. Take the device to the dedicated maintenance area.
2. Take all necessary steps to ensure that the device is in a safe
ATTENTION:
users are advised to always wear protective
gloves, to avoid the risk of serious injury to hands.
3.
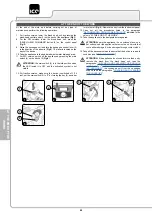
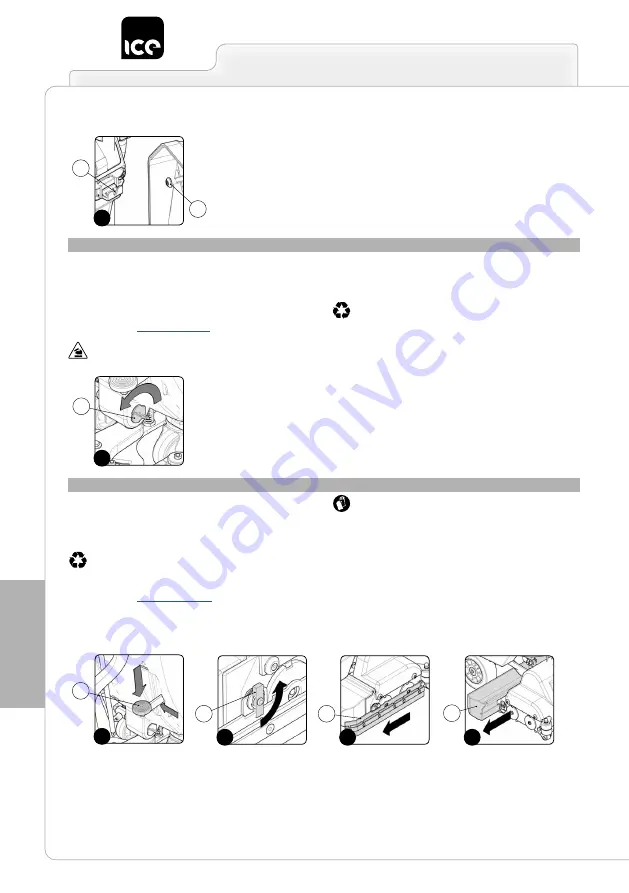
Unscrew the detergent solution cap-filter (1), turning it counter-
clockwise (
Fig.1
).
4. Clean it under a jet of clean water. Remove any impurities that
may be present.
ATTENTION:
the place designated for this operation must
comply with current environmental protection regulations.
5. Repeat the operations in reverse order to reassemble all the
parts.
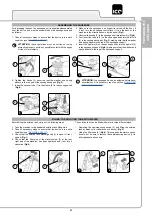
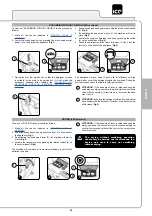
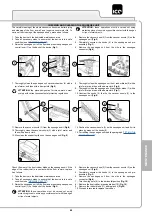
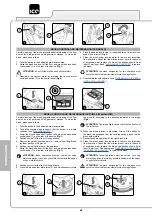
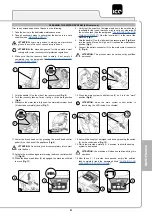
7. Insert the clamp (3) of the recovery tank cover in the slot (4) on
the recovery tank cover support (
Fig.5
).
8. Rinse the inside with a jet of water, if necessary use a spatula
to remove the sludge that has accumulated at the bottom of the
tank.
9. Repeat the operations in reverse order to reassemble all the
parts.
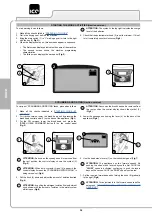
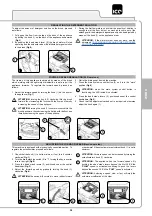
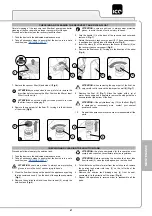
CHECKING AND CLEANING THE DEBRIS HOPPER (50C versions)
The thorough cleaning of the debris hopper ensures better floor
cleaning performance. To clean the debris hopper, proceed as
follows:
1. Take the device to the dedicated maintenance area.
ATTENTION:
the place designated for this operation must
comply with current environmental protection regulations.
2. Take all necessary steps to ensure that the device is in a safe
’”).
3.
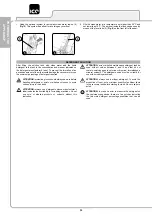
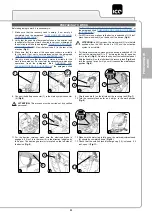
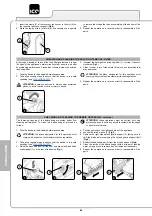
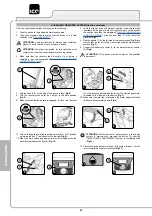
Raise the brush head unit off the floor and press the brush head
control pedal (1) on the rear of the device (
Fig.1
).
ATTENTION:
these operations must be carried out using
protective gloves to avoid any possible contact with the edges
or tips of metal objects.
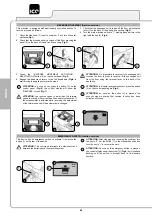
4. Position yourself on the right-hand side of the appliance.
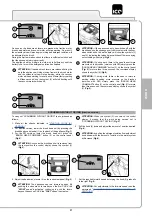
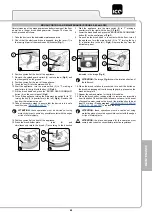
5. Loosen the retainer knob (2) (
Fig.2
).
6. Remove the right side splash guard support (3), taking care to
shift the blade before removing the splash guard support itself
(
Fig.3
).
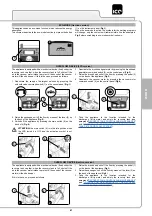
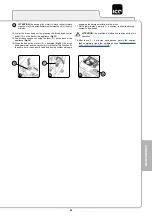
7. Extract the debris hopper (4) from the brush head unit (
Fig.4
).
8. Clean the inside of the debris hopper with a stream of running
water, using a brush to remove any dirt residues if necessary.
9. Repeat the operations in reverse order to reassemble all the
parts.
1
1
5
4
3
1
1
4
4
2
3
2
3

