background image

Page 102 

Using Your Basic Applications

Tip:

A quick way to create a new Expense item is to make sure that 

no Expense item is selected in the Expense List, write the first 
letter(s) of the expense type, and then write the numerical 
amount of the Expense item. This technique takes advantage 
of the automatic fill feature. See “Options menu” later in this 
chapter for details.

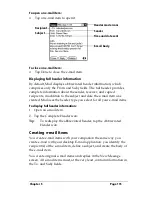
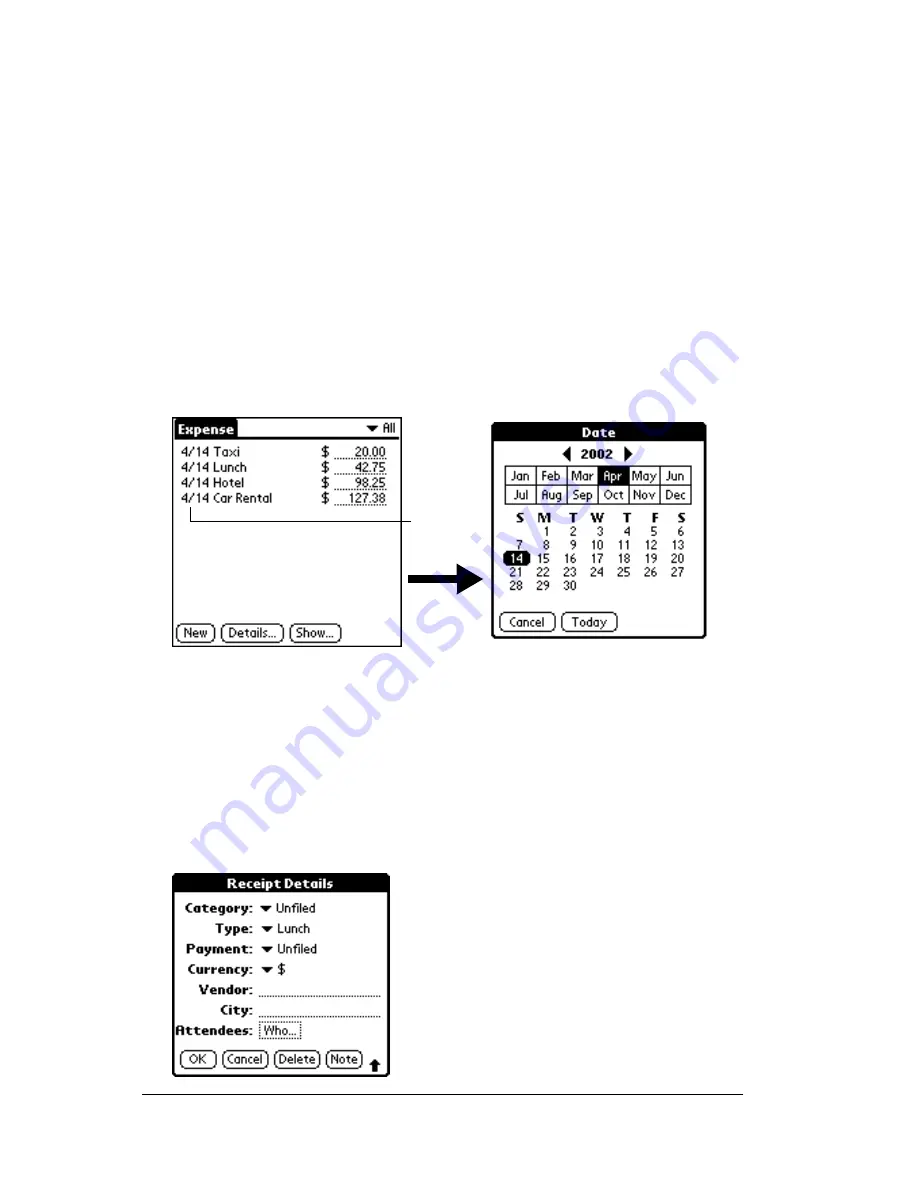
Changing the date of an Expense item

Initially, Expense items appear with the date you enter them. You can 
use Expense to change the date associated with any Expense item.

To change the date of an Expense item:

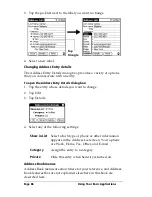
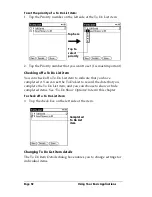
1. Tap the Expense item you want to change.

2. Tap the date of the selected item. 

3. Tap the new date.

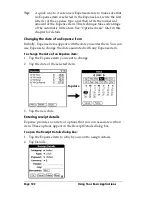
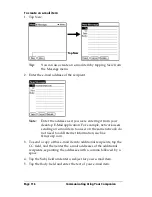
Entering receipt details

Expense provides a variety of options that you can associate with an 
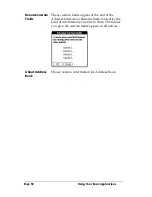
item. These options appear in the Receipt Details dialog box.

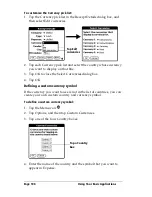
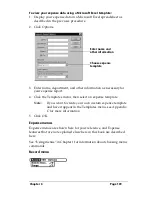
To open the Receipt Details dialog box:

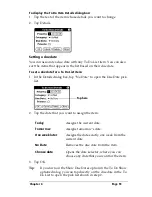
1. Tap the Expense item to which you want to assign details.

2. Tap Details.

Tap date

Содержание WorkPad c3

Страница 1: ...Handbook for the WorkPad c3 PC Companion...

Страница 2: ...tion and its subsidiaries assume no responsibility for any damage or loss resulting from the use of this handbook 3Com Corporation and its subsidiaries assume no responsibility for any loss or claims...

Страница 3: ...ys to enter data 19 Customizing your companion 23 Chapter 2 Entering Data in Your WorkPad c3 Companion Using Graffiti writing to enter data 25 Writing Graffiti characters 25 Graffiti tips 27 The Graff...

Страница 4: ...mpanion 47 Recovering from a forgotten password 48 Chapter 4 Using Your Basic Applications Overview of basic applications 50 Date Book 50 Address Book 51 To Do List 52 Memo Pad 53 Calculator 53 Expens...

Страница 5: ...s 126 HotSync options 128 Creating special filters 129 Truncating e mail items 133 Mail menus 134 Beaming information 135 Chapter 6 Advanced HotSync Operations Selecting HotSync setup options 137 Cust...

Страница 6: ...ervice template 166 Creating a login script 169 Deleting a service template 170 Network preferences menu commands 171 TCP IP troubleshooting 171 Owner preferences 173 ShortCuts preferences 174 Creatin...

Страница 7: ...Characters for Login Scripts Use of char 209 Carriage return and line feed 209 Literal characters 210 Warranty and Other Product Information Product warranties 211 IBM U K Statement of Warranty 212 P...

Страница 8: ...Page viii Handbook for the WorkPad c3 PC Companion...

Страница 9: ...uickly on your companion The beginning chapter explains the following All the parts of your companion The WorkPad c3 interface Entering data Setting up security and other preferences After you become...

Страница 10: ...Page 2 About This Book...

Страница 11: ...ur schedule details in Date Book so you can view them by the day week or month you can even set an alarm to remind you of important meetings Keep all your contact names addresses phone numbers and oth...

Страница 12: ...panion into the same folder as your current Palm Desktop for IBM WorkPad software All your data will be preserved when you install the new version in the same folder as the previous version If you use...

Страница 13: ...racters Application buttons Activates the individual WorkPad c3 companion applications that correspond to the icons on the buttons Date Book Address Book To Do List and Memo Pad See Buttons preference...

Страница 14: ...tton scrolls down to view information below the viewing area and pressing the upper half of the button scrolls up to view the information above the viewing area Contrast control button Turns on the on...

Страница 15: ...about two seconds Release the button when the backlight turns on To turn off the backlight Press and hold the power button for about two seconds The backlight also turns off automatically after a peri...

Страница 16: ...ld a pen or pencil IR port Uses infrared technology to transmit data to and receive data from other infrared enabled WorkPad companions or other Palm Computing platform devices nearby See Beaming info...

Страница 17: ...chnology Note The cradle must be plugged into the serial COM port at the back of your computer Danger To avoid a shock hazard do not connect or disconnect any cables or perform installation maintenanc...

Страница 18: ...place it in the cradle for a few minutes each day to recharge the battery to full capacity If the battery gets low your WorkPad c3 companion displays a warning message If this occurs perform a HotSync...

Страница 19: ...nion Changes you make on your WorkPad c3 companion or Palm Desktop for IBM WorkPad appear in both places after you synchronize With Palm Desktop for IBM WorkPad you can do the following Work with your...

Страница 20: ...off your computer and connect the cradle to it Do not insert your companion in the cradle until instructed Do not simply copy the Palm Desktop for IBM WorkPad files to your computer s hard disk You m...

Страница 21: ...soft Outlook all you need is HotSync Manager and the connection software called a conduit that lets you synchronize the data between your companion and your PIM For information on conduit software go...

Страница 22: ...n so that when you tap an element on the screen the companion can detect exactly which task you want to perform Important Always use the point of the stylus for tapping or making strokes on the compan...

Страница 23: ...a button to perform a command Command buttons appear in dialog boxes and at the bottom of application screens Icons Tap the icons to open applications menus Calculator and to find text anywhere in you...

Страница 24: ...tive If a check box is empty tapping it inserts a check mark If a check box is checked tapping it removes the check mark Pick list Tap the arrow to display a list of choices and then tap an item in th...

Страница 25: ...e Graffiti character for the first letter of its name The Applications Launcher scrolls to the first application with a name that begins with that letter You can also assign application icons to diffe...

Страница 26: ...the application that is currently open Also the menus and menu commands vary depending on which part of the application you are currently using For example in Memo Pad the menus are different for the...

Страница 27: ...te the command letter immediately to choose the menu command Displaying online tips Many of the dialog boxes that appear on your companion contain an online Tips icon in the upper right corner Online...

Страница 28: ...ote You cannot enter Graffiti characters while using the onscreen keyboard Graffiti writing Your WorkPad c3 companion includes Graffiti writing software as the primary system for entering text and num...

Страница 29: ...Graffiti writing This section explains how to open Memo Pad and use it to practice Graffiti writing To open Memo Pad 1 Press the Memo Pad application button 2 Tap New Note A blinking cursor appears o...

Страница 30: ...c operation to synchronize your companion with your computer See Exchanging and updating data HotSync operations in Chapter 4 for more information Importing data If you already have data in a database...

Страница 31: ...ications icon 2 Tap the Preferences icon 3 Tap the category pick list in the upper right corner of the screen 4 Tap the Preferences category you want to view The following procedures for setting the t...

Страница 32: ...Your WorkPad c3 Companion To set the current date 1 Tap the Set Date box 2 Tap the arrows to select the current year 3 Tap a month 4 Tap the current date Tap arrows to select year Tap to select month...

Страница 33: ...iti characters Most people find they can enter text quickly and accurately with only minutes of practice Graffiti writing includes any character you can type on a standard keyboard The Graffiti stroke...

Страница 34: ...write Graffiti letters 1 Tap the screen where you want your text to go Note You need to tap above the Graffiti writing area and must see a blinking cursor before you write the text 2 Use the tables on...

Страница 35: ...in the Graffiti writing area If you do not make Graffiti strokes in the Graffiti writing area your companion does not recognize them as text characters Graffiti tips When using Graffiti writing keep...

Страница 36: ...ge 28 Entering Data in Your WorkPad c3 Companion The Graffiti alphabet Letter Strokes Letter Strokes A N B O C P D Q E R F S G T H U I V J W K X L Y M Z Space Back Space Carriage Return Period tap twi...

Страница 37: ...apital letter Use the Caps Shift stroke Tip When Caps Shift is active an up arrow symbol appears in the lower right corner of the companion screen If you accidentally activate Caps Shift backspace wil...

Страница 38: ...gin with a single tap on the Graffiti writing area When you make this tap you activate Punctuation Shift and a dot appears to show it is active The next stroke you make with the stylus creates a punct...

Страница 39: ...the Graffiti writing area of your companion When the Symbol Shift is active a slanted shift symbol appears in the lower right corner of the screen The next stroke that you make creates the symbol or...

Страница 40: ...r For example the following diagram shows the strokes required to draw an accented e Accent strokes Using these accent strokes you can write the following accented letters Additional non English chara...

Страница 41: ...ortCuts and you can also create your own Each ShortCut can represent up to 45 characters For example you might create a ShortCut for your name or for the header of a memo See ShortCuts preferences in...

Страница 42: ...ring Data in Your WorkPad c3 Companion Your companion includes the following predefined Graffiti ShortCuts Entry ShortCut Date stamp ds Time stamp ts Date time stamp dts Meeting me Breakfast br Lunch...

Страница 43: ...dialogs at any time to enter the exact text you need 5 After you finish tap Done to close the onscreen keyboard and place the text in the record Using your computer keyboard If you have a lot of data...

Страница 44: ...us Organizer 2 x 97 Mapping Address Book only Date Book archive dba Address Book archive aba To Do List archive tda Memo Pad archive mpa Archive formats can only be used with Palm Desktop for IBM Work...

Страница 45: ...corresponding imported field on the right 8 If you do not want to import a field deselect the check box for that field 9 Click OK The imported data is highlighted in the application 10 To add the impo...

Страница 46: ...Page 38 Entering Data in Your WorkPad c3 Companion...

Страница 47: ...ations installed on your companion appear in the Applications Launcher See Opening applications in Chapter 1 for details Switching between applications When working in any application tap the Applicat...

Страница 48: ...Done To display applications by category 1 Tap the Applications icon 2 Do one of the following Tap the Applications icon repeatedly to cycle through all your categories Tap the pick list in the upper...

Страница 49: ...pplications icon 2 Tap the Menu icon 3 Tap Options and then tap Preferences 4 Tap the Remember Last Category check box to select it 5 Tap OK Choosing preferences You can set options that affect an ent...

Страница 50: ...ng a HotSync operation There are a variety of third party applications available for your WorkPad c3 companion To learn more about these applications go to the web site http www palm com Note Any game...

Страница 51: ...3 Page 43 3 Click Install Tip You can also access the Install Tool dialog by selecting Install Tool from the Palm Desktop for IBM WorkPad program group or by double clicking any file with a PRC file e...

Страница 52: ...ply removes it from the list of applications to install 8 Perform a HotSync operation to install the application s you selected in step 6 See Exchanging and updating data HotSync operations in Chapter...

Страница 53: ...2 Tap the Menu icon 3 Tap App and then tap Delete 4 Tap the application that you want to remove 5 Tap Delete 6 Tap Yes 7 Tap Done Removing Palm Desktop for IBM WorkPad If you no longer want to use Pal...

Страница 54: ...ith or without a password Without a password private records are hidden until you set the Security application to show them With a password you must enter the password to view the private entries See...

Страница 55: ...ssword and tap OK To delete the password tap Delete Locking your companion You can also lock your companion so that you need to enter your password to operate it Important If you lock your companion y...

Страница 56: ...t on and then enter the password Recovering from a forgotten password If you did not activate the Off Lock feature and you forget your password you can delete the password from your companion Deleting...

Страница 57: ...s briefly describes each application and explains how to open it Common tasks gives instructions on how to do tasks that you can do in most or all of the basic applications It is easy to transfer what...

Страница 58: ...licts Display a monthly calendar to quickly spot days where you have morning lunch or afternoon appointments Set an alarm to sound prior to the scheduled activity Create reminders for events that are...

Страница 59: ...hich phone number appears in the Address List for each Address Book entry Attach a note to each Address Book entry in which you can enter additional information about the entry Assign Address Book ent...

Страница 60: ...Do List items to categories so that you can organize and view them in logical groups Sort your To Do List items either by due date priority level or category Attach notes to individual To Do List item...

Страница 61: ...wn phone numbers and other types of information Later you can copy and paste this information to other applications To open Memo Pad Press the Memo Pad application button on the front panel of your co...

Страница 62: ...ciated with any money that you spend Assign expense items to categories so that you can organize and view them in logical groups Keep track of vendors companies and people involved with each particula...

Страница 63: ...1 Select the application in which you want to create a record 2 Tap New 3 In Date Book only Select start and end times for your appointment and tap OK 4 Enter text for the record 5 Optional Tap Detai...

Страница 64: ...tion of the last edit command For example if you used Cut to remove text Undo restores the text you removed Undo also reverses deletions done by using backspace Cut Removes the selected text and store...

Страница 65: ...ap the check box to remove the check 4 Tap OK If you choose to save a copy of the selected item your companion transfers it to the archive file on your desktop the next time you perform a HotSync oper...

Страница 66: ...1 Open the application 2 Tap the Menu icon 3 Tap Record and then tap Purge A confirmation dialog box appears Date Book Tap the pick list and select how old a record must be to be purged Purge deletes...

Страница 67: ...rkPad After you enter this information and synchronize the HotSync Manager recognizes your companion and does not ask for this information again If you are a System Administrator preparing several PC...

Страница 68: ...c cable instead of a cradle click the HotSync icon in the Windows system tray and select Local from the menu Important The first time you perform a HotSync operation you must enter a user name in the...

Страница 69: ...with two default categories Business and Personal In addition the Address Book contains the QuickList category which you can use as a quick reference of names addresses and phone numbers such as emer...

Страница 70: ...ory you want to view The List screen now displays only the records assigned to that category Tip Pressing an application button on the front panel of the companion toggles through all the categories o...

Страница 71: ...nd then tap OK 5 Tap OK You can assign any of your records to the new category To rename a category 1 Tap the category pick list in the upper right corner of the screen 2 Tap Edit Categories 3 Select...

Страница 72: ...pears in this list to a record Address Book The Look Up line lets you enter the first letters of a name to scroll immediately to that name Expense Lookup displays the names in your Address Book that h...

Страница 73: ...ls to the first letter of the company name 3 Tap the record to view its contents Using Find You can use Find to locate any text that you specify in any application To use Find 1 Tap the Find icon Tip...

Страница 74: ...isplays the Address List screen and lets you add the information that appears in this list to a record To use Phone Lookup 1 Display the record in which you want to insert a phone number The record ca...

Страница 75: ...that begins with Wi your companion inserts the full name Williams and its associated information If you have more than one name that begins with Wi the Phone Lookup screen appears and highlights the f...

Страница 76: ...sort lists of records in various ways depending on the application Sorting is available in applications that have List screens Address Book To Do List Memo Pad and Expense Note You can also assign re...

Страница 77: ...Pad as you manually sorted it on your companion open Memo Pad in Palm Desktop for IBM WorkPad and click List by Then select Order on handheld Making records private In all basic applications except Ex...

Страница 78: ...to confirm that you want to hide private records To display private records 1 Tap the Applications icon 2 Tap Security 3 Tap Show If you do not have a password hidden records become visible If you hav...

Страница 79: ...thousand characters long For example for an appointment in Date Book you can attach a note with directions to the location To attach a note to a record 1 Display the entry to which you want to add a n...

Страница 80: ...ke text easier to read You can choose a different font style for each application To change the font style 1 Open an application 2 Tap the Menu icon 3 Tap Options and then tap Font 4 Tap the font styl...

Страница 81: ...le events that overlap but Date Book makes it easy to find such conflicts See Spotting event conflicts later in this chapter You can also schedule events in your Date Book that occur on a particular d...

Страница 82: ...event is selected and then writing a number on the number side of the Graffiti writing area 4 Tap the time columns on the right side of the Set Time dialog to set the Start Time 5 Tap the End Time box...

Страница 83: ...ve forward or backward one day at a time Tap Go To at the bottom of the screen to open the Go to Date dialog box Select a date by tapping a year month and day in the calendar Tip In the Go to Date dia...

Страница 84: ...reate a new untimed event by making sure no event is selected and then writing letters in the Graffiti writing area 4 Enter a description of the event 5 Tap a blank area on the screen to deselect the...

Страница 85: ...e an event The default Alarm setting is 5 minutes before the time of the event but you can change this to any number of minutes hours or days When you set an alarm this icon appears to the far right o...

Страница 86: ...en until you turn on your companion and tap OK to dismiss it Scheduling repeating or continuous events The Repeat function lets you schedule events that recur at regular intervals or extend over a per...

Страница 87: ...on which you change the setting are not changed and your companion creates a new repeating event If you change the date of an occurrence of a repeating event e g from January 14th to January 15th and...

Страница 88: ...n addition the graphical display helps you spot overlaps and conflicts in your schedule To display the Week View 1 Tap the Week View button 2 Tap the navigation controls to move forward or backward a...

Страница 89: ...span defined by the Start Time and End Time in the Date Book Preferences settings If you have an event before or after this time span a bar appears at the top or bottom of that day s column Use the o...

Страница 90: ...Tap a day in the Month View to display that day in the Day View Tap the scroll arrows in the upper right corner to move forward or backward a month Tap Go to to open the date selector and select a di...

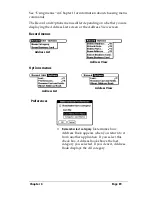
Страница 91: ...isplay options Date Book menus are shown here for your reference and Date Book features that are not explained elsewhere in this book are described here See Using menus in Chapter 1 for information ab...

Страница 92: ...Compress Day View Controls how times appear in the Day View When Compress Day View is off all time slots display When it is on start and end times display for each event but blank time slots toward th...

Страница 93: ...arm for each new event The silent alarm for untimed events is defined by minutes days or hours before midnight of the date of the event Alarm Sound Sets the tone of the alarm Remind Me Defines how man...

Страница 94: ...M WorkPad also has data import capabilities that enable you to load database files into Address Book on your companion See Importing data in Chapter 2 and Palm Desktop online Help for more information...

Страница 95: ...ng information tap Done Tip To create an entry that always appears at the top of the Address List begin the Last name or Company field with a symbol as in If Found Call This entry can contain contact...

Страница 96: ...y whose details you want to change 2 Tap Edit 3 Tap Details 4 Select any of the following settings Address Book menus Address Book menus are shown here for your reference and Address Book features tha...

Страница 97: ...ress List screen or the Address View screen Record menus Options menus Preferences Remember last category Determines how Address Book appears when you return to it from another application If you sele...

Страница 98: ...ds These custom fields appear at the end of the Address Edit screen Rename them to identify the kind of information you enter in them The names you give the custom fields appear in all entries About A...

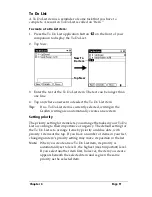
Страница 99: ...rea automatically creates a new item Setting priority The priority setting for items lets you arrange the tasks in your To Do List according to their importance or urgency The default setting for the...

Страница 100: ...em to indicate that you have completed it You can set the To Do List to record the date that you complete the To Do List item and you can choose to show or hide completed items See To Do Show Options...

Страница 101: ...x tap No Date to open the Due Date pick list 2 Tap the date that you want to assign the item 3 Tap OK Tip If you turn on the Show Due Dates option in the To Do Show options dialog you can tap directly...

Страница 102: ...em Items that no longer appear on the list because you turn off this setting have not been deleted They are still in the memory of your companion Purge completed items to remove them from memory Show...

Страница 103: ...1 for information about choosing menu commands Record menu Options menu Show Due Dates Displays the due dates associated with items in the To Do List and displays an exclamation mark next to items th...

Страница 104: ...front of your companion to display the Memo List 2 Tap New Tip In the Memo List screen you can also begin writing in the Graffiti writing area to create a new memo The first letter is automatically c...

Страница 105: ...ference and Memo Pad features that are not explained elsewhere in this book are described here See Using menus in Chapter 1 for information about choosing menu commands The Record and Options menus di...

Страница 106: ...e Moves to the top first line of the memo Go to Bottom of Page Moves to the bottom last line of the memo Preferences Displays the Memo Preferences dialog box where you define the sort order for memos...

Страница 107: ...the calculation over Clears the entire calculation and enables you to begin a fresh calculation Toggles the current number between a negative and positive value If you want to enter a negative number...

Страница 108: ...lator menus Calculator menus are shown here for your reference and Calculator features that are not explained elsewhere in this book are described here See Using menus in Chapter 1 for information abo...

Страница 109: ...cations icon 2 Tap Expense 3 Tap New Tip You can also create a new Expense item by writing on the number side of the Graffiti writing area while in the Expense List screen The first number you write b...

Страница 110: ...ng the date of an Expense item Initially Expense items appear with the date you enter them You can use Expense to change the date associated with any Expense item To change the date of an Expense item...

Страница 111: ...eadsheet See Transferring your data to Microsoft Excel later in this chapter for more information Currency Enables you to choose the type of currency used to pay the Expense item The default currency...

Страница 112: ...Tap OK to close the Select Currencies dialog box 4 Tap OK Defining a custom currency symbol If the currency you want to use is not in the list of countries you can create your own custom country and...

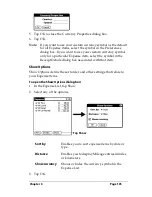
Страница 113: ...item select the symbol in the Receipt Details dialog box associated with that item Show Options Show Options define the sort order and other settings that relate to your Expense items To open the Show...

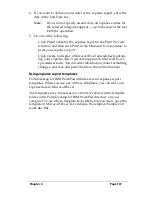
Страница 114: ...for more information Creating or printing an expense report Palm Desktop for IBM WorkPad makes it quick and easy to view and print your Expense data in a Microsoft Excel spreadsheet To create or print...

Страница 115: ...cel spreadsheet contain ing your expense data Your data appears in Microsoft Excel spreadsheet form You can enter information make formatting changes and save and print the file in the normal manner U...

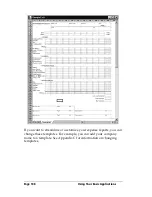
Страница 116: ...Basic Applications If you want to streamline or customize your expense reports you can change these templates For example you can add your company name to a template See Appendix C for information on...

Страница 117: ...e Templates menu then select an expense template Note If you want to create your own custom expense template and have it appear in the Templates menu see Appendix C for more information 5 Click OK Exp...

Страница 118: ...etter of an expense type in the Graffiti writing area For example if you write the letter T it enters the Taxi expense type Writing T and then E enters Telephone which is the first expense type beginn...

Страница 119: ...E Mail away from your desk Mail lets you manage the e mail that you send and receive through the E Mail application on your desktop computer You can read reply to compose and delete e mail on your co...

Страница 120: ...full list of the supported applications when you set up Mail If your desktop E Mail application does not appear on the list you may still be able to manage your desktop E Mail application from your co...

Страница 121: ...Desktop overwrites handheld Replaces the mail on your companion with the mail in your desktop E Mail application You should use this option only if for some reason the two inboxes get out of sync This...

Страница 122: ...Click OK Synchronizing Mail with your E Mail application After you enable and configure Mail you need to perform a HotSync operation to synchronize Mail with your desktop E Mail application For a comp...

Страница 123: ...ect for all your e mail items To display full header information 1 Open an e mail item 2 Tap the Complete Header icon Tip To redisplay the abbreviated header tap the Abbreviated Header icon Creating e...

Страница 124: ...ication For example network users sending an e mail item to a user on the same network do not need to add Internet information such as mycorp com 3 To send a copy of this e mail item to additional rec...

Страница 125: ...t onscreen 2 Tap Reply 3 Select whom you want to receive the reply Sender only All recipients or someone who did not see the original e mail item Forward 4 Select whether you want to include original...

Страница 126: ...you enter identify a unique listing from your Address Book your companion completes the address for you If not the Lookup dialog box appears and lists all records that contain information in an E mail...

Страница 127: ...ote The Priority and BCC settings are valid only for the current e mail item and must be set for each item you create Priority Flags an e mail item as High Normal or Low priority BCC Creates a blind c...

Страница 128: ...ist and select the priority you want 3 Tap OK Tip Your companion can flag e mail items with a specific priority only if your desktop E Mail application supports this feature Sending a blind carbon cop...

Страница 129: ...y other text you want to include By defining such information as a signature you save yourself the trouble of having to enter it every time you create an e mail item Adding a signature to your message...

Страница 130: ...screen tap Details 2 Select the Confirm Delivery check box to select it 3 Tap OK Storing e mail to be sent later When you send e mail from your companion it actually stores the e mail in the Outbox f...

Страница 131: ...add additional information before sending it Your companion stores such e mail items in the Draft folder until you are ready to edit them again Note When you are creating or editing an e mail item you...

Страница 132: ...Send to move the item to your Outbox folder Filing e mail Your companion can store e mail you receive or create in the Filed folder The contents of this folder do not automatically synchronize with y...

Страница 133: ...Delete 3 If you selected the Preferences option to confirm deletion tap Yes Removing e mail from the Deleted folder You can reverse the deletion of an e mail item by removing it from the Deleted folde...

Страница 134: ...the Message List displays information Folders Your companion provides folders for categorizing your mail The Message List displays the e mail items in the folder you select To select a folder 1 Tap th...

Страница 135: ...ty e mail items always appear first no matter how you sort the list To sort the Message List 1 In the Message List tap Show 2 Tap the Sort by pick list and select one of the following options 3 Tap OK...

Страница 136: ...e settings for the HotSync operation To open the HotSync Options dialog box 1 Tap the Menu icon 2 Tap Options and then tap HotSync Options 3 Tap the Settings for pick list and select Local HotSync or...

Страница 137: ...trieving items that contain specific information in their header fields To create a special filter you must decide whether you want to ignore or retrieve certain e mail items Then based on that decisi...

Страница 138: ...ify To define whether to ignore or receive e mail Tap the pick list in the center of the HotSync Options dialog box and select one of the following settings Ignore Messages Containing Tells your compa...

Страница 139: ...from John Smith jsmith aol com or Jack Jones jjones aol com concerning the Apollo Project You would create the following filter strings In the To field jsmith aol com jjones aol com In the Subj field...

Страница 140: ...screen for that header field For more information about header field Notes screens see Creating e mail items earlier in this chapter 4 Tap Done to return to the HotSync Options dialog box 5 Tap OK Hi...

Страница 141: ...rs By truncating long messages you reduce the time it takes to synchronize your desktop E Mail and Mail as well as the amount of storage space e mail uses on your companion Note Truncation is separate...

Страница 142: ...pter 1 for information about choosing menu commands Message menus The Message menu varies depending on whether you are viewing an e mail item creating an e mail item or viewing the Message List Option...

Страница 143: ...installed in RAM memory To select a business card 1 Create an Address Book record that contains the information you want on your business card 2 Tap the Menu icon 3 Tap Record and then tap Select Busi...

Страница 144: ...Status dialog box to indicate that the transfer is complete before you continue working on your companion To receive beamed information 1 Turn on your companion 2 Point the IR port directly at the IR...

Страница 145: ...with a WorkPad c3 Modem or network This chapter describes how to select HotSync options and perform a HotSync operation via a modem or network See Exchanging and updating data HotSync operations in C...

Страница 146: ...e Adds HotSync Manager to the Startup folder and constantly monitors the communication port for synchronization requests from your companion With this option the HotSync Manager synchronizes data even...

Страница 147: ...ies the port that Palm Desktop for IBM WorkPad uses to communicate with the cradle This selection should match the number of the port to which you connected the cradle Note Your companion cannot share...

Страница 148: ...nchronizing a particular type of file because you do not use it In addition to the conduits for Date Book Address Book To Do List Memo Pad and Expense Palm Desktop for IBM WorkPad includes System and...

Страница 149: ...ext HotSync operation Thereafter the HotSync Actions revert to their default settings To use a new setting on an ongoing basis select the Set As Default box Thereafter whatever you selected as the def...

Страница 150: ...em Preparing your computer There are a few steps you must perform to prepare your computer for a modem HotSync operation Be sure to perform these steps before you leave your office so that your comput...

Страница 151: ...te first and adjust downward if you experience problems This setting allows Palm Desktop for IBM WorkPad and your companion to find and use the fastest speed Modem Identifies the modem type or manufac...

Страница 152: ...computer 5 If needed enter a dial prefix such as 9 to access an outside line and then tap the Dial Prefix check box Tip You can enter a comma in the field to introduce a pause in the dialing sequence...

Страница 153: ...modem To change the Conduit Setup for a modem HotSync operation 1 Tap the Applications icon 2 Tap the HotSync icon 3 Tap the Menu icon 4 Tap Options and then tap Conduit Setup 5 Tap the check boxes to...

Страница 154: ...software enables you to perform a HotSync operation by dialing in to a network or by using a cradle that is connected to any computer on your LAN or WAN provided that the computer connected to the cr...

Страница 155: ...2 From the HotSync Manager menu choose Network 3 From the HotSync Manager menu choose Setup 4 Click the Network tab and make sure your user name has a check mark next to it If the check mark is not th...

Страница 156: ...our companion You can configure the File Link feature to check for changes to the external file when you perform a HotSync operation With File Link you can import data stored in any of the following f...

Страница 157: ...ers 3 Click Profiles 4 Click New 5 Enter a unique name for the profile and click OK 6 Repeat steps 3 and 4 for each profile that you want to create and then click OK to return to Palm Desktop for IBM...

Страница 158: ...radle 2 Press the HotSync button on the cradle 3 Click Profiles 4 Select the profile that you want to load on the companion and click OK 5 Click Yes to transfer all the profile data to the companion T...

Страница 159: ...time the auto shut off interval the Stay on in cradle feature the Beam Receive feature and the system alarm and game sounds Formats Set the country default and the formats for dates times calendar and...

Страница 160: ...not have to change to a different screen or application If you assign a different application to a button you can still access the original application using the Applications Launcher To change the B...

Страница 161: ...ion Keyboard Opens the onscreen keyboard for entering text characters Graffiti Help Opens a series of screens that show the complete Graffiti character set Turn Off Lock Turns off and locks the compan...

Страница 162: ...he button you want to assign 3 Tap the application that you want to assign to each button The default setting for each button is the HotSync setting which means the cradle and optional WorkPad c3 Mode...

Страница 163: ...country default 1 Tap the country name pick list 2 Tap the setting you want to use Time date week start and numbers formats The Time setting defines the format for the time of day The time format tha...

Страница 164: ...ur companion If you find that your companion shuts itself off before you finish reviewing the information on the screen you should increase the time setting of the automatic shutoff feature To set the...

Страница 165: ...sociated with the HotSync operation 2 Tap the Alarm Sound pick list and select the sound level 3 Tap the Game Sound pick list and select the sound level Note The Game Sound setting works only with gam...

Страница 166: ...rt TouchTone dialing 2 Tap the Speed pick list and select the maximum speed for your modem Note This is the speed at which your modem communicates with your companion not the speed at which your modem...

Страница 167: ...vel See Modem preferences earlier in this chapter for a complete explanation on how to configure modem parameters After you configure both the Network and Modem Preferences you can establish a PPP Poi...

Страница 168: ...identifies the name you use when you log into your Internet Service Provider or your dial in server Although this field can contain multiple lines of text only two lines appear onscreen To enter a use...

Страница 169: ...in this field and asks you to enter a password during the login procedure If you enter a password your companion displays the word Assigned in this field and does not prompt you to enter a password d...

Страница 170: ...stance services However because MCI works differently MCI customers need to put the calling card number in the Phone field and the phone number in the Use calling card field To enter your server phone...

Страница 171: ...fore logging into your ISP or dial in server To disable Call Waiting 1 Tap the Disable call waiting check box to select it 2 Enter the code to disable Call Waiting on the Disable call waiting line Not...

Страница 172: ...mber you need to add commas at the beginning to compensate for this delay Each comma delays transmission of your calling card number for two seconds To use a calling card 1 Tap the Use calling card ch...

Страница 173: ...ection Progress messages press the lower half of the Scroll button To close a connection Tap Disconnect to terminate the connection between your companion and your service Creating additional service...

Страница 174: ...rvice field 2 Tap Details 3 Tap the Connection type pick list and select one of the following connection types Note If you are not sure try PPP if that does not work ask your Internet Service Provider...

Страница 175: ...o not require that you enter a DNS If you are not sure leave the DNS field blank To enter a primary and secondary DNS 1 Tap the Query DNS check box to deselect it 2 Tap the space to the left of the fi...

Страница 176: ...is permanently assigned you need to get that information from your System Administrator If you are not sure select Automatic To identify dynamic IP addressing Tap the IP Address check box to select i...

Страница 177: ...ASCII and literal characters in your login script See Appendix D for more information To create a login script 1 Tap Script 2 Tap the End pick list 3 Tap the command you want from the Command list If...

Страница 178: ...ID field of the Network Preferences screen Send Password Transmits the password entered in the Password field of the Network Preferences screen If you did not enter a password this command prompts you...

Страница 179: ...dure the connection fails An easy way to do this is to display the expanded Service Connection Progress messages Expanded Service Connection Progress messages describe the current stage of the login p...

Страница 180: ...ber If your ISP or dial in server requires a DNS number and you did not enter that information in the Network Preferences screen it will appear that you successfully logged into your network When you...

Страница 181: ...hapter 1 for more information To enter the Owner preferences Enter the text that you want to associate with your companion in the Owner Preferences screen If you enter more text than can fit on one sc...

Страница 182: ...f your companion applications and are backed up on your computer when you perform a HotSync operation To create a ShortCut 1 Tap New 2 On the ShortCut name line enter the letters you want to use to ac...

Страница 183: ...To edit a ShortCut 1 Tap the ShortCut you want to edit 2 Tap Edit 3 Make the changes you want and tap OK Deleting a ShortCut If you no longer need a ShortCut you can delete it from the list of ShortC...

Страница 184: ...Page 176 Setting Preferences for Your Companion...

Страница 185: ...erproof and should not be exposed to rain or moisture Under extreme conditions water may enter the circuitry through the front panel buttons In general treat your companion as you would a pocket calcu...

Страница 186: ...back up your data then recharge the unit This helps prevent accidental data loss If the battery drains to the point where your companion does not operate it stores your data safely for about a week In...

Страница 187: ...art over again All records and entries stored in your companion are retained with a soft reset After a soft reset the Welcome screen appears followed by the General Preferences screen to set time and...

Страница 188: ...ase the power button 4 When a message appears on the companion screen warning that you are about to erase all the data stored on your companion do one of the following Press the upper half of the scro...

Страница 189: ...sktop overwrites handheld Note Changing the HotSync setting from the default affects only the next HotSync operation Thereafter the HotSync Actions revert to their default settings 7 Click OK 8 Repeat...

Страница 190: ...Page 182 Maintaining Your Companion...

Страница 191: ...eb site If you are still having problems contact your local IBM HelpCenter for technical support See Product Registration and Getting Help by Telephone later in this Appendix Note Thousands of third p...

Страница 192: ...lete unused memos and records If necessary you can save these records See Deleting records in Chapter 4 If you have installed additional applications on your companion remove them to recover memory Se...

Страница 193: ...o recognize handwriting input with the stylus you need to use Graffiti writing See Using Graffiti writing to enter data in Chapter 2 Make the Graffiti character strokes in the Graffiti writing area no...

Страница 194: ...r Show Only Due Items is selected I am having problems listing memos the way I want to see them If you cannot manually arrange the order of the memos in the List screen check the Memo Preferences sett...

Страница 195: ...ly I did a HotSync operation but one of my applications did not synchronize Click the HotSync Manager and choose Custom Check that the correct conduit is active I am using Outlook as my PIM but I cann...

Страница 196: ...you selected the correct serial port on the Local tab in the Setup dialog It should be set to the port where you connected the cradle Try a lower baud rate setting on the Local tab in the Setup dialo...

Страница 197: ...nd is connected to the incoming phone line Confirm that the Setup String in the Setup dialog box configures your modem correctly You may need to select a different Modem Type or enter a custom Setup S...

Страница 198: ...ne number If you need to dial an outside line prefix make sure you selected the Dial Prefix option on your companion and entered the correct code If the telephone line you are using has Call Waiting m...

Страница 199: ...o other WorkPad PC companions may be different Move your companion closer to the receiving device Perform a soft reset See Performing a soft reset in Appendix A for more information When someone beams...

Страница 200: ...the cradle light does not go on Confirm that your companion is well seated in the cradle Confirm that your recharger cable is properly connected to the back of the cradle s serial COM port connector...

Страница 201: ...ocedure restores your private entries and lets you access them 1 Use the Palm Desktop for IBM Work Pad and the cradle to synchronize your data 2 Tap Forgotten Password in Security to remove the passwo...

Страница 202: ...numbers Be sure to retain your proof of purchase to obtain warranty service For additional information refer to the IBM warranty statement included with your product or available from your reseller Be...

Страница 203: ...st any need Purchasing Additional Services During and after the warranty period you can purchase additional services such as support for IBM and non IBM hardware operating systems and application prog...

Страница 204: ...aly 02 482 75003 Italian 9 00AM 6 00PM Monday Friday Luxembourg 298 977 5060 French 9 00AM 6 00PM Monday Friday Netherlands 020 504 0531 Dutch 9 00AM 6 00PM Monday Friday Norway 2 305 3203 Norwegian 9...

Страница 205: ...00 Spanish 8 00AM 8 00PM Monday Friday Nicaragua 505 266 4141 Spanish 8 00AM 5 00PM Monday Friday Panama 507 263 9977 Spanish 8 00AM 5 00PM Monday Friday Peru 349 0050 Spanish 8 30AM 8 30PM Monday Fri...

Страница 206: ...Page 198 Frequently Asked Questions...

Страница 207: ...eet Each Expense item in your companion represents a group of related data You can associate the following data with an expense item Category Payment Currency Date Vendor Expense Type City Amount Atte...

Страница 208: ...in Microsoft Excel 3 Make any changes that you want to the names or other information in the sample template Important Do not insert rows or columns in the sample template Doing so changes the way you...

Страница 209: ...ble later in this appendix Read all of the sections of this appendix before making changes to the Maptable xls file Determining the layout of the Expense Report This section describes the layout consi...

Страница 210: ...tions for the data mapping To create additional Sections with different mapping you create corresponding additional lines to the mapping table file named Maptable xls This procedure is explained later...

Страница 211: ...ntify the data Sections A Section is an area of data with common row and column formatting A yellow highlighter marking pen can make it easy to see the Sections as you work with programming the mappin...

Страница 212: ...up copy of this file before you make your modifications 2 Mapping a new template Scroll to where you find the name of the original template that you chose for your modifications The name of the templa...

Страница 213: ...emplate You may add or delete rows as necessary so that the total number of rows corresponds to the number of Sections in your custom Expense Report To clear all of the existing settings in a row clic...

Страница 214: ...ion for the day e g Sun Mon Tue In the Day cell enter the row or column number where all the day information will be placed If the dates are in a row enter the row number If the dates are in a column...

Страница 215: ...e expense types that appear in the Section These settings appear in the aqua columns 20 48 For these settings simply enter the row or column number for the expense types you want to appear in the Sect...

Страница 216: ...oft Excel such as Lotus 1 2 3 or Quattro Pro to open and manipulate the Expense data on your computer The data file is named Expense txt and is stored in the Expense folder within the folder containin...

Страница 217: ...M is converted to a carriage return If char is a value between a and z then the character sequence is translated to a single byte value between 1 and 26 If char is any other value then the character s...

Страница 218: ...cter defines that the next character is transmitted as a literal character and is not subject to any special processing ordinarily associated with that character Examples Includes a caret as part of t...

Страница 219: ...e included in this handbook IBM U K Statement of Warranty IBM U S Canada and Puerto Rico Statement of Limited Warranty Additional translations of the product warranties are included on the Palm Deskto...

Страница 220: ...on its Date of Installation The date on your sales receipt is the Date of Installation unless IBM or your reseller informs you oth erwise During the warranty period IBM or your reseller if approved b...

Страница 221: ...service either at your location or at a service centre to keep Machines in or restore them to conformance with their Specifications IBM or your reseller will inform you of the available types of serv...

Страница 222: ...anty terms apply Limitation of Liability Circumstances may arise where because of a default on IBM s part or other liability you are entitled to recover damages from IBM In each such instance regardle...

Страница 223: ...consumption then none of the limitations in this paragraph apply PEOPLE S REPUBLIC OF CHINA Governing Law The following is added to this Statement The laws of the State of New York govern this Stateme...

Страница 224: ...competent court for this Statement are those of the country in which the warranty service is being provided However the laws of Austria govern this Statement if the warranty service is provided in Al...

Страница 225: ...utory conditions in cluding all warranties implied but without prejudice to the generality of the foregoing all warranties implied by the Sale of Goods Act 1893 or the Sale of Goods and Supply of Serv...

Страница 226: ...aces items 1 and 2 of the first paragraph of this Section 1 death or personal injury or physical damage to your real property solely caused by IBM s negligence 2 the amount of any other actual direct...

Страница 227: ...ixed period commencing on its Date of Installation The date on your sales receipt is the Date of Installation unless IBM or your reseller informs you oth erwise During the warranty period IBM or your...

Страница 228: ...r provides certain types of repair and exchange service either at your location or at a service center to keep Machines in or restore them to conformance with their Specifications IBM or your reseller...

Страница 229: ...rranty terms apply Limitation of Liability Circumstances may arise where because of a default on IBM s part or other liability you are entitled to recover damages from IBM In each such instance regard...

Страница 230: ...or consumption then none of the limitations in this paragraph apply PEOPLE S REPUBLIC OF CHINA Governing Law The following is added to this Statement The laws of the State of New York govern this Stat...

Страница 231: ...competent court for this Statement are those of the country in which the warranty service is being provided However the laws of Austria govern this Statement if the warranty service is provided in Al...

Страница 232: ...utory conditions in cluding all warranties implied but without prejudice to the generality of the foregoing all warranties implied by the Sale of Goods Act 1893 or the Sale of Goods and Supply of Serv...

Страница 233: ...Machines as newly manufactured in accordance with IBM s production standards UNITED KINGDOM Limitation of Liability The following replaces items 1 and 2 of the first paragraph of this Section 1 death...

Страница 234: ...operly exchange date data with it This IBM hardware product has been designed to process four digit date information correctly within and between the 20th and 21st centuries the years 1999 and 2000 If...

Страница 235: ...cor rect the interference by one of more of the following measures Reorient or relocate the receiving antenna Increase the separation between the equipment or receiver Connect the equipment into an o...

Страница 236: ...cause radio interference in which case the user may be required to take adequate measures CE Compliance Statement This product was tested by Palm Computing Inc a subsidiary of 3Com Corporation and fo...

Страница 237: ...a minimum 18 AWG Type SVT or SJT three conductor cord a maximum of 15 feet in length and a parallel blade grounding type attachment plug rated 15 amperes 125 volts For units intended to be operated a...

Страница 238: ...Page 230...
Страница 239: ...een keyboard 15 20 Application buttons 5 16 50 51 52 53 136 152 Applications Address Book 51 beaming 135 136 Calculator 53 categories 39 40 Date Book 50 Expense 54 font style 72 installing 42 44 Memo...

Страница 240: ...th 22 Conduits for connecting to PIMs 13 for modem HotSync operations 145 for synchronizing applications 187 140 141 181 Confirming e mail 122 Conflicting events 81 Connecting service templates 165 to...

Страница 241: ...Book view 73 84 DBA Date Book archive file 36 Decimal point 155 Default categories 61 currency in Expense 110 settings See Preferences Deleted data saving in archive files 57 e mail recovering 125 De...

Страница 242: ...eports 107 type 103 110 vendor 103 F Files linking to external 148 Filing e mail 124 Filters for e mail 129 133 Finding applications using Graffiti writing 17 e mail addresses 118 119 information in a...

Страница 243: ...server connection 166 Ignoring e mail See Filters for e mail Importing data 22 36 37 Inbox 126 Infrared port See IR port Installing applications 42 44 conduit to install applications 140 Desktop softw...

Страница 244: ...e files mpa 36 categorizing records 61 conduit for synchronizing 140 creating records 55 96 deleting records 57 dragging memos into other applications 53 fonts 72 menus 97 100 opening 53 overview 53 p...

Страница 245: ...sting text 56 Payment Expense item 103 Pen stroke full screen 152 153 Personal information managers See PIM Phone Lookup 66 67 Phone numbers selecting for Address List 88 selecting types 87 Phone sett...

Страница 246: ...sktop software 45 Renaming categories 63 Repeating events deleting from Date Book 57 scheduling 78 Replying to e mail 117 Rescheduling events 77 Resetting companion hard reset 180 location of reset bu...

Страница 247: ...System sounds 157 T Tab delimited files importing data from 36 Tapping 14 185 TCP IP 159 171 TDA To Do List archive file 36 Technical Support 183 194 Templates for expense reports 107 Text copying 56...

Страница 248: ...doing actions 56 Uninstalling Desktop software 45 Unresponsive companion 184 Unsent e mail editing 122 Untimed events 73 76 78 Updating data See HotSync Upgrading Desktop software 4 User name for ISP...

Отзывы: