Installing the Tray
To install the Cable Management Tray in the selected rack:
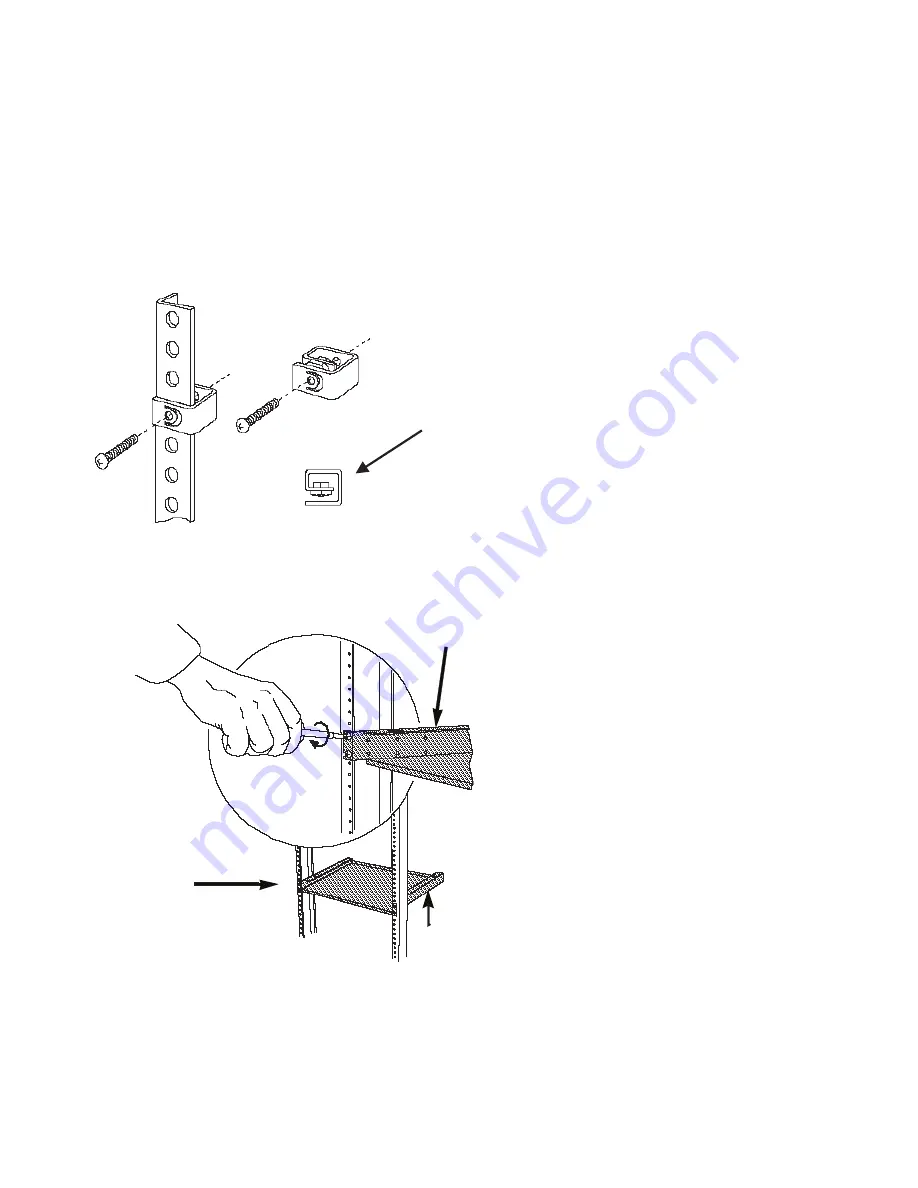
1. Attach the two rack mount flanges (supplied) to the Cable Management Tray using the flathead screws
provided (eight, 8-32 x 1/4-inch screws, four per side). Install the screws using a Phillips- head
screwdriver. Installed Cable Management Tray rack mount flanges are shown in Figure 4.
2. Install the clip nuts provided (four) onto the front of the rack at the position where the Cable
Management Tray will be attached. Figure 3 shows the clip nut installation.
Be sure to thread the screw
through this nut to securely
attach each clip nut to the rack.
Figure 3. Installing a Clip Nut in the Rack
Figure 4 shows the Cable Management Tray in the rack.
Installed rack
mount flange
Installed cable
management
tray
Installed rack
mount flange
Figure 4. Installing the Cable Management Tray in a Rack
3. Place the Cable Management Tray in the rack and attach the tray to the front of the rack using the
screws provided (four, 10-32 x 1/2-inch screws). Install the screws with a Phillips head screwdriver.
10
IBM 8265: Installation Guide
Содержание 8265 Nways ATM Switch
Страница 1: ...8265 Nways ATM Switch IBM Installation Guide SA33 0441 02...
Страница 2: ......
Страница 3: ...8265 Nways ATM Switch IBM Installation Guide SA33 0441 02...
Страница 8: ...vi IBM 8265 Installation Guide...
Страница 10: ...viii IBM 8265 Installation Guide...
Страница 12: ...x IBM 8265 Installation Guide...
Страница 14: ...xii IBM 8265 Installation Guide...
Страница 32: ...18 IBM 8265 Installation Guide...
Страница 52: ...38 IBM 8265 Installation Guide...
Страница 68: ...54 IBM 8265 Installation Guide...
Страница 88: ...Models 17S Serial Number Located on the 8265 chassis label 74 IBM 8265 Installation Guide...
Страница 98: ......
Страница 101: ......
Страница 102: ...IBM SA33 441 2...


