57
104 72 79-26
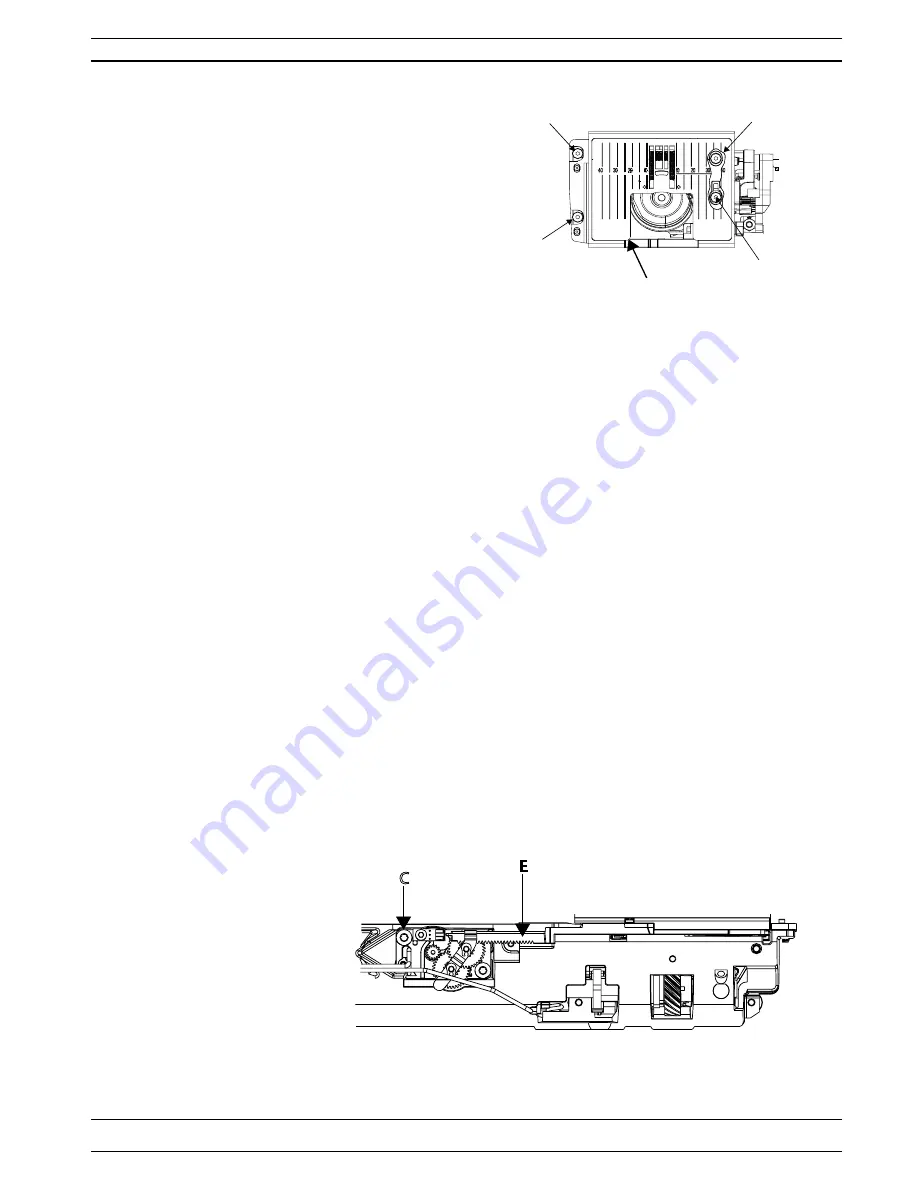
Hook cover compl. 870
Dismantling
1. Remove the rear cover and the front cover.
2. Remove the powersupply.
3. Remove the screw (C). Remove and cut the ziptie.
4. Remove the cable bobbin sensor from the PC-board and its
fasteningpoints.
5. Raise the presser bar to its highest position.
6. Remove the needle.
7. Remove the presser foot holder.
8. Remove the needle plate by placing a screw driver at (A) and
snap it off.
9. Remove the bobbin window.
10. Remove the bobbin basket holder and the bobbin basket.
11. Remove the four screws (B) on the hook cover.
12. Remove the hook cover. Pull the bar (E) out from the cutter step motor unit.
Mounting
1. Push the bar (E) into its position in the cutter step motor unit.
2. On the left side of the castings free arm is it two black setting pins, place the hook cover openings on top
of these.
3. Mount all four Torx 10 screws that hold the hook cover in position but do not tighten them at this point.
The hook cover must be movable back to front.
Note! On the right hand front should side should the ESD washer be positioned.
4. Mount the bobbin basket, bobbin basket holder and the needle plate.
5. Insert the new size 90 needle in the machine.
6. Put the A-foot on the machine and centre the needle by the hand.
7. Remove the A-Foot.
8. Turn the hand wheel so that the needle eye is just above the needle plate.
9. Set the hook cover in relation to the needle in feeding direction.
The needle must be in centre position looking from the side and move the hook cover until the needle is
in the centre position.
7LJKWHQWKHWZRVFUHZVRQWKHOHIWKDQGVLGHÀUVW$OZD\VKROGWKHFRYHUZLWKRQHKDQGZKHQWLJKWHQLQJ
WKHÀUVWVFUHZ
11. Turn the hand wheel so the needle is in its upper turning position and then remove the needle plate.
12. Tighten the two screws on the right hand side.
13. Mount the Needle plate.
14. Turn the hand wheel so that the needle enters the needle hole in the needle plate and re-check the setting
- The needle should now still be in centre position looking from the side.
15. Mount the cable and attach it to the PC-board.
16. Mount a new ziptie.
17. Mount the screw (C).
Set thereafter
The height of the hook.
C
B
A
B
B
B


