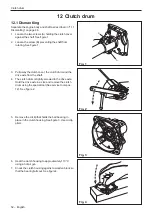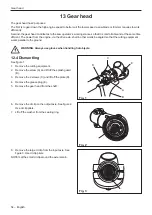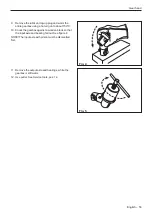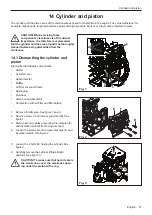
14.4 Assembling
CAUTION! Place a rag in the crankcase
opening to prevent the circlip from falling
into the crankcase.
1. Lubricate the needle bearing of the gudgeon pin with
a few drops of engine oil.
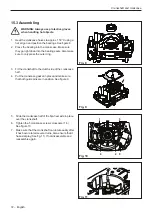
2. Direct the arrow on the top of the piston towards the
exhaust port. See figure 5.
3. Press in the gudgeon pin and attach the G circlip.
4.
Turn the circlip with a flat-nosed pliers to make sure
that it is correctly fitted into the groove.
Cylinder and piston
5.
Mount the piston holder (D) to fix the piston in place.
See figure 6. See Service tools, pos. 5
6.
Place a new cylinder base gasket (A) on the cylinder.
See figure 6.
7.
Insert the screws (B) in the holes at the base of the
cylinder. See figure 6.
8. Lubricate the piston with a few drops of engine oil
and fit the cylinder using a suitable piston ring
compressor (C). See Service tools, pos. 5.
9. Screw the cylinder into place.
10. Assemble the carburettor and the other parts in the
opposite sequence as set out for dismantling.
A
C
D
B
Fig. 5
Fig. 6
60 – English
Содержание 545FX AT
Страница 1: ...Workshop manual English 545RXT AT 545FX AT 545FXT AT 545FX 545FXT 545RX 545RXT ...
Страница 2: ......
Страница 8: ...Service tools 3 Service tools 3 mm 4 mm 5 mm 1 11 4 6 9 7 10 8 5 2 12 3 13 14 15 16 17 8 English ...
Страница 79: ...English 79 ...
Страница 80: ...2018 10 04 115 88 11 26 ...


