11.5 Assembling clutch shoes and
springs
WARNING: Use protective glasses when
working on the clutch. The springs might
have high tension and can cause injury.
1. Temporarily place the clutch shoes on the clutch hub
and loosely tighten the screws.
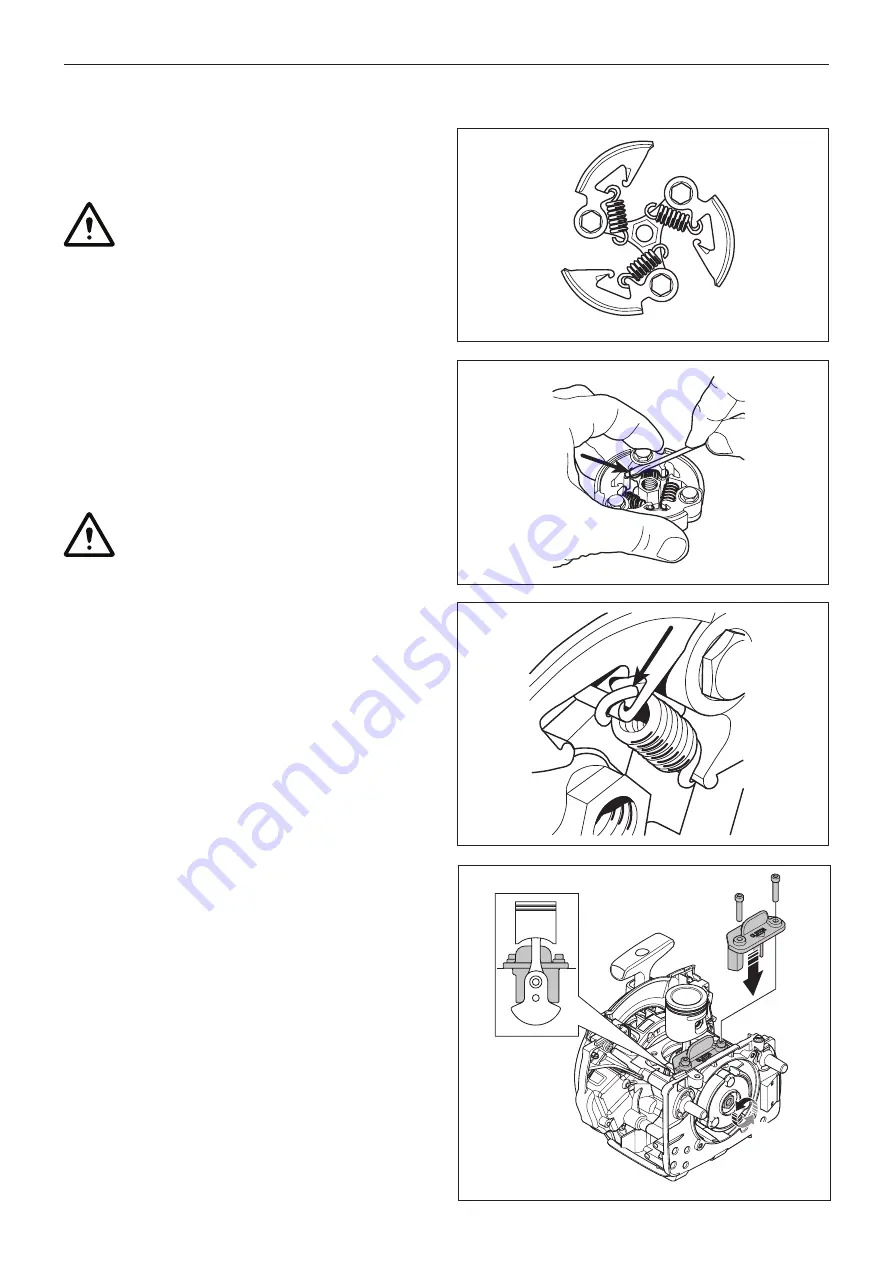
2. Pry out the shoes and hook 1 spring into the cut-out in
each shoe from underneath. See figure 9.
3. Insert the clutch shoes as far as possible and hook
the springs to the adjacent clutch shoe from above
as shown in figure 10 and 11. Use a small
screwdriver or flat-nosed pliers.
CAUTION! Make sure that the spring eye is
pressed into the correct position.
4. Remove the screws and put the cover plates in
position.
5. Tighten the bolts.
Centrifugal clutch
11.6 Assembling clutch assembly
1.
Use the crank stop service tool to fix the crank shaft
(A), assemble the clutch assembly to the crank shaft
then tighten the clutch hub nut with a
torque of 40 - 45 Nm. See fig. 12.
Fig. 9
Fig. 10
Fig. 11
Fig. 12
A
B
English – 51
Содержание 545FX AT
Страница 1: ...Workshop manual English 545RXT AT 545FX AT 545FXT AT 545FX 545FXT 545RX 545RXT ...
Страница 2: ......
Страница 8: ...Service tools 3 Service tools 3 mm 4 mm 5 mm 1 11 4 6 9 7 10 8 5 2 12 3 13 14 15 16 17 8 English ...
Страница 79: ...English 79 ...
Страница 80: ...2018 10 04 115 88 11 26 ...


