


Hardware options installation 100
13.
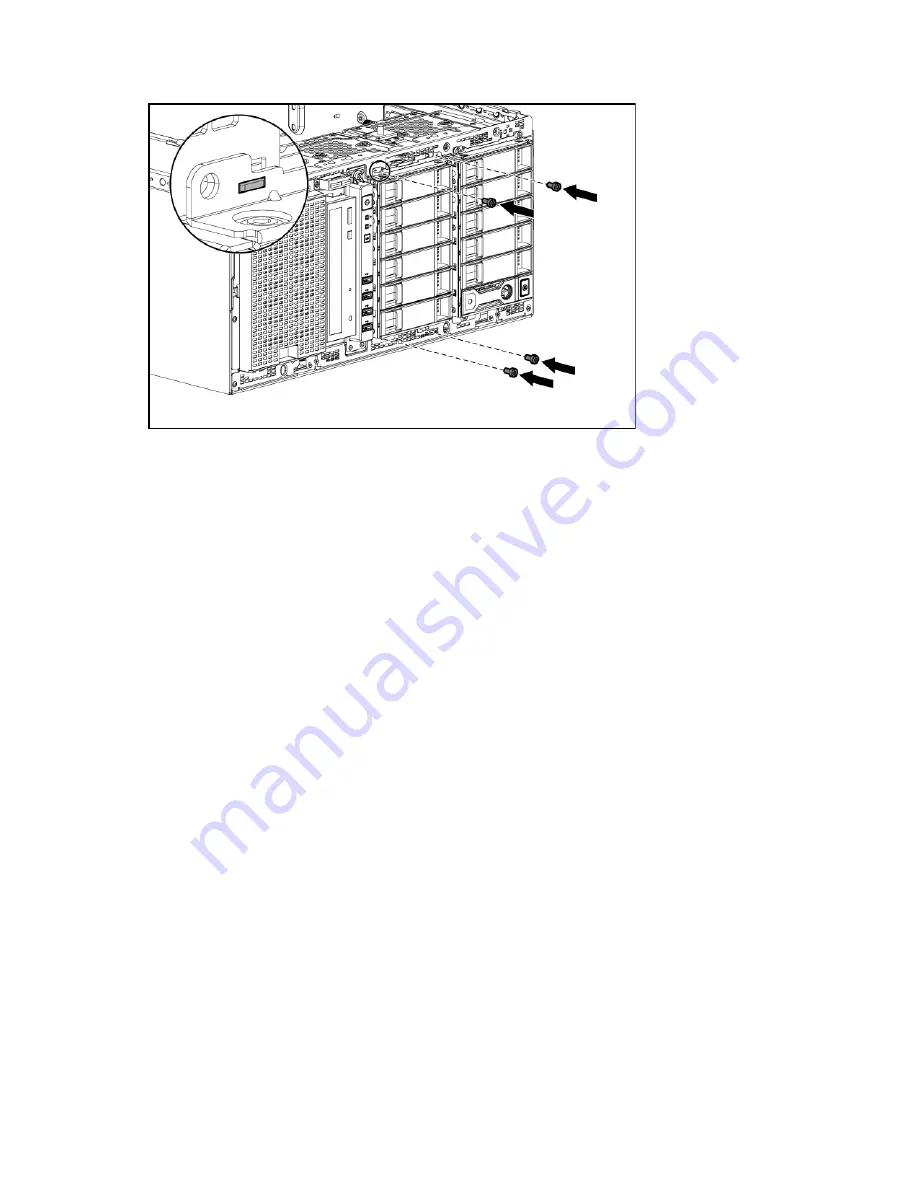
Fully install the LFF drive cage, and then secure it by tightening the T-15 screws.
14.
Install the fan cage.
15.
Install the air baffle (on page
26
).
16.
For tower models, do the following:
a.
Install the access panel (on page
24
).
b.
Return the server to an upright position.
17.
For rack models, do the following:
a.
Install the rack bezel (on page
23
).
b.
Install the access panel (on page
24
).
c.
Slide the server back into the rack.
18.
Connect each power cord to the server.
19.
Connect each power cord to the power source.
20.
Press the Power On/Standby button.
The server exits standby mode and applies full power to the system. The system power LED changes
from amber to green.
21.
Do one of the following:
o
For tower models, install the bezel.
o
For rack models, if removed, install the security bezel (on page
21
).
Installing the 8 bay SFF drive backplane expander
1.
Do one of the following:
o
For tower models, open and remove the bezel ("
Remove the tower bezel
" on page
21
).
o
For rack models, if installed, remove the security bezel (on page
21
).
2.
Power down the server (on page
20
).
3.
Remove all power:
a.
Disconnect each power cord from the power source.
Содержание ProLiant ML350p Gen8
Страница 19: ...Component identification 19 Item Connector Description 5 J8 Graphic card power connector ...
Страница 30: ...Operations 30 ...
Страница 39: ...Setup 39 12 Remove the air baffle 13 Remove the fan cage ...
Страница 46: ...Hardware options installation 46 o Cable routing to box 1 o Cable routing to box 2 ...
Страница 67: ...Hardware options installation 67 6 Remove the blank from box 3 7 Install the optical drive cage ...
Страница 99: ...Hardware options installation 99 i Connect the short mini SAS cables ii Connect the long mini SAS cables ...
Страница 137: ...Support and other resources 137 ...
Страница 138: ...Support and other resources 138 ...