Hardware options installation 87
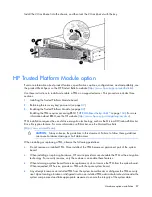
Install the 2U rack bezel into the chassis, and then lock the 2U rack bezel with the key.
HP Trusted Platform Module option
For more information about product features, specifications, options, configurations, and compatibility, see
the product QuickSpecs on the HP Product Bulletin website (
http://www.hp.com/go/productbulletin
).
Use these instructions to install and enable a TPM on a supported server. This procedure includes three
sections:
1.
Installing the Trusted Platform Module board.
2.
Retaining the recovery key/password (on page
89
).
3.
Enabling the Trusted Platform Module (on page
89
).
Enabling the TPM requires accessing RBSU ("
HP ROM-Based Setup Utility
" on page
104
). For more
information about RBSU, see the HP website (
http://www.hp.com/go/ilomgmtengine/docs
).
TPM installation requires the use of drive encryption technology, such as the Microsoft Windows BitLocker
Drive Encryption feature. For more information on BitLocker, see the Microsoft website
(
http://www.microsoft.com
).
CAUTION:
Always observe the guidelines in this document. Failure to follow these guidelines
can cause hardware damage or halt data access.
When installing or replacing a TPM, observe the following guidelines:
•
Do not remove an installed TPM. Once installed, the TPM becomes a permanent part of the system
board.
•
When installing or replacing hardware, HP service providers cannot enable the TPM or the encryption
technology. For security reasons, only the customer can enable these features.
•
When returning a system board for service replacement, do not remove the TPM from the system board.
When requested, HP Service provides a TPM with the spare system board.
•
Any attempt to remove an installed TPM from the system board breaks or disfigures the TPM security
rivet. Upon locating a broken or disfigured rivet on an installed TPM, administrators should consider the
system compromised and take appropriate measures to ensure the integrity of the system data.
Содержание ProLiant DL380p Gen8
Страница 6: ...Contents 6 Index 131 ...
Страница 47: ...Hardware options installation 47 14 Install the heatsink 15 Remove the two fan blanks ...
Страница 91: ...Cabling 91 Cabling SAS hard drive cabling SFF hard drive cabling SFF cabling with optional drive cage ...
Страница 92: ...Cabling 92 LFF hard drive cabling Optical drive cabling ...
Страница 93: ...Cabling 93 FBWC cabling 8 or 16 drive SFF 8 drive LFF ...
Страница 98: ...Cabling 98 Connect the cable as indicated ...
Страница 125: ...Support and other resources 125 ...
Страница 126: ...Support and other resources 126 ...

