


3.4.2
Installing the server
To install the server
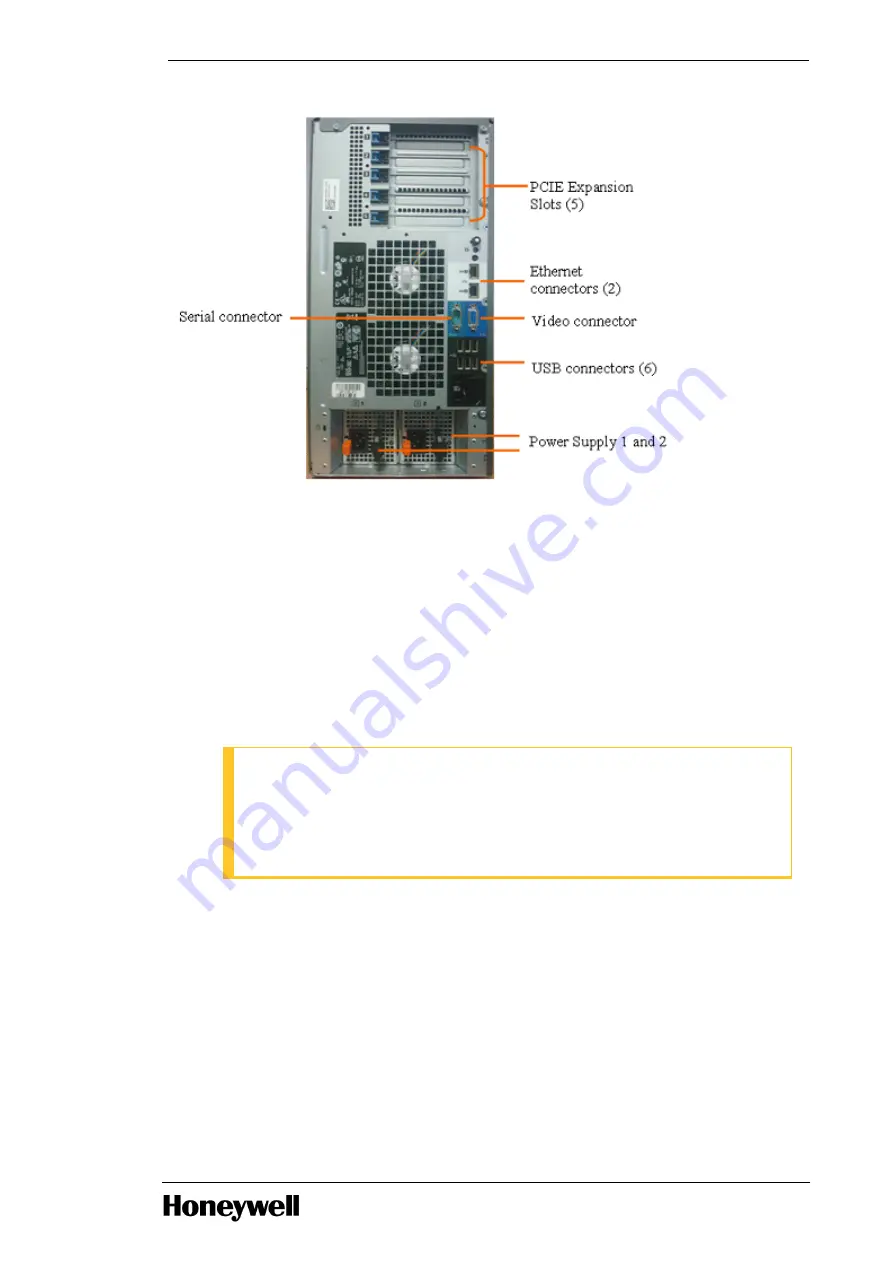
1. Connect the power cords and all cables to the back panel of the server.
2. Fully extend the right and left Versa Rail slides (pre-installed at the Honeywell factory) in the
cabinet.
3. Lower the server into the J-shaped slots on each slide, starting with the slot closest to the cabinet.
4. Gently push the server toward the cabinet until the retaining clips snap into place.
ATTENTION
The Versa Rail kit includes a cable management arm (installed in the Honeywell
factory) that mounts to the rear of the Versa Rail. AC power cords and KVM cables are
pre-routed through the cable management arm. For additional information, see the
“Rack Installation Guide” shipped with the” provided with the instructions shipped with
the cabinet.
5. Slide the server directly into the cabinet and engage the captivated retaining screws in the front
flange of the Versa Rails.
6. After both retaining screws are engaged in the threaded inserts, tighten them until the server rack
mount flanges contact the front mounting rails of the cabinet.
7. If you are using the 8-port KVM, switch/control console for your human interface (pre-installed in
the Honeywell factory), connect the KVM cable mouse and keyboard connections to the USB
connectors on the rear of the server. The KVM cable has separate USB connections for the mouse
and keyboard or they can be combined into one USB connector through USB to PS/2 adapter
(included with the KVM cable).
- 28 -
Chapter 3 - Installation