ID61/62 Series Panel - Operating Manual
Operator
Actions at Panel
23
997-458-000-8, Issue 8
January 2010
5
i
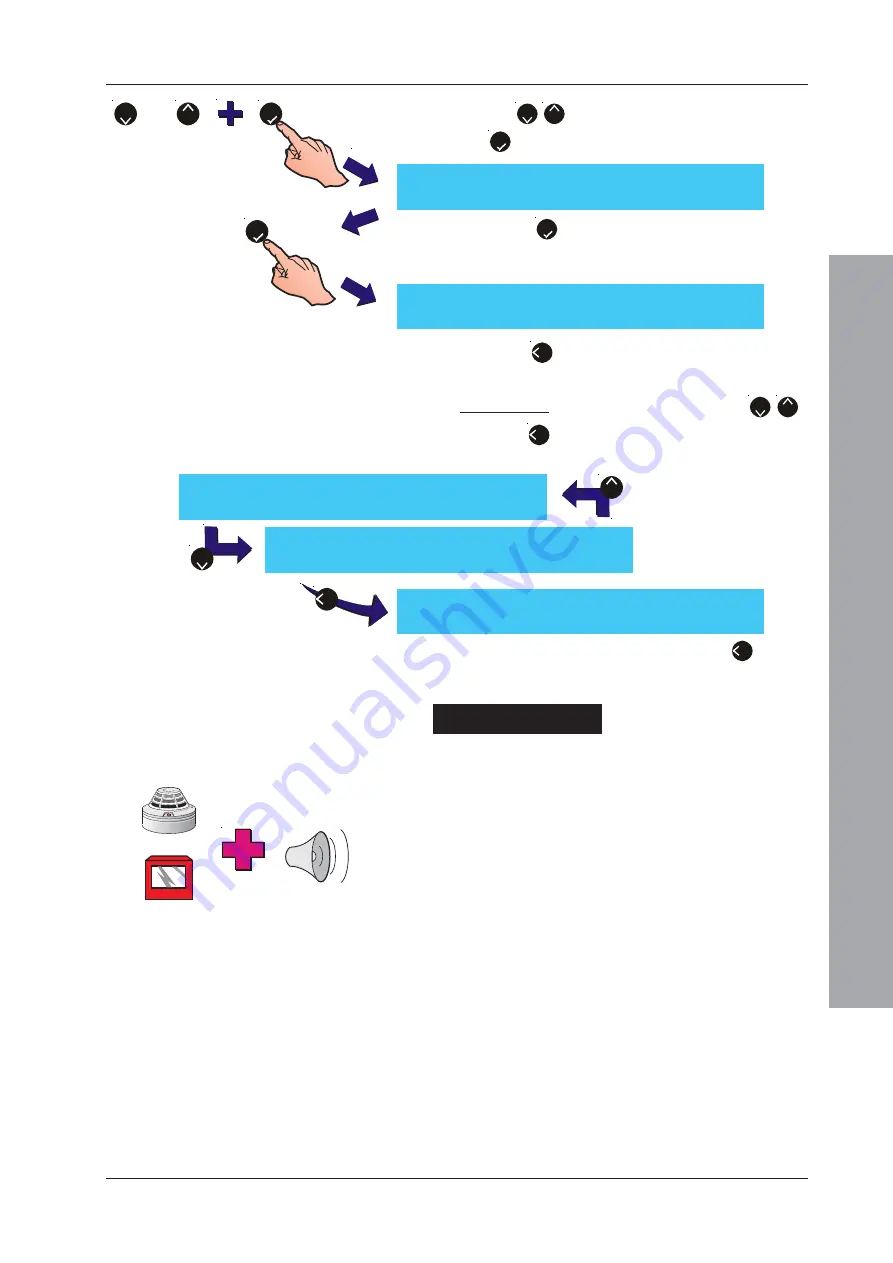
Use the ‘
2
/
8
’ buttons to select the zone, then press
the ‘
5
’ button to confirm the zone number.
ii Press the ‘
5
’ button to stop the walk test for the
selected zone. If no other walk tests are active, the
following is displayed:
iii Press the ‘
4
’ button to exit the Walk Test menu and
return to the Test Zones menu.
b. For all zones: from the ‘
¦
: More’ option (‘
2
/
8
’)
press the ‘
4
’ button on the numeric keypad to select
the Stop All menu:
4
To exit the Test Zones menu, press the ‘
4
’ button.
Continue pressing this button until the required menu
or the ‘Status: NORMAL’ message is displayed.
Checking the Devices
Use the following methods to check devices during a walk test:
i. Test sensors by applying smoke or heat as
appropriate, or by operating the device’s internal test
switch by means of a magnet.
ii. Test Manual Call Points by using a test key.
For each device, the panel will record the event in the
log, sound its internal buzzer, illuminate the appropriate
ZONE LED and turn on the LED at the device that initiated
the alarm.
For OPAL protocol devices the longer green LED flash
duration is replaced, after testing, by the normal poll flash.
Note:
A maximum of ten devices’ LEDs can be illuminated
during the test. Further device testing functions
normally in all other respects. LEDs will not light
again until after the removal of the walk test
condition and manually resetting the panel.
[STOP WALK TEST] Select Zone: 01
Press
to Confirm
<:Cancel
The system has NO walk test zones active
<:Exit
[U0 Zones]
1: Ring Sounders
2:No Sounders
3:View/Stop Test
¦
: More
[U0 Zones]
4: Stop All
¦
: More
Stop all Zones in Walk Test ?
Press
to Confirm
<:Cancel
5
2
8
or
2
8
4


