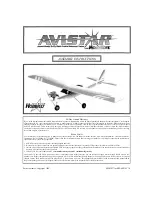
AVISTAR 40 ARF IMPORTANT BUILDING NOTES?
Please make notes of the following points in your instruction manual before beginning assembly.
6-32 X 3/4"
This kit contains an adjustable engine mount. This will allow you mount almost any engine
quickly and easily. To use this mount, please replace the following steps in the manual with
these:
Engine Mount
Machine Screws
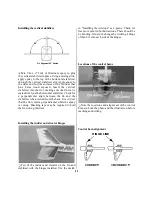
1. On page 16, at step 31, drill a hole in the firewall so it is 9/16" in from the right side and
3/8" up from the bottom as shown in the sketch at right.
3/8"
2. On page 17, before step 35, install the engine mount halves by fitting them together and
attaching them to the firewall using four 6-32 x 3/4" machine screws with washers. Do
not tighten completely until later.
9/16"
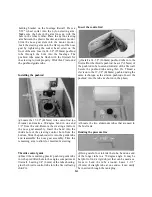
3. On page 17, at step 36, install the nose gear strut through the steering arm, followed by a 4mm
collar. Next, slide the strut through the lower lug on the engine mount and install a second collar
(see sketch at right). Tighten the collars using 3 x 5mm machine screws.
Nose gear
strut
4. On page 17, at step 37, rotate the steering arm so it is 1/2" away from the firewall with the wheel
pointing straight ahead.
4mm
Collars
5. On page 18, after step 46, once the engine in properly positioned, tighten the engine mount to
the firewall.
6. On page 19, step 47, drill four 7/64" holes at the marks. Do not drill 1/8" holes.
7. On page 19, step 50 will tell you to mount the engine using four 3 x 25mm machine screws with washers and nuts. This hard
ware has been replaced with four #6 x 3/4" sheet metal screws. Simply screw these into the mount to hold the engine in piace.
AV12ADD2


