background image

40 

P5417005

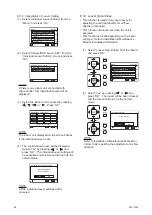
10.1.4  External Power Saving Control Processing

During Outdoor Capacity Control setting in 

process of the central controller or outdoor unit 

The icon “Ext. Sav” will display as ON. 
However, if the controller is set for indoor unit 

rotation or intermittent operation control, the icon 

will not display as ON.

10.1.5 Thermo-Controller

The fan speed is changed to “LOW” at the 

thermo-controller actuation.  However, the 

indication is not changed. (It changes only in the 

heating operation mode.)

10.1.6 Defrosting

Only device using both Cooling/Heating


(included multi Cooling/Heating device 


for building)

• When Turning OFF Operation During Defrosting.


The operation light will turn OFF but the 

operation will continue and the defrosting will 

stop when complete.

10.1.7  Operation Control

Power Activation
•  The icon “Preheating” will display as ON.


The compressor is preheating.  

Because the unit cannot operate beyond four 

hours at a maximum, do not turn OFF the 

power of the outdoor unit in a Cooling/Heating 

season. 

Apply power to the outdoor unit(s) at least 

12 hours prior to operation of the system for 

preheating of the compressor oil.

Activating in Hot Start (only for Heating Mode)
•  The icon “HOT-START” will display as ON.


The icon “HOT-START” will turn OFF when the 

unit is not operating.

In an instance where the operation mode set by 

the central station is different from the operation 

mode of the outdoor unit  

(when the outdoor unit is operating in a mode 

other than heat/cool simultaneous operation.)

•  The current operation mode and the message  

“Other remote are in HEAT setting” will be 

flashing.

• When in Defrosting Operation


The icon “Defrost” will display as ON and the 

indoor fan will turn OFF.


The unit will be situated so the air will blow 

horizontally.

Flashing

Содержание PC-ARF1

Страница 1: ... Wired Controller PC ARF1 IMPORTANT READ AND UNDERSTAND THIS MANUAL BEFORE USING THIS WIRED CONTROLLER KEEP THIS MANUAL FOR FUTURE REFERENCE OK Menu Back Help ECO On Off A C MODE SPEED TEMP COOL LOUV Adj Meeting Room LOUV FLTR ...

Страница 2: ......

Страница 3: ...ated by a medical equipment Do not install the controller in the place where the electromagnetic wave is directly radiated to the electrical box remote control cable or wired controller Install the controller at least 3 meters away from electromagnetic wave radiators such as a radio The installer and system specialist shall comply with local regulations or standards for the safety The following st...

Страница 4: ...not avoided will result in death or serious injury WARNING indicates a hazardous situation which if not avoided could result in death or serious injury CAUTION used with the safety alert symbol indicates a hazardous situation which if not avoided could result in minor or moderate injury NOTICE is used to address practices not related to personal injury NOTE is useful information for operation and ...

Страница 5: ... Grille 12 8 6 Power Saving 13 8 6 1 Power Saving Detailed Setting Outdoor Unit Capacity Control 14 8 6 2 Power Saving Detailed Setting Indoor Unit Rotation Control 16 8 6 3 Power Saving Detailed Setting Intermittent Operation Control 17 8 7 Night Quiet Operation 19 8 8 Quick Function 20 8 9 Comfort Setting 21 8 10 Power Saving Operation Noise Reduction Schedule 22 8 11 Individual Louver Setting 2...

Страница 6: ...ation 38 10 Other Indications 39 10 1 In Normal Condition 39 10 1 1 Main Sub Controller 39 10 1 2 Central Control 39 10 1 3 Priorities 39 10 1 4 External Power Saving Control Processing 40 10 1 5 Thermo Controller 40 10 1 6 Defrosting 40 10 1 7 Operation Control 40 10 2 In Abnormal Condition 41 10 2 1 Abnormality 41 10 2 2 Power Failure 41 10 2 3 Electromagnetic Interference EMI 41 ...

Страница 7: ...lities are found stop the system turn OFF the main power supply and contact your distributor or dealer Do not install the indoor unit outdoor unit controller and cable at such places as 1 where oil vapor or oil is dispersed 2 where the hot springs are near in a sulfuric environment 3 where generation flowing staying or leaking of flammable gas is detected 4 where the sea is near in the salty envir...

Страница 8: ...Operation Component Temperature Setting Indicator Page 4 ECO Button Page 6 Power saving can be started or stopped by pressing this button Back Help Button Page 35 Used to return to the previous screen or to display the Help Menu when pressed from the Normal Mode Menu Button Page 7 To display the Menu Backlight Backlight is turned ON by pressing any button In an instance of using two controllers on...

Страница 9: ... outdoor unit is not covered with snow or ice If covered remove it by using warm water less than 50o C If the water temperature is higher than 50 C it will cause damage to plastic parts 3 Operation Method 3 1 Basic Procedures 1 Function Selection By pressing or the icon will move to the next function in order of the functions MODE SPEED LOUV and TEMP 2 Change of Settings With the function MODE SPE...

Страница 10: ...enu When the Automatic Reset of Setting Temperature function is selected the temperature is automatically returned to the preset temperature after the temperature set point change Contact your distributor for detailed information about Automatic Reset of Setting Temperature and Cooling Lower Limit Value and Heating Upper Limit Value for Setting Temperature functions 4 2 Fan Speed 1 Press or and se...

Страница 11: ...l louver position may not match during the auto swing operation To set the louver positions set the angle after checking the position on the LCD The louver may NOT stop immediately after the switch is pressed 5 Operation 5 1 Operation Start Press On Off The run indicator will be turned on and the operation will be started NOTE Temperature Air Flow Setting Temperature set point and air flow setting...

Страница 12: ...and select Sav Level By pressing or the setting will change between LOW MED HIGH 2 3 Detailed Setting Press or and select Detailed Setting By pressing OK the Detailed Setting screen will be displayed OK Menu Back Help Power Save Guide Sav Mode Capacity Cntl Sav ON OFF ON Sav Level HIGH Rtrn Sel Adj Back Schedule No Setting Detailed Setting NOTE Each time when pressing and Back Help simultaneously ...

Страница 13: ...ed will be displayed on the lower screen 1 Press Menu The menu will be displayed 2 Select a function by pressing or and press OK will be displayed if the function is not available 3 Press Back Help to return to Normal Mode Operation Mode Indication Menu Power Saving Setting Elevating Grille Operation Schedule Reset Filter Sign Time 01 05 Simple Timer 15 10 Fri Entr Rtrn Sel Back OK OK Menu Back He...

Страница 14: ...hanged to Not Used after one timer operation Do not set the same hour for both ON OFF timers Menu Power Saving Setting Elevating Grille Operation Schedule Reset Filter Sign Time 01 05 Simple Timer 15 10 Fri Entr Rtrn Sel Back OK OK Menu Back Help Simple Timer Execute Not Used ON Time OFF Time 15 10 Fri Entr Rtrn Sel Adj OK Back Simple Timer Execute Everyday ON Time 08 30 OFF Time 15 10 Fri Entr Rt...

Страница 15: ...unit operation at a set time Temperature can be also set with Schedule Timer operation Five different schedule timers maximum can be set for each day of the week 1 Select Operation Schedule from the Menu and press OK 2 Select Day Time Setting by pressing or and press OK NOTE If the present time has not been set yet Set Date Time will automatically display Refer to Section 8 15 Adjusting Date Time ...

Страница 16: ...an be set for each day of the week When setting other days of the week press Menu The schedule setting screen of the next day will display 5 Press OK The confirmation screen will be displayed will be indicated when the scheduled operation is activated 6 Select Yes by pressing or and press OK The setting will be confirmed and the screen will return to normal mode To set other days of the week selec...

Страница 17: ...peration Schedule Reset Filter Sign Time 01 05 Simple Timer 15 10 Fri Entr Rtrn Sel Back OK Back OK Operation Schedule Schedule ON OFF Holiday Setting Day Time Setting 15 10 Fri Entr Rtrn Sel Back OK 0 6 12 18 Sun Mon Tue Wed Thu Fri Sat Holiday Setting 15 10 Fri Entr Rtrn Sel Hol ON OFF 5 Select Yes by pressing or and press OK The holiday setting will be confirmed and the screen will return to no...

Страница 18: ...ng grille is equipped with the air panel Caution of Setting Elevating Grille into Air Panel After Cleaning When the air inlet grille is set inside the air panel ensure that the air inlet grille is horizontal and the wire is suspended tightly without loosening After the above is ensured set the air inlet grille If the air inlet grille is inclined and the wire is loosened they may be caught in the p...

Страница 19: ...the normal mode after Back Help is pressed OK Menu Back Help 8 6 Power Saving Depending on the type and setting of the indoor unit and outdoor unit it may be impossible to set this function Function 1 Outdoor Unit Capacity Control Controls the COOL HEAT capacity of the outdoor unit 2 Indoor Unit Rotation Control Indoor units linked with the same outdoor unit system are switched ON in order one by ...

Страница 20: ... and outdoor unit it may be impossible to set this function Control Method The Peak Cut Control reduces the power consumption range when it exceeds the value of the power setting On the basis of the current air conditioning capacity the Moderate Control is used to moderate the air conditioning capacity as well as the peak Power Saving LOW MED HIGH Assign a value corresponding to the capacity contr...

Страница 21: ...ected it will change as follows Peak Cut Control Moderate Control If Sav LOW MED or HIGH is selected it will change as follows 100 90 80 70 60 50 40 0 Press OK after completing all settings The next setting screen will be displayed 6 By pressing or the setting function will change as follows LOW MED HIGH LOW Only MED Only HIGH Only Press OK after completing the setting 7 The confirmation screen wi...

Страница 22: ...F will be OFF This function can only be used when the operation mode is in COOL or HEAT The cooling heating capacity can decrease when using the Power Saving function 1 Select Power Saving Setting from the Menu and press OK 2 The Power Saving Setting screen will be displayed Select Detailed Setting with or and press OK 3 Select Rotation Control with or and press OK The detailed setting screen of t...

Страница 23: ...epeat the operation as follows If the Power Saving Mode changes the Power Saving Detailed setting in intermittent operation control the Power Saving ON OFF will be OFF The cooling heating capacity can decrease when using the Power Saving function Cool Dry Mode Heat Mode SAV LOW Normal Mode 20min Fan Mode 10min Normal Mode 25min Fan Mode 5min SAV MED Normal Mode 17min Fan Mode 13min Normal Mode 20m...

Страница 24: ...ting confirmation screen will be displayed Select Yes with or and press OK to confirm the setting The screen will return to normal mode If the Power Saving Setting setting is accessible set it ON using Power Saving Guidance Back OK Detailed Setting Power Saving Mode Setting Power Saving Setting Entr Rtrn Sel Detailed Setting Intermittent Control Rotation Control Capacity Control Entr Rtrn Sel Back...

Страница 25: ...tting 1 Select Operation Noise Reduction from the Menu and press OK The Operation Noise Reduction setting screen will be displayed Setting Outdoor Unit Setting Name Not Available No Setting LOW Setting 1 MED Setting 2 HIGH Setting 3 2 By pressing or the setting will change as follows OFF LOW MED HIGH Select the level and press OK 3 The setting confirmation screen will be displayed Select Yes with ...

Страница 26: ...e controller when in cooling mode 1 Select Quick Function from the Menu and press OK The Quick Function screen will be displayed 2 By pressing or the Quick mode will change as follows OFF COOL Only HEAT Only COOL HEAT Select the Quick mode and press OK 3 The setting confirmation screen will be displayed Select Yes with or and press OK to confirm the setting The screen will return to normal mode Th...

Страница 27: ...and press OK The Comfort Setting screen will be displayed 2 By pressing or the Comfort Setting Mode will change as follows OFF LOW MED HIGH Select the Control Cool Air level and press OK 3 The setting confirmation screen will be displayed Select Yes with or and press OK to confirm the setting The screen will return to normal mode Menu Function 10 Sav reduction Schedule Comfort Setting Quick Functi...

Страница 28: ...er to 3 below 2 By pressing or select the setting item The setting will change as follows Capacity Control Intermittent Control Noise Reduction Press OK The power saving schedule setting or noise reduction schedule screen will be displayed as Sav Reduction Schedule 3 Select the Day Time Setting with or and press OK The weekly schedule setting screen will be displayed When the current time is not s...

Страница 29: ...es the power saving control or the operation noise reduction control and the icon indicates the canceled time period In case of a holiday setting the icons will appear as follows and To copy a setting press and OK simultaneously for the selected day The setting data of the previous day will be copied The figure above displays the ON Time at 8 30 the OFF Time at 12 15 and the power saving level as ...

Страница 30: ...ittent Control cannot be selected 3 Select Schedule ON OFF with or and press OK 4 The Schedule ON OFF setting confirmation screen will be displayed When schedule is ON select Turn OFF schedule function When schedule is OFF select Turn ON schedule function Select Yes with or and press OK to confirm the schedule ON OFF setting The screen will return to the normal mode Menu Function 10 Sav Reduction ...

Страница 31: ...uver Setting 8 11 1 Setting This setting is available only for indoor units that allow an individual louver control Each louver angle can be set individually NOTE This function is available only when the indoor unit corresponds to an individual louver This function cannot be set if the unit is stopped The fan speed will be changed to LOW while this function is being set After the setting is comple...

Страница 32: ...nit connected with the controller four individual louvers will be displayed NOTE The indoor unit displayed on the screen flashes if the individual louver is set NOTE All the individual louver settings will be canceled 2 Select Yes by pressing or and press OK The louver will be open closed and the screen will return to the normal mode 8 12 Louver Open Close This function is used to fully open louve...

Страница 33: ...Menu Back Help OK Menu Back Help OK Menu Back Help OK Menu Back Help OK Menu Back Help OK Menu Back Help 8 14 Setting of Total Heat Exchanger This function is used to change the ventilation mode of the total heat exchanger NOTE This function is available only when the total heat exchanger is connected This function cannot be set when the unit is operated 1 Select Total Heat Exchanger SET from the ...

Страница 34: ...e set at the same time Check Main or Sub at the Main Sub Remote from the Help Menu Current Setting 1 Select Adjusting Date Time from the Menu and press OK 2 Press or and select yyyy mm dd hh mm OK Set date time Adjusting Date Time Yes No Sel Entr Rtrn Back 5 The confirmation screen is displayed Select Yes by pressing or and press OK The setting will be confirmed and the screen will return to the n...

Страница 35: ...ht Saving Time Yes No Sel Entr Rtrn 15 10 Fri Stop Daylight Saving Time 1 Select Daylight Saving Time from the Menu and press OK 2 The Daylight Saving Time screen will display Select Put 1h backward using or and press OK 3 The Daylight Saving Time confirmation screen displays Select Yes using or and press OK to confirm the setting The screen will return to normal mode Menu Screen Display Setting R...

Страница 36: ...tion Time Format Changes the time form to 12 hour or 24 hour Brightness Adjusts the brightness of backlight Backlight Changes the time 5 15 or 30 seconds between ON and OFF of backlight Contrast Adjusts the degree of difference between light and dark elements of the LCD display On Off lamp Adjusts the brightness of the run indicator 1 Select Screen Display Setting from the Menu and press OK 3 Sele...

Страница 37: ...ay Temperature Unit Language Setting Display Adjustment Entr Rtrn Sel Back OK 8 17 3 Temperature Unit 1 Select Screen Display Setting from the Menu and press OK 2 The Screen Display Setting screen will display Select Temperature Unit using or and press OK The temperature setting screen will be displayed 3 The temperature setting options display Press or and select the setting item The temperature ...

Страница 38: ...y Select Main Sub Display using or and press OK It cannot be set if only the main controller is available or when the display for Main Sub Remote in the Current Setting is shown as NOTE If the unit is set as Non display it is possible to verify if the controller is Main Sub in the Main Sub Remote of the Help Menu Current Setting 3 The Main Sub Display screen displays By pressing or the setting wil...

Страница 39: ... e s z 4 r d x 5 t f c 6 y g v 7 u h b 8 i 9 o k m j n l 0 p ABC abc Sym 1 Sym 2 Spce Del Fin Entr Fin Sel Letter m Meeting Roo Menu Screen Display Setting Room Name Registration Function 19 Daylight Saving Time 04 05 Adjusting Date Time 15 10 Fri Entr Rtrn Sel OK Back Room Name Registration OK ECO Menu 1 Q 2 W A 3 E S Z 4 R D X 5 T F C 6 Y G V 7 U H B 8 I 9 O K M J N L 0 P ABC abc Sym 1 Sym 2 Spc...

Страница 40: ...d Power Failure outdoor unit indoor unit wired controller Communication Failure outdoor unit indoor unit wired controller Modification of time 1 Select Usage Amount Display from the Menu and press OK The Usage Amount Display setting screen will be displayed When the current time is not set the time adjusting screen will be automatically displayed 2 The confirmation screen will be displayed Press O...

Страница 41: ...Menu will be displayed 2 Select the topic from the Help Menu by pressing or and press OK OK Help Menu Contact Information Troubleshooting About Operation Current Setting Entr Rtrn Sel About Indication Back OK Help Menu Contact Information Troubleshooting About Operation Current Setting Entr Rtrn Sel About Indication Back OK ECO Menu Back Help NOTE If the Menu screen remains unchanged for approxima...

Страница 42: ...ain Sub Remote External Power Saving Control Operation Mode Setting Temperature Priorities Operation Noise Reduction Quick Mode Schedule Simple Schedule Operation Schedule Outdoor Unit Capacity Control Schedule Intermittent Operation Control Schedule Noise Reduction Schedule Lock Operation Operation Mode Fan Speed Louver Setting Temperature Central Control ON OFF Operation Mode Fan Speed Louver Se...

Страница 43: ...n from the Help Menu and press OK A list of operation functions will be displayed 2 Select the operation functions from the list by pressing or and press OK The explanation of the selected operation will be displayed 3 Press or to scroll the information up and down 4 Press Back Help The screen will return to the operation function OK Help Menu Contact Information Troubleshooting About Operation Cu...

Страница 44: ...e press Back Help again 9 5 Troubleshooting This function is used to troubleshoot operating problems Make sure that the troubleshooting section is read carefully before requesting repairs 1 Select Troubleshooting from the Help Menu and press OK 2 A list of troubleshooting issues is displayed Select a problem from the list by pressing or and press OK The details of the selected problem will be disp...

Страница 45: ...ontrol When remote control operation is restricted all functions The central control will turn ON If the remote control restriction is set from the central controller the settings for RUN Operation Mode Temperature Setting Fan Speed and Louver will not be accessible from the controller When remote control operation is restricted some functions The icon will display as ON The function operation whi...

Страница 46: ...ontrol Power Activation The icon Preheating will display as ON The compressor is preheating Because the unit cannot operate beyond four hours at a maximum do not turn OFF the power of the outdoor unit in a Cooling Heating season Apply power to the outdoor unit s at least 12 hours prior to operation of the system for preheating of the compressor oil Activating in Hot Start only for Heating Mode The...

Страница 47: ...re All the indications are OFF Once the unit is stopped by power failure the unit will not be started again although power recovers Perform the starting procedures again If the power recovers within two seconds the unit will start again automatically 10 2 3 Electromagnetic Interference EMI There could be an instance where all the indications are OFF and the unit is stopped This can occur through a...

Страница 48: ...P5417005 2017 Printed in China 2017 Johnson Controls Hitachi Air Conditioning Technology Hong Kong Ltd ...

Отзывы: