Installation
Suprasetter A52/A75 – Installation
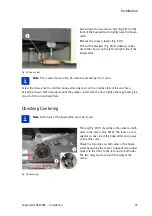
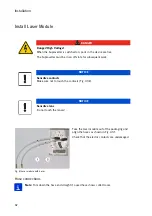
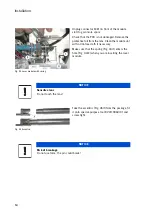
Fig. 42 Hose connection
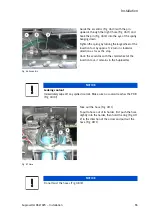
Fig. 43 Laser module hose connection
Push hose (Fig. 42/5) into the hose connector (Fig.
42/1) until the resistance of the collet (Fig. 42/3)
can be felt.
Exert strong pressure to slide the hose approx. 2-3
mm through the O-ring (Fig. 42/2) (second resis-
tance).
Slightly pull back the hose so the collect grips the
hose. The distance between the cap (Fig. 42/4)
and the connector is then approx. 1 mm.
Please note that just like with the compressed air
connection you must overcome a resistance twice
with the connections on the laser module:
1.
with the collet and
2. with the O-ring.
You can tell that a hose was pushed into the con-
nector far enough if the visible part of the metallic
sleeve is smaller than 5 mm (Fig. 43).
Again, you must pull back the hose somewhat so
the collet grips the hose.
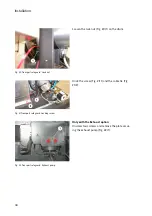
Align the hoses as shown in Fig. 41/1.
NOTICE
Sensitive contacts
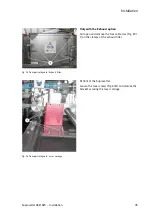
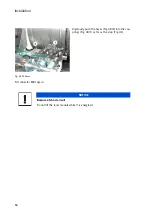
Make sure not to touch the PCB contacts (Fig. 44/3)!
Содержание Suprasetter A52
Страница 6: ......
Страница 24: ...Safety 22 Fig 24 Filter replacement Fig 13 4 On the filter unit ...
Страница 26: ...Safety 24 Fig 26 Warning sign copy template ...
Страница 36: ...Installation Preparation 34 Pallet Installation Instructions ...
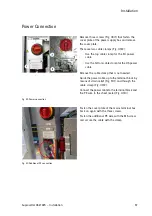
Страница 60: ...Installation 58 Fig 51 Power cable strain relief Tighten the strain relief for the power cable Fig 51 1 ...
Страница 82: ...Technical Data 80 Resolution 1000 pixels cm 2540 dpi Type Value Comment ...
Страница 84: ......
Страница 85: ......

