60
High Water Temperature Safety Shutoff Control
Principles
The correct name is an “aquastat.” It is referred to as an aquastat because it
measures the temperature of water (aqua means water). It is sometimes referred to as a thermostat, but
thermo means air. It
does not
measure the temperature of air. The High Water Temperature Safety Shutoff
Control turns off all electrical power to the combustion air blower and the front light if an excessive water
temperature be reached. To provide added safety and notification, when a high water temperature is reached,
this aquastat will send electrical power to the “red wire”. The red wire leading from the HEATMOR™ back to
the power source can be installed so the electrical power will sound an alarm or will override the comfortable
heat settings within the heated building. By starting heating appliances in the building, heat will be drawn
off the HEATMOR™, dumped into the building, creating an elevated temperature
environment in the building, and hence a notification of an unusually high water
temperature within the HEATMOR™. By removing this excess heat from the
HEATMOR™, a “boil” will normally be avoided.
Operation
• From the factory, this control is set at 200 degrees Fahrenheit. When the
water temperature within the water jacket lowers to 195 degrees
Fahrenheit; the electrical circuit to the main combustion air blower(s)
would be re-activated. The combustion air blower will not come back on
until the low water temperature is reached.
•
DO nOt MaKe anY aDJustMents
.
Leave it set at 200 degrees Fahrenheit.
Removal and Replacement
1) Turn off the main power supply to the HEATMOR™.
2) Remove the aquastat cover.
3) Disconnect and label or draw a diagram of each wire connection
on the aquastat.
4) Loosen the two screws at the back of the aquastat, which clamp the
aquastat to the “well” in the water jacket.
5) Pull the aquastat body straight out of the “well”, ensuring the copper
wire and probe is being pulled out of the well along with the body.
6) Insert the new unit probe first into the well. (Ensure contact paste
has been applied to well.)
7) The clamp must fit around the groove of the well. Tighten the clamp with the two screws at the back
of the aquastat body.
8) Connect the electrical wires to the appropriate connections, following the label or diagram.
9) Replace the cover.
10) Turn on the power.
11) Adjust the dial and white wheel to the preferred settings.
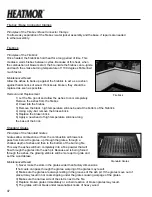
Wire Probe
Removal of
Aquastat Cover
Содержание Response 200 SSRII
Страница 1: ...Operations And Maintenance Manual...
Страница 3: ...Outdoor Furnaces TM THE save these instructions...
Страница 12: ...5 HEATMOR Stainless Steel RESPONSE Outdoor Furnace Model Chapter 1 Model 200 SSRII...
Страница 93: ...Outdoor Furnaces...


