Section 5-3
22
MLSM2003-09-03
Procedure M
- Electrodes
(Surface & Grill)
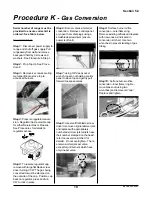
Step 1: Before replacing surface
electrode, ensure it is clean of food
deposits (an emery board can be
used to remove solid food sub-
stances). Also ensure that caps are
correctly positioned.
Step 2: Disconnect power supply to
range. Pull range away from wall
and remove backguard held by 3
screws and washers. See Proce-
dure A Step 1.
Step 3: Prop Top Up. See Proce-
dure P.
Step 4: Remove burner rings from
suspect electrode
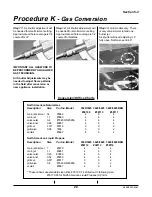
Step 5: Test electrode for continuity
by placing tip of probe on head of
electrode and other end on the
electrode wire to the spark module
(pull wire from module)
Step 6: If no continuity at electrode,
pull wire from electrode and test wire
for continuity. If wire is in order,
replace electrode.
Step 7: To replace electrode, turn
center brass nut CCW 3 to 4
revolutions.
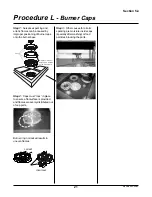
Step 8: in some models, remove
“C” clip holding electrode to base
with needle nose pliers by sliding off
horizontally from underneath the top.
Step 10: Pull wire from faulty
electrode and transfer to new
electrode.
Step 11: Place electrode on burner
base - if old electrode had a “c”
clamp it is not necessary to rein-
stall. Friction from center venturi is
more than adequate.
Step 12: If electrode and wire test
in good condition, check wiring and
connections at spark module or at
ignition switch.
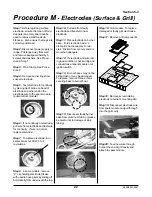
Step 13: Burner bases may not be
sitting flush or may be damaged.
To replace, remove three screws
securing base to burner bowl.
Step 15: Disconnect faulty burner
base from aluminum tubing (please
be careful not to damage or kink
tubing).
Step 16: Grill models. To replace
damaged or faulty grill electrodes.
Step 17: Remove grill components
Step 18: Remove screw holding
electrode to burner’s mounting clip.
Step 19: Disconnect electrode wire
from spark module and pull through
into the grill cavity.
Step 20: Feed new wire through
hole at the end of grill cavity and
attach to spark module.


