Archive Service
56
Vision
2
Instruction Manual
Upload Video
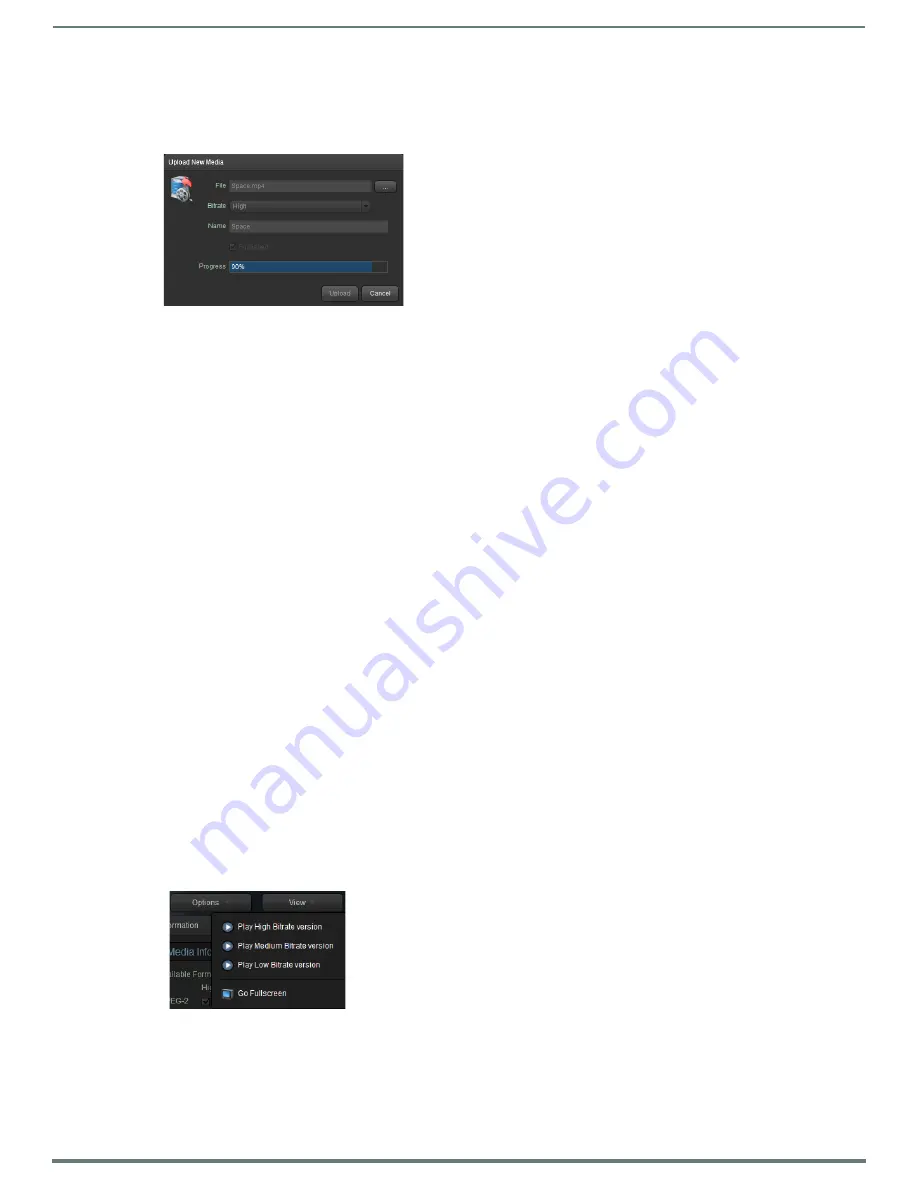
To upload a video, select
Upload New Media
from the options menu to display the upload screen. Vision
2
does not support
transcoding files. Versions of the same file must be uploaded with different formats and bitrates using the Upload Additional Media
option.
Perform these steps to upload a video:
1.
Click the
Browse (...)
button to select a file to upload.
2.
Select a Bitrate for the video from the drop down. The available options are high, medium, and low. This option is not available
for MP3 files as bitrate is irrelevant in this case the bandwidth demands of MP3 files are relatively low.
3.
Enter a name for the video in the name text box, by default the name is taken from the filename. Note this text box is not
available if you are uploading an additional video. Punctuation is not accepted, only numbers or letters are allowed.
4.
Set the publish check box to change whether the uploaded video is published/hidden. This check box is not available if
uploading an additional video. Published videos are viewable by Tablet and Set-top box users. If user access control is enabled
for this archive, then Published videos are viewable by Set-top box users if their user group has view permissions on this
folder. Published videos are viewable by PC and tablet users if the user group they belong to has view permission to this folder.
NOTE:
If access control is enabled, then PC or Tablet users without Publish permission cannot see Hidden videos. Set-top box users
can never see Hidden videos. See Archive Permissions on page 23 for more details. .
5.
Click
Upload
to begin uploading the video. This process can take some time, especially with large video files.
NOTE:
This upload tool has a limit of 2GB. If needing to upload larger files, use the AMX Vision2 FTP client.
Edit Poster Frame
Use this option to edit the thumbnail image for the video in the Archive. Click
Update Poster Frame
to take a snapshot of the
playing video and use this as the video thumbnail to identify the video in the archive.
Select
Options > Cancel/Done editing
to finish.
NOTE:
The snapshot captured by update poster frame is taken from the nearest previous I frame to the point at which Update Poster
Frame was clicked. This may be slightly out of sync with the video playback
Layout Menu
The layout menu allows you to select the layout used for browsing the Archive. There are three options:
Tiles - default layout
Tiles + Navigation Tree - default windows explorer style tree navigation pane on the left of the screen
List + Navigation Tree - list view + windows explorer style tree navigation pane on the left of the screen
View Menu
The view menu allows playback of different bitrate versions of the selected video. The best available video format is selected
automatically. If logged in as an administrator or user with upload permission in the current folder, use the details drop down to
select any of the available file formats and bitrates to check all versions of the video play correctly.
The format is chosen automatically. If wanting to play a particular format and bitrate, use the details menu (this option is only
available to administrators or those with upload permission).
FIG. 80
Upload Media
FIG. 81
View Menu


