


4 - Sprayer Setup
64
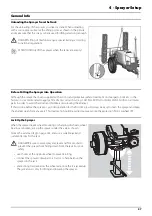
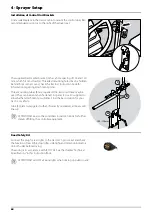
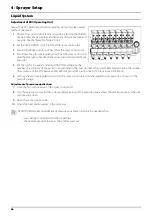
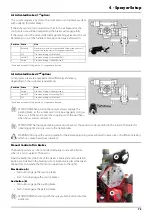
Installation of Control Unit Brackets
Find a suitable place in the tractor cabin to mount the control units. Best
recommended position is to the right of the driver seat.
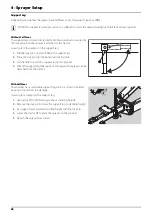
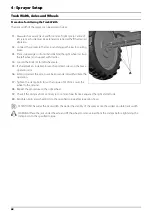
The supplied tractor pillar bracket (A) has a hole spacing of 100 and 120
mm, which fits most tractors. Threaded mounting holes may be hidden
behind front corner cover. Check the tractor’s instruction book for
information regarding attachment points.
Three mounting tubes (B) are supplied. One, two or all three may be
used. They can be bent and shortened. A spacer (C) is also supplied to
allow further attachment possibilities. Find the best solution for your
tractor or vehicle.
Tube (B) plate is staggered so that, if correctly orientated, all boxes will
line up.
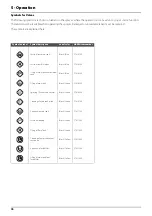
μ
ATTENTION! See also the controllers instruction book for further
details of fitting the controller equipment.
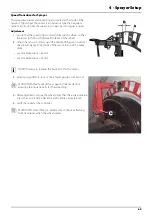
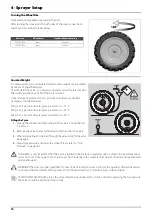
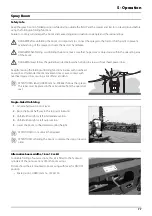
Road Safety Kit
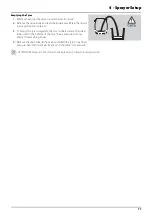
Connect the plug for rear lights to the tractor’s 7-pin socket and check
the function of rear lights, stop lights, side lights and direction indicators
on both sides before driving.
The wiring is in accordance with ISO 1724. See the chapter “Technical
Specifications” in this Instruction Book.
μ
ATTENTION! Turn OFF all work lights when driving on public roads!
100 -120mm
A
B
C
Содержание RANGER PRO VH
Страница 4: ...1 EU Declaration 4 ...
Страница 10: ...Table of Contents 6 ...
Страница 108: ...5 Operation 104 ...
Страница 111: ...6 Maintenance 107 Boom Lubrication Oiling Plan Lubrication Oiling Plan Trailer Paralift ...
Страница 142: ...6 Maintenance 138 ...
Страница 149: ...8 Technical Specifications 145 Pump Specifications Pump Model 364 5 5 Pump Model 364 7 0 Pump Model 364 10 0 ...
Страница 164: ...Index 160 ...
Страница 166: ...HARDI INTERNATIONAL A S Herthadalvej 10 DK 4840 Nørre Alslev DENMARK ...


