12_
live
live
manual Switching
Click the arrow <◄/►> key to move to the next split mode.
M
`
If your product supports a remote controller, you can manually press the Left/Right buttons to switch between different
screen modes.
For products that support remote controls, see “
NVR products supporting each feature
”. (Page 4)
example 1) after setting to 16-split mode in prn-4011, if you press the right [
+
] button:
Channel (CH 01~16)
;
Channel (CH 17~32)
;
Channel (CH 33~48)
;
Channel (CH 49~64)
example 2) after setting to 4-split screen mode in xrn-810S, if you press the right [
+
] button:
Channel (CH 1~4)
;
Channel (CH 5~8)
StatuS
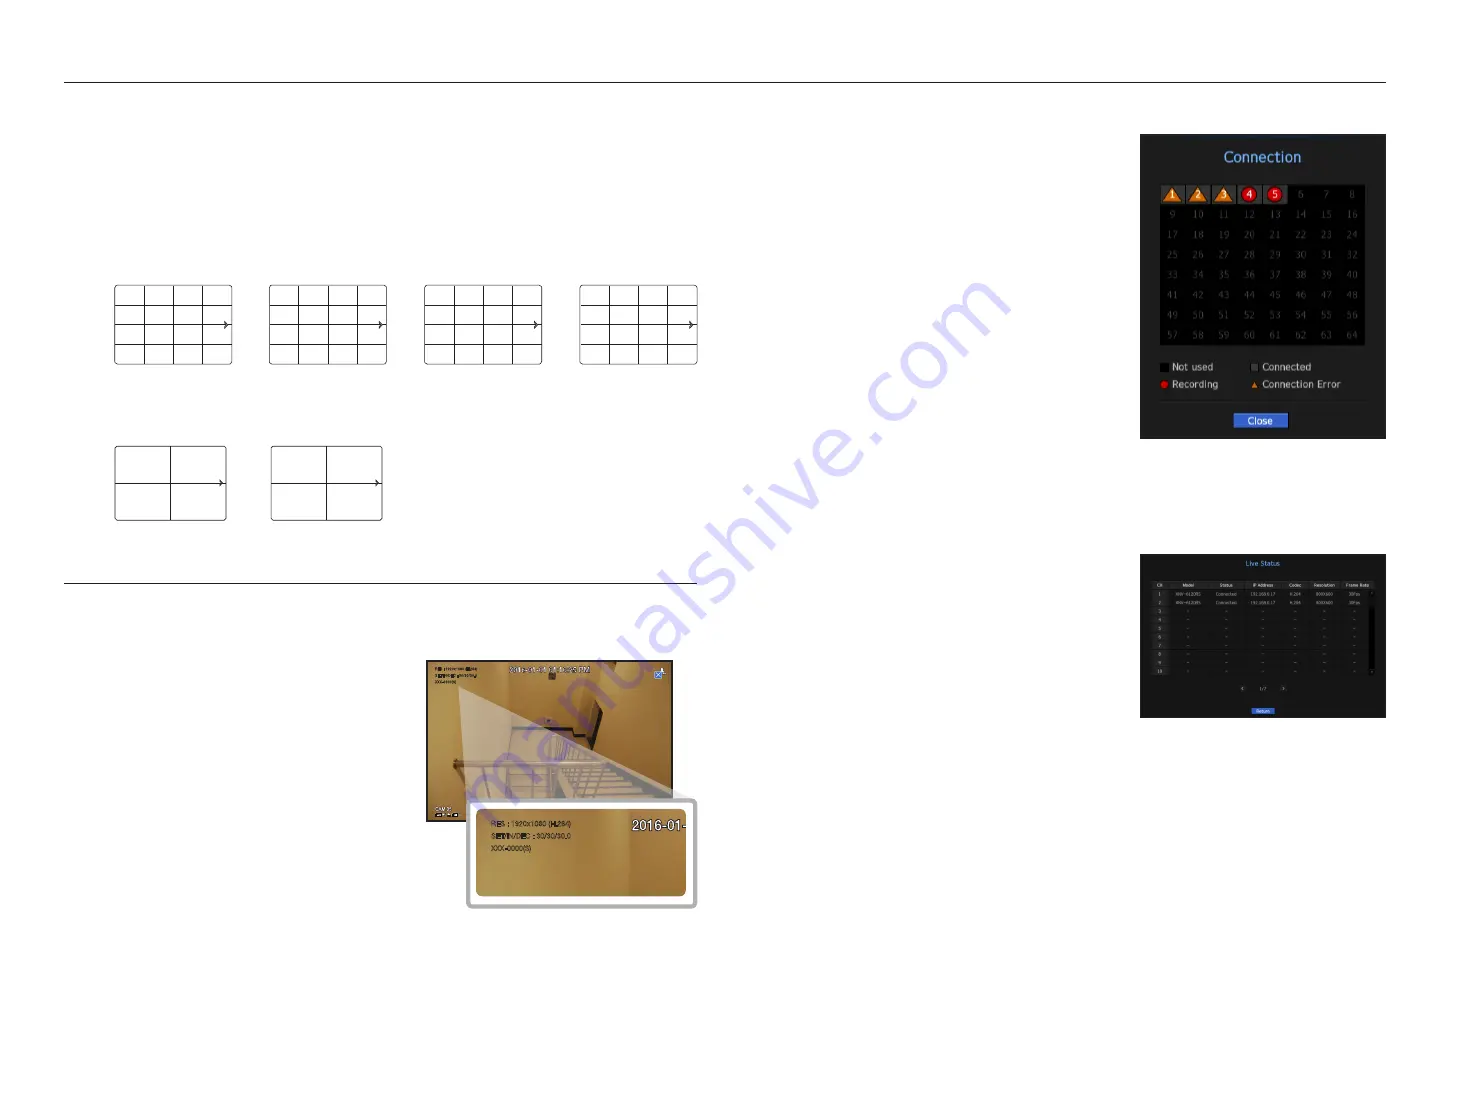
You can check the connection information of the camera to be connected to each channel on the live screen.
channel info
Right-click on the live screen and select <
cH info
> in the
<
Status
> menu to display the information on the current
video in overlay over the live video being monitored.
M
`
ARB is only displayed when an ARB situation occurs.
`
The letters shown next to the product name represents the
protocol used to register the camera.
-
S and V represent Wisenet protocol while O represents
ONVIF.
-
If connected using the RTSP protocol, then only RTSP is
displayed without any product name.
;
;
;
CH1
CH2
CH3
CH4
CH5
CH6
CH7
CH8
CH9
CH10
CH11
CH12
CH13
CH14
CH15
CH16
CH17
CH18
CH19
CH20
CH21
CH22
CH23
CH24
CH25
CH26
CH27
CH28
CH29
CH30
CH31
CH32
CH33
CH34
CH35
CH36
CH37
CH38
CH39
CH40
CH41
CH42
CH43
CH44
CH45
CH46
CH47
CH48
CH49
CH50
CH51
CH52
CH53
CH54
CH55
CH56
CH57
CH58
CH59
CH60
CH61
CH62
CH63
CH64
CH4
CH5
CH2
CH6
CH1
CH3
CH7
CH8
CH9
CH4
CH5
CH2
CH6
CH1
CH3
CH7
CH8
CH9
CH1
CH2
CH3
CH4
CH4
CH5
CH2
CH6
CH1
CH3
CH7
CH8
CH9
CH15
CH11
CH16
CH12
CH7
CH3
CH8
CH4
CH13
CH9
CH14
CH10
CH5
CH1
CH6
CH2
CH1
CH2
CH3
CH4
CH6
CH7
CH3
CH2
CH4
CH1
CH5
CH4
CH5
CH2
CH6
CH1
CH3
CH7 CH8 CH9 CH10 CH11 CH12 CH13 CH14 CH15 CH16
CH12
CH1
CH13
CH9
CH4
CH7
CH5
CH10
CH8
CH11
CH6
CH2
CH3
CH1
CH2
CH1
CH1
CH2
CH1
CH4
CH5
CH2
CH6
CH1
CH3
CH7
CH8
CH9
CH13
CH14
CH11
CH15
CH10
CH12
CH16
CH4
CH5
CH2
CH6
CH1
CH3
CH7
CH8
CH9
CH1
CH2
CH3
CH4
CH1
CH2
CH3
CH4
CH5
CH6
CH7
CH8
CH9
CH10
CH11
CH12
CH13
CH14
CH15
CH16
CH15
CH11
CH16
CH12
CH7
CH3
CH8
CH4
CH13
CH9
CH14
CH10
CH5
CH1
CH6
CH2
CH15
CH11
CH16
CH12
CH1
CH3
CH8
CH4
CH13
CH9
CH14
CH10
CH5
CH7
CH6
CH2
CH3
CH4
CH5
CH2
CH6
CH1
CH3
CH7
CH8
CH9
CH4
CH5
CH2
CH6
CH1
CH3
CH7
CH8
CH9
CH1
CH2
CH3
CH4
CH4
CH5
CH2
CH6
CH1
CH3
CH7
CH8
CH9
CH15
CH11
CH16
CH12
CH7
CH3
CH8
CH4
CH13
CH9
CH14
CH10
CH5
CH1
CH6
CH2
CH1
CH2
CH3
CH4
CH6
CH7
CH3
CH2
CH4
CH1
CH5
CH4
CH5
CH2
CH6
CH1
CH3
CH7 CH8 CH9 CH10 CH11 CH12 CH13 CH14 CH15 CH16
CH12
CH1
CH13
CH9
CH4
CH7
CH5
CH10
CH8
CH11
CH6
CH2
CH3
CH1
CH2
CH1
CH1
CH2
CH1
CH4
CH5
CH2
CH6
CH1
CH3
CH7
CH8
CH9
CH13
CH14
CH11
CH15
CH10
CH12
CH16
CH4
CH5
CH2
CH6
CH1
CH3
CH7
CH8
CH9
CH1
CH2
CH3
CH4
CH1
CH2
CH3
CH4
CH5
CH6
CH7
CH8
CH9
CH10
CH11
CH12
CH13
CH14
CH15
CH16
CH15
CH11
CH16
CH12
CH7
CH3
CH8
CH4
CH13
CH9
CH14
CH10
CH5
CH1
CH6
CH2
CH15
CH11
CH16
CH12
CH1
CH3
CH8
CH4
CH13
CH9
CH14
CH10
CH5
CH7
CH6
CH2
CH3
;
connection
Right-click on the live screen and select <
connection
> in the
<
Status
> menu to check the status of cameras connected to
each channel.
live Status
Right-click on the live screen and select <
live
> in the <
Status
> menu to check the transmitted data from a
camera connected to each channel.
•
Model : Displays the model name of camera connected to
each channel.
•
Status : Shows the connection status of camera set to each
channel.
•
IP Address : Displays the IP address of a camera set to each
channel.
•
Codec : Displays the live profile codec information for a
camera set to each channel.
•
Resolution : Displays the live profile resolution of a camera set
to each channel.
•
Frame Rate : Displays the live profile transmission rate for a camera set to each channel.
RES : 1920x1080 (H.264)
SET/IN/DEC : 30/30/30.0
XXX-0000(S)
RES : 1920x1080 (H.264)
SET/IN/DEC : 30/30/30.0
XXX-0000(S)


