background image

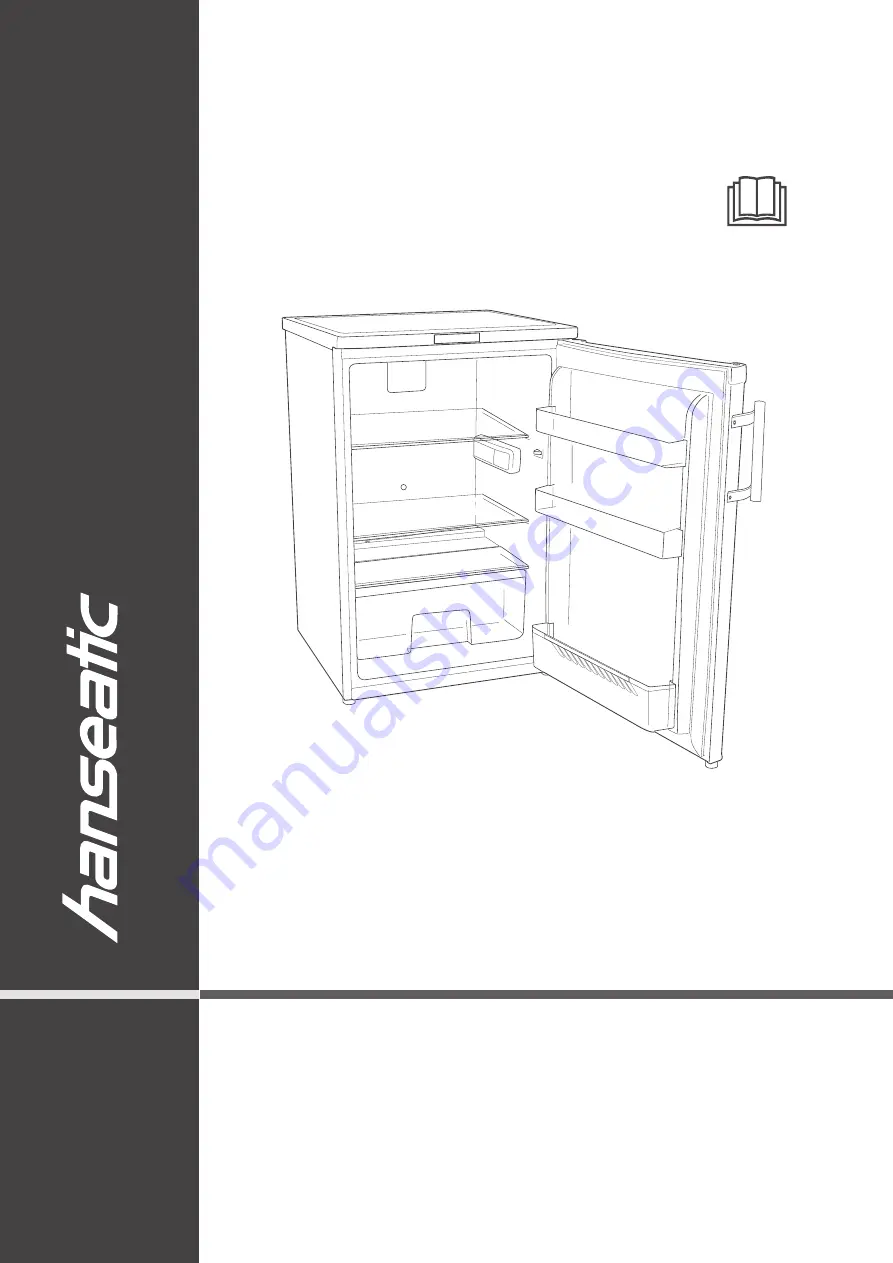
Kühlschrank

Gebrauchsanleitung

Anleitung/Version:
2101-01152 DE 20211018 
Bestell-Nr.: 45093968 
Nachdruck, auch aus zugs-
 wei se, nicht ge stat tet!

HKS8555DW

Содержание HKS8555DW

Страница 1: ...K hlschrank Gebrauchsanleitung Anleitung Version 2101 01152 DE 20211018 Bestell Nr 45093968 Nachdruck auch auszugs weise nicht gestattet HKS8555DW...

Страница 2: ...nd ausrichten DE 21 Grundreinigung DE 22 Ger t ans Stromnetz anschlie en DE 22 T ranschlag wechseln DE 24 Fehlersuchtabelle DE 27 Service DE 29 Beratung Reklamation und Bestellung DE 29 Reparaturen un...

Страница 3: ...nalbegriff warnt vor m glichen Sachsch den Symbolerkl rung Dieses Symbol verweist auf n tzliche Zusatzinformationen Vorsicht Brandgefahr entflammbare Materialien Definitionen Lebensmittel bezeichnet N...

Страница 4: ...in dieser Gebrauchsanleitung beschrieben Jede andere Verwendung gilt als nicht be stimmungsgem und kann zu Sachsch den oder sogar zu Personensch den f hren Der Hersteller bernimmt keine Haftung f r S...

Страница 5: ...Trennung vom Stromnetz erfolgt bei diesem Ger t nur durch Ziehen des Netzsteckers aus der Steckdose Ger t daher nur an eine gut zug ngliche Steckdo se anschlie en damit es im St rfall schnell vom Str...

Страница 6: ...eleuchtung auszutauschen Wenden Sie sich im Bedarfsfall an unseren Service siehe Seite DE 29 Ger t regelm ig auf Sch den pr fen Brandgefahr Unsachgem er Umgang mit dem Ge r t kann zu einem Brand zu Ve...

Страница 7: ...belkeit oder Ersticken verursachen K ltemitteld mpfe nicht einatmen Sollte K ltemittel austreten Raum unverz glich l ften Risiken durch chemische Stoffe VORSICHT Explosionsgefahr Unsachgem er Umgang...

Страница 8: ...andhabung unzurei chende K hlung oder berlagerung k nnen die eingelagerten Lebensmittel verderben Bei Verzehr besteht die Ge fahr einer Lebensmittelvergiftung Insbesondere rohes Fleisch und Fisch ausr...

Страница 9: ...chen Einrichtungen oder sonstigen Mittel als die vom Hersteller empfohlenen benutzen Innenraumbeleuchtung ausschlie lich zur Beleuchtung des Ger teinne ren verwenden Sie ist nicht zur Be leuchtung ein...

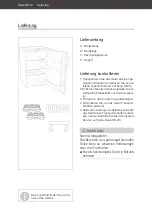
Страница 10: ...pols ter 3 Pr fen Sie ob die Lieferung vollst ndig ist 4 Kontrollieren Sie ob das Ger t Transport sch den aufweist 5 Sollte die Lieferung unvollst ndig sein oder das Ger t einen Transportschaden aufwe...

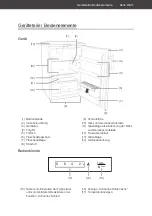
Страница 11: ...e 10 Obst und Gem seschublade 11 Glasablage als Abdeckung der Obst und Gem seschublade 12 Tauwasserablauf 13 Glasablage 14 Ger teabdeckung Bedienblende Ger t 8 6 4 2 Temp 3sec 15 Taster zum Einstellen...

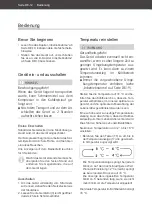
Страница 12: ...chimmel bildet Temperatur einstellen WARNUNG Gesundheitsgefahr Das Ger t arbeitet eventuell nicht ein wandfrei wenn es ber l ngere Zeit zu geringer Umgebungstemperatur aus gesetzt wird Es kann dann zu...

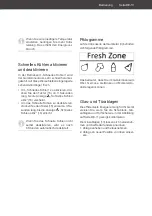
Страница 13: ...a 3 Se kunden lang bis die Anzeige Schnelles K hlen aktiv 16 erlischt Wenn Sie das Schnelle K hlen nicht selbst deaktivieren wird es nach 6 Stunden automatisch deaktiviert Piktogramme Auf der Innensei...

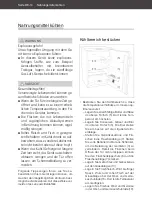
Страница 14: ...gern k nnen um sie ber den l ngstm glichen Zeitraum best m glich aufzubewahren Auf diese Weise ver meiden Sie Lebensmittelabf lle K hlbereich best cken 13 13 13 13 13 10 10 10 0 5 5 5 6 6 6 7 7 13 13...

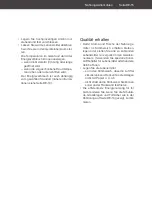
Страница 15: ...alten Damit Aroma und Frische der Nahrungs mittel im K hlbereich erhalten bleiben legen oder stellen Sie alle zu k hlenden Lebensmittel nur verpackt in den Ger tein nenraum Verwenden Sie spezielle Kun...

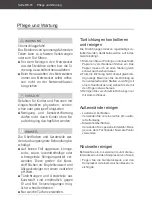
Страница 16: ...emp ndlich gegen l und Fett Verunreinigungen m g lichst schnell entfernen Nur weiche T cher verwenden T rdichtungen kontrollieren und reinigen Die T rdichtungen m ssen regelm ig kon trolliert werden d...

Страница 17: ...en 13 aus dem K hlbereich heraus 4 Um die T rf cher 5 und die Flaschenab lage 7 herauszunehmen dr cken Sie sie seitlich etwas zusammen und ziehen Sie sie gleichzeitig nach oben aus der Halte rung hera...

Страница 18: ...ch tung nicht entfernen Nicht versuchen die Innenbeleuch tung auszutauschen Die Innenbeleuchtung schaltet sich beim ff nen der Ger tet r 3 automatisch ein und er lischt beim Schlie en Als Leuchtmittel...

Страница 19: ...temittelkreislaufs kein z ndf hi ges Gas Luft Gemisch entstehen kann muss der Aufstellraum laut Norm EN378 eine Mindestgr e von 1 m3 je 8 g K ltemittel haben Die Menge des K ltemittels in Ihrem Ge r t...

Страница 20: ...u boden heizung installiert ist stellen Sie das K hl ger t auf eine Isolierplatte aus festem Ma terial ber Klimaklassen Halten Sie immer die vorgeschriebene Um gebungstemperatur ein siehe Inbetrieb na...

Страница 21: ...ss der Abstand von den L ftungsschlit zen zur Wand zu Schr nken oder anderen Ger ten mindestens 15 cm betragen 2 berpr fen Sie den Stand mit einer Was serwaage 9 3 3 Kippen Sie ggf das Ger t leicht na...

Страница 22: ...hen bzw Sicherung herausschrauben ausschalten und unseren Service kontaktieren siehe Seite DE 29 Der Anschluss an eine Zeitschaltuhr oder ein separates Fernwirksystem zur Fern berwachung und steuerung...

Страница 23: ...den aufrecht stehen lassen Dadurch hat das Schmiermittel gen gend Zeit um in den Kompressor zur ckzu ie en Stecken Sie den Netzstecker in eine vor schriftsm ig installierte und leicht zu g ngliche Ste...

Страница 24: ...teabdeckung 14 ab notfalls mithilfe des Schlitzschraubendre hers 22 14 4 L sen Sie die Steckverbindung 22 zwi schen der Ger teabdeckung 14 und dem Ger t Legen oder stellen Sie die Ger teabde ckung 14...

Страница 25: ...beiden Schraub f e 9 wieder auf der jeweils anderen Seite ein 4 Stellen Sie den K hlschrank vorsichtig aufrecht hin Ger tet r montieren 8 1 Schrauben Sie den St tzfu 8 von der Ger tet r 3 ab und schr...

Страница 26: ...n Seite der Ger tet r 3 heraus und setzen Sie sie auf der Seite wieder ein auf der Sie den T rgriff 4 abmontiert ha ben 3 Montieren Sie den T rgriff 4 auf der an deren Seite an wie im Abschnitt T rgri...

Страница 27: ...ich Wenn die Innentemperatur steigt schaltet sich der Kompressor selbstt tig ein Ger t k hlt zu stark Temperatur zu niedrig eingestellt H here Einstellung w hlen siehe Temperatur einstellen auf Seite...

Страница 28: ...e t durch die Rohre Klicken Kompressor schaltet sich ein oder aus St rende Ger usche Festen Stand berpr fen Gegenst nde vom Ger t entfernen Fremdk rper von der Ger ter ckseite entfernen Unten im K hlb...

Страница 29: ...dauer von sieben Jahren nach dem Inverkehrbringen des letzten Exemplars des Modells zur Ver f gung T rdichtungen stehen f r einen Zeit raum von zehn Jahren zur Verf gung Kunden in Deutschland Wenden S...

Страница 30: ...grunds tzlich Vorrang vor Ma nahmen der Abfallbewirtschaftung Als Ma nahmen der Abfallvermeidung kom men bei Elektro und Elektronikger ten insbe sondere die Verl ngerung ihrer Lebensdauer durch Repara...

Страница 31: ...45093968 Ger tebezeichnung K hlschrank Modellkennung HKS8555DW Ger tema e H he Breite Tiefe 845 mm 560 mm 575 mm Leergewicht 34 kg K ltemittel R600a K ltemittel F llmenge 26 g Schaummittel Zyklopentan...

Страница 32: ......

Страница 33: ...Refrigerator User manual Manual version 2101 01152 EN 20211018 Article no 45093968 Reproduction even of ex cerpts is not permitted HKS8555DW...

Страница 34: ...nd aligning the appliance EN 21 Cleaning before use EN 22 Connecting the appliance to the mains EN 22 Changing the door hinges EN 24 Troubleshooting table EN 27 Service EN 29 Advice complaints and ord...

Страница 35: ...le damage to property Explanation of symbols This symbol refers to useful additional information Caution Fire hazard flammable ma terials Definitions Food refers to foods ingredients and drinks includ...

Страница 36: ...s deemed improper and may result in damage to prop erty or even personal injury The manufactur er accepts no liability for damage caused by improper use Safety notices In this chapter you will find ge...

Страница 37: ...be connected to an easi ly accessible socket so that it can be quickly disconnected from the power supply in the event of a breakdown Since all poles of the appliance can not be disconnected from the...

Страница 38: ...the appliance Do not connect to a multi socket ex tension cable or a multi socket plug Risks associated with using refrigerants WARNING Risk of re and explosion Your appliance s refrigeration circuit...

Страница 39: ...health hazard The thermal insulation and the interior are scratch and heat sensitive and can melt or catch re Plastics such as those used in thermal insulation can release toxic fumes if they melt or...

Страница 40: ...age EN 19 Risk of damage NOTICE Risk of damage to property If the appliance has been transported horizontally lubricant from the com pressor may make its way into the cool ing circuit If possible only...

Страница 41: ...k the plastic surfaces All purpose cleaners with a neutral pH are recommended Door seals and plastic parts are sensitive to oil and grease Remove contaminants as quickly as possi ble Use only soft clo...

Страница 42: ...ape and foam padding 3 Check that the delivery is complete 4 Check whether the appliance was dam aged during transit 5 If the delivery is incomplete or the appli ance has been damaged during transport...

Страница 43: ...eet 10 Fruit vegetable drawer 11 Glass shelf as the fruit vegetable drawer s cover 12 Defrost drain 13 Glass shelf 14 Appliance cover Control panel Appliance 8 6 4 2 Temp 3sec 15 Button for setting th...

Страница 44: ...om forming Setting the temperature WARNING Health hazard The appliance may not operate proper ly if exposed to low ambient tempera tures for extended periods of time This could then cause a rise in te...

Страница 45: ...16 disappears Quick refrigerating will automatically deactivate after 6 hours if you do not deactivate it yourself Pictograms The following pictograms are displayed on the inside of the appliance door...

Страница 46: ...r the longest possible period They will help prevent food from being wasted Filling the fridge 13 13 13 13 13 10 10 0 10 0 5 5 5 6 6 6 7 7 13 13 13 13 Fill the fridge in such a way that the tem peratu...

Страница 47: ...taining quality To maintain the flavour and freshness of food in the fridge only place packaged food inside the appliance Use special plastic containers for food or customary films Place the food in t...

Страница 48: ...d grease Remove con taminants as quickly as possible Only use soft cloths Checking and cleaning door seals The door seals must be checked regularly so that no warm air can enter the appliance 1 To tes...

Страница 49: ...t vegetable drawer 10 the door compartments 5 the bottle rack 7 and the glass shelves 13 out of the fridge 4 In order to remove the door compart ments 5 and bottle rack 7 push them together slightly a...

Страница 50: ...ior light Do not attempt to replace the interi or light The interior light switches on automatically when the appliance door 3 is opened and goes out when the door is closed Maintenance free LEDs are...

Страница 51: ...leakage in the refrigeration cir cuit the installation space must have a minimum size of 1 m3 per 8 g of refrigerant in compliance with the EN 378 standard The amount of re frigerant contained in you...

Страница 52: ...the appliances If underfloor heating is installed at the set up location place the cooling appliance on an insulation plate made from solid mate rial About climate categories Always ensure the prescri...

Страница 53: ...ce of 5 cm the clearance between the ventilation slots and the wall units or other appliances must be at least 15 cm 2 Check the position with a spirit level 9 3 3 If necessary tilt the appliance back...

Страница 54: ...unscrew isolate the fuse and contact our Service de partment see page EN 29 Do not connect to a timer or a sepa rate remote controlled system for dis tance monitoring and control Since all poles of th...

Страница 55: ...fter transport and before connecting This allows the lubricant enough time to ow back into the compressor Insert the mains plug into an easily ac cessible and properly installed socket 220 240 V 50 Hz...

Страница 56: ...14 and if necessary use a slot screwdriver to do so 22 14 4 Disconnect the plug connector 22 be tween the appliance cover 14 and the appliance Lay down or put the appliance cover 14 in a safe place 24...

Страница 57: ...lly stand the refrigerator upright Attaching the appliance door 8 1 Unscrew the support leg 8 from the ap pliance door 3 and screw it back in on the opposite side 2 Re insert the appliance door 3 23 2...

Страница 58: ...om the other side of the appliance door 3 and re insert them on the other side from which you removed the door handle 4 3 Attach the door handle 4 to the other side as described in section Installing...

Страница 59: ...equired When the inside temperature rises the compressor automatically switches on Appliance cools too quickly Temperature has been set too low Select a higher setting see Setting the temperature on p...

Страница 60: ...t is flowing through the pipes Clicking The compressor is switching on or off Disturbing noises Check that it is stable Remove any objects from the appliance Remove any foreign matter from the back of...

Страница 61: ...ing this Spare parts are available for a minimum peri od of seven years after the final version of the model has been placed on the market Door seals are available for a period of ten years Customers...

Страница 62: ...e priority over waste management For electrical and electronic devices waste prevention measures include extending the lifespan of defective devices through repair and reselling used working appliance...

Страница 63: ...ppliance Refrigerator Model identifier HKS8555DW Device measurements Height Width Depth 845 mm 560 mm 575 mm Unloaded weight 34 kg Refrigerant R600a Filling capacity refrigerant 26 g Foaming agent cyc...

Страница 64: ......

Отзывы: