30
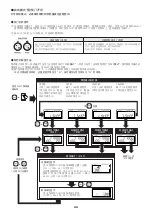
Control Panel (Local operation)
Press the [AUTO] button once to open the shutter. After
the set time has elapsed, the shutter closes automati-
cally. When the shutter opens, the indicator lamp lights,
and when the shutter closes, the lamp goes out.
External Control Signal (Remote operation)
Shorting Pins
!2
to
!5
for an instant (approximately 0.5 sec-
onds) opens the shutter in Auto mode.
After the set time has elapsed, the shutter closes automatically.
While the shutter is open, Pin
t
outputs ON signal.
■
Opening/closing of shutter in Auto mode
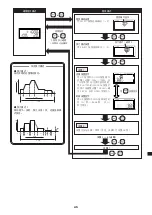
For the shutter operation in the Auto mode, it is necessary to make settings of the time and light intensity in the program in advance.
●
Shutter open operation
q
Press the [SELECT] button while pressing the [SHIFT] button in the normal display mode, then the mode changes to the pro-
gram mode and the program number flashes.
Using the [SHIFT] button and [SELECT] button in this state, set the specified program by selecting the number. (After setting,
pressing the [SHIFT] and [SELECT] buttons at the same time for longer than 3 seconds will reset to the normal display mode.)
w
Press the [AUTO] button for [SHUTTER], and the selected program is activated.
●
Program setting procedure
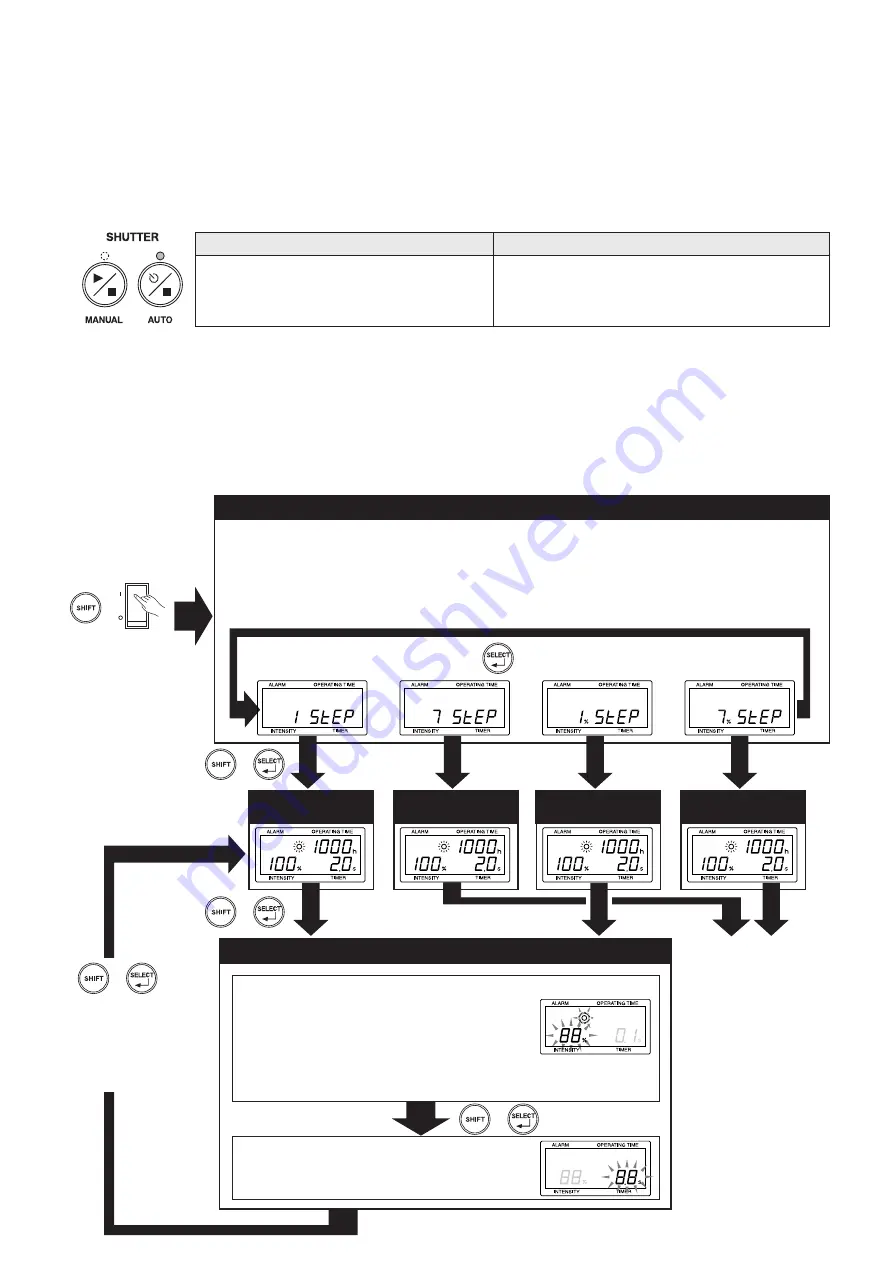
There are two program modes: one is
“7 STEP mode”
in which light output program in up to 7 steps can be set and the other is
“1 STEP mode”
in which the light output program in 1 step only can be set.
To select the program mode, turn on the power while pressing the SHIFT button and select the mode, using the SELECT button.
As the program mode, once set, is stored in the memory of the main unit, the program starts in the previously set mode when
the power is turned on next time.
* Use the guide mark for installation of the filter on the back (unpainted) of the cover. The filter installed in the re-
verse direction here cannot be inserted in the light source unit.
+
Selecting program mode
1 STEP mode
Light output program in 1 step
only. (When the Optical Feed-
back Unit is installed, the unit
display is changed automati-
cally to the unit display W.)
+
Normal display
mode : 7%STEP
7 STEP mode
Light output program in up to
7 steps. (When the Optical
Feedback Unit is installed, the
unit display is changed auto-
matically to the unit display W.)
1 STEP mode
Light output pro-
gram in 1 step only.
(The unit display
is fixed to %.)
7 STEP mode
Light output program
in up to 7 steps.
(The unit display
is fixed to %.)
Normal display
mode : 1%STEP
Normal display
mode : 7STEP
Normal display
mode : 1STEP
Program mode (1STEP)
+
Output intensity setting display
Adjust the output intensity (diaphragm opening) us-
ing UP and DOWN buttons (0 to 100 %, by every 1 %).
When the optical feedback function is at work, open
the shutter by operating the MANUAL button of the
shutter and adjust the output intensity (0.00 W to 4.50
W (max.), by approximately every 0.02 W).
Time setting display
Set the time using UP and DOWN buttons
(0.1 sec to 999.0 sec, by every 0.1 sec).
+
Turn on the power
while pressing the
SHIFT button.
To next page
Refer to 7 STEP
program
+
Press these buttons for
longer than 3 seconds
continuously or leave
them untouched for
longer than 1 minute
Displayed alternately
at every pressing
Содержание LIGHTINGCURE LC8
Страница 2: ...2...
Страница 6: ...6 1 1 1 2 JIS C 7550 3 JIS T 8141 30 kV 15 1 MPa 10 4 MPa 40...
Страница 8: ...8 25 80 10 cm 10 cm L9566 L9588 10 cm 10 cm 10 cm 10 cm...
Страница 11: ...11 q OFF w e 1 MPa 10 r t y u...
Страница 35: ...35 1 1 1 2 IEC 2006 IEC 62471 EMI 30kV 15 1MPa 10 4MPa 40...
Страница 37: ...37 L9566 L9588 10cm 10cm 10cm 10cm 25 80 10cm 10cm...
Страница 40: ...40 q OFF w e r t y 1MPa 10 u...
Страница 54: ...54...
Страница 55: ...55...


