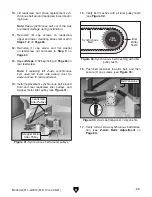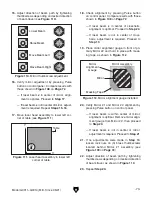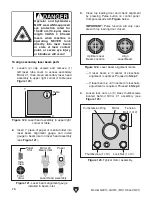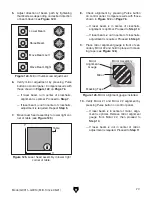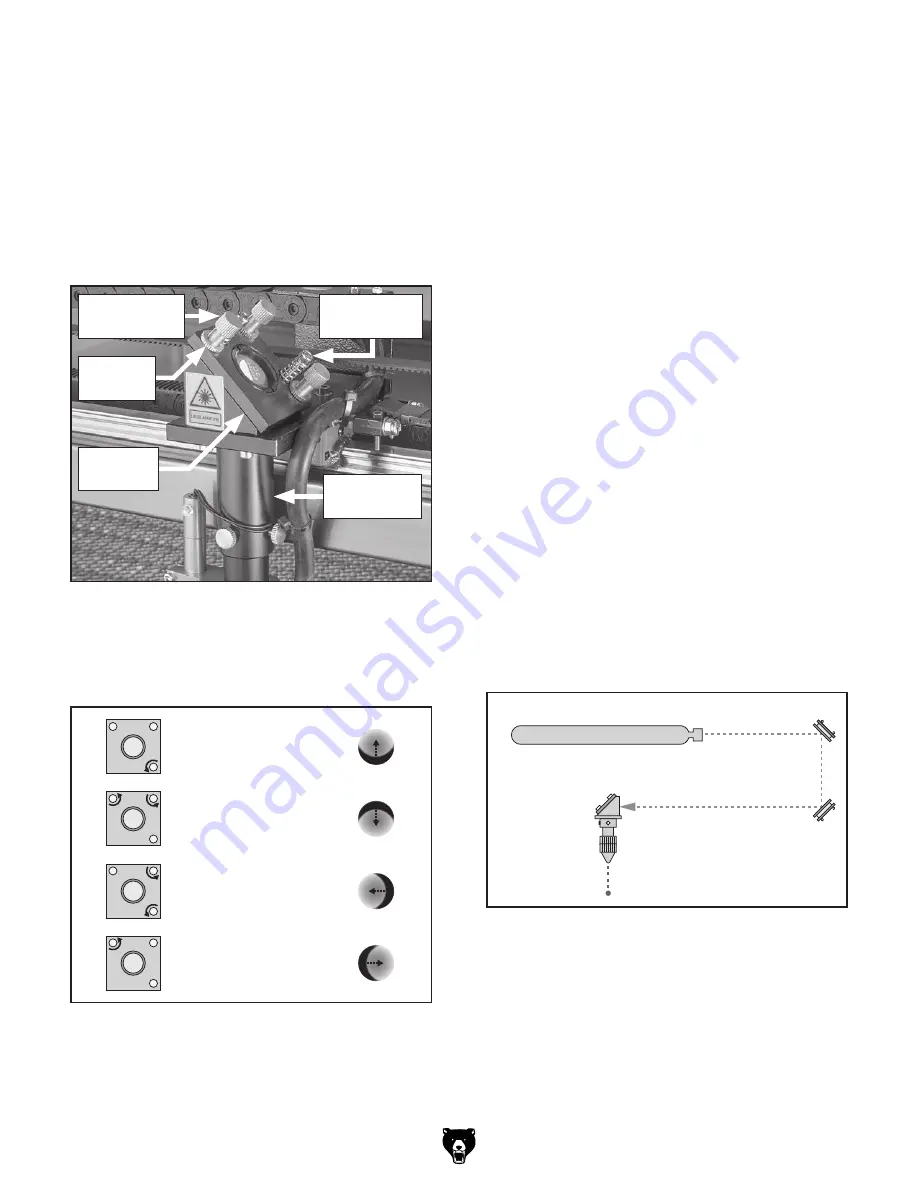
Move Beam Left
Move Beam Right
Move Beam Up
Move Beam Down
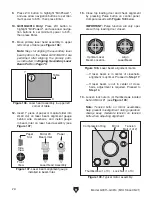
Figure 118. Mirror thumbscrew adjustment.
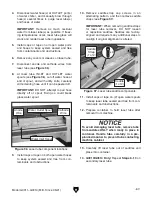
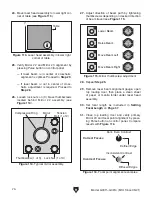
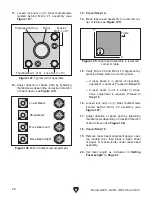
Figure 117. Mirror #3 assembly components.
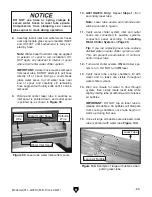
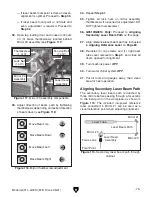
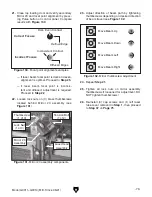
Laser Tube
Mirror #1
Laser Beam Path
Laser Head
Assembly
Mirror #2
Mirror #3
Focus Lens
Focal Point
Figure 119. Secondary laser beam path through
cabinet.
Model G0911–G0914 (Mfd. Since 05/21)
-75-
33. Adjust direction of beam path by tightening
thumbscrews depending on desired direction
of beam travel (see
Figure 118).
— If laser beam focal point is dark and even,
alignment is optimal. Proceed to
Step 35.
— If laser beam focal point is not dark and
even, adjustment is required. Proceed to
Step 32.
32. Open top loading door and loosen lock nuts
on (3) brass thumbscrews located behind
Mirror #3 assembly (see
Figure 117).
34. Repeat Step 31.
35. Tighten all lock nuts on mirror assembly
thumbscrews if loosened for adjustment. DO
NOT tighten thumbscrews!
36. G0913/G0914 Only:
Proceed to
Aligning
Secondary Laser Beam Path on this page.
37. Align reference laser beam path as instructed
in
Aligning Reference Laser on Page 80.
38. Re-install (4) cap screws and (1) right laser
tube cover removed in
Step 3, and close all
doors opened for alignment.
39. Turn machine power OFF.
40. Turn water chiller system OFF.
41. Put all tools and gauges away, then clean
area for next operation.
Aligning Secondary Laser Beam Path
The secondary laser beam path is directed by
three mirrors before passing through a focus lens
to the focal point on the workpiece, as shown in
Figure 119. The included low-power reference
laser connected to Mirror #1 can be used as a
visual reference point when adjusting alignment.
Thumbscrew
(1 of 3)
Mirror #3
Assembly
Laser Head
Assembly
Tension Bolt
(1 of 2)
Lock Nut
(1 of 3)
Содержание G0911
Страница 100: ......

