


-68-
Model G0853 (Mfd. Since 07/18)
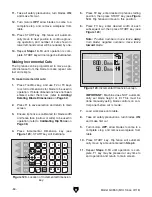
Rip Cutting with Rip Fence
1. DISCONNECT MACHINE FROM POWER!
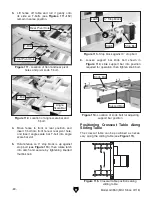
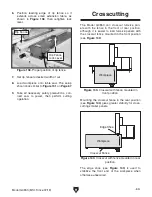
2. Move crosscut table and fence to front of slid-
ing table, and lock them in place with cross-
cut table lock lever (see
Figure 134).
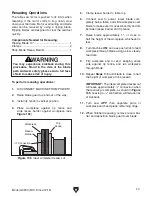
4. Loosen rip fence lock lever, as shown in
Figure 136.
3. Lock sliding table in place with table lock
lever (see
Figure 135).
6. Position blade guard according to height
of workpiece. (Refer to
Understanding &
Using Blade Guard on Page 48.)
7. Load workpiece onto table saw. The setup
should look similar to
Figure 130 on Page 67.
8. Take all necessary safety precautions, con-
nect saw to power, then perform cutting
operation.
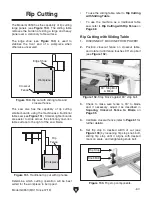
Figure 134. Location of crosscut table lock lever.
Crosscut Table
Lock Lever
Figure 135. Location of sliding table lock lever.
Sliding Table
Lock Lever
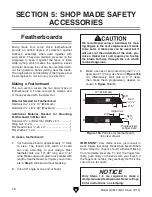
Vertical
Horizontal
Figure 137. Rip fence positions.
5. Place fence in vertical position (see Figure
137) for thicker workpieces, or in horizontal
position for thinner workpieces and for angled
cuts where blade is tilted over the fence.
Rip Cutting with Rip Fence
Figure 136. Location of rip fence lock lever.
Rip Fence
Lock Lever


